So I have spoken about my new 16th century German chemise/shirt, and I have also documented the whole process of making it so that I can show you how it is made.
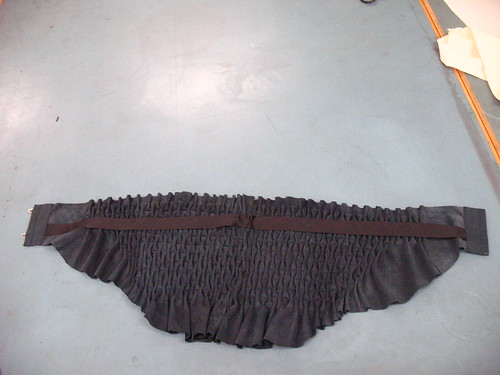
This hemd goes under the name of “silly eternity hemd” because it have a rather silly amount of fabric in it, and a equally silly high collar with a ridiculous tight smock, and it really have taken an eternity to sew.
I like things silly, especially with my German outfit, and I love to work a long time on things, but I have to admit that it might be a bit to much to have 4,5 meters of fabric smocked into the collar.
It is in a thin linen fabric from medeltidsmode.se and is sewn with silk thread.
The seam allowances are felled and when done they are only 0,5 cm wide.
The embroidery is in linen thread but for a more period correct thread I would suggest silk if you want to use colour.

So here is the pattern, it is in cm and not inches.
I am using the width of the fabric, using one width for the front, one for the back and half a width for each sleeve. Using 3 meters gives you enough fabric for these pieces, the sleeve gusset and for lining the collar and end of the sleeves.
In centre front, we have a slit that is cut open.
As said, to use 150cm to the font and the back might be a bit to much, so if you want to using half a fabric width, 75 cm that will turn out as a nice hemd that to.

When I work in linen fabric, I like to pull threads. This ensures that I cut 100% on the grain.
Using a big needle, I pull up one thread.

Pulling it out until it breaks.


When it breaks, you just use the needle to pull it out again and then when you have gone the full width of the fabric it will look like this.

And now you can cut your fabric.

Voila! 100% straight on the grain.


Now it is time to start sewing. You need to sew your pieces together before you smock. I have a seam allowance of 1 cm.
As you can see in this picture, you need to sew your pieces together so that they form a “tube”. Sew only down to the X mark, witch is in my hemd 31 cm down. My hemd is rather tight fitting around the armcycle, and this measurement decides this. For a looser fit you need to sew longer. Or if you are smaller you might need to have this distance shorter if you want the tighter fit. You can if you want sew just as much as you need for the smocking (15cm) and then when the smock is finished, put it over your head and pin with needles so that it fits right here.
The blue in this picture shows where my smocking is going to be.

Of course I forgot to take photos of how I sewed it together, but I have these stand in pictures to show you how I sew a felled seam. It is important that the finished seam is not wider then your smock pleats, or else it will look funny and you will see the seam in your smocked collar. As my smock pleats are 0,5cm therefore my finished seam is 0,5 so that it blends in. Therefore I start out with a 1 cm seam allowance.
I sew with running stitches as there is no strain on this seam and we are also felling it witch means that it will be stronger because of that.

Then I scrape the seam open with my bone tool, this is a period way of getting flat seams with out ironing them, and linen takes this treatment fabulously.

Then I cut down the seam allowance on one side.

Folds the other sides seam allowance in half, here I use a fingernail to scrape it down.

Fold the whole thing to one side, scraping it a bit with my bone tool to make it lie flat.

And then I sew it down. And that is how I make my felled seams.

So let me introduce my bone tool, it is made as you all can guess out of bone. Moose bone to be exact. I have made it myself and I originally use it when working with leather, polishing the edges among other things.
But when I was reading in “Woven into the Earth: Textile finds in Norse Greenland” by Else Ostergaard there was information about tools found that was connected with textile working (pages 111-115). Among the tools were the “seam smoothers” that were used to make the seams flat. They could be made out of every kind of material, wood, bone, stone, glass, horn, it even says something about a pigs tooth.
So I thought that “well I need to try it” and said and done, and now I use my bone tool with all my linen fabric. So nice not having to use the iron all the time, especially with small seams and narrow seam allowances that you end up burning your fingertips of while working with.
But now, lets continue on our hemd.

Now it is time to hem the top of your hemd, that will become your collar.
I pull a thread at 1 cm and make a double fold.

Like this, here you can see my felled seam.

Now we are going to make a dotted grid for the smocking. I have made a guide out of thin cardboard, this saves so much time! I am going to dot each cm with one cm between each row.
I am dotting 10 rows.


It is just to put it along with the hemmed edge and with a pen make a dot using the grid, This takes almost forever, remember to sharpen your pen now and then.
Yes that is about 4500 dots… yes you are crazy for doing this ;)

Here you can see that I have also hemmed the slit in the front. (or at least one side of it).

The end of the slit is hard to hem in a good way, and it is also a place that have a lot of strain on it. So I finished it of with some buttonhole stitches to cover the raw edge and then some stitches across to make it durable. And it is pretty to.

Now it is time to sew your gathering stitches. I use a regular polyester thread in a bright colour, so that I remember to take it away later. I sew with a long double thread and pick up a few threads at each dot.

Sew all the lines.

Then gather your fabric and tie it of when you have gathered it to your neck circumference + some ease. Hold a measuring tape against your neck to know what you want ( mine is 44cm ).

Really dense smocked fabric, ridiculously dense.

Now I baste some guide threads on the front, to help me with my embroidery. They are 1cm apart.
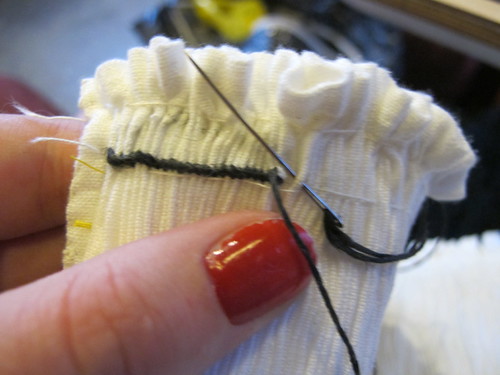
I start my embroidering with this, along the whole collar, to keep it together.

Like this

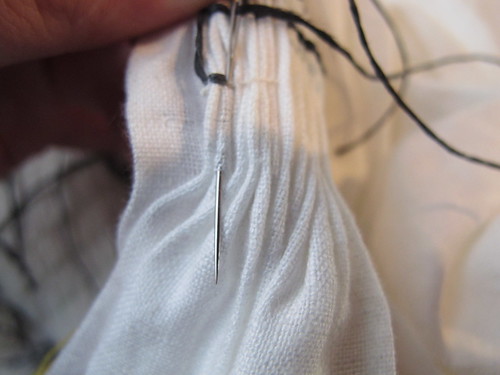
Then I want to have these.
And this is how you sew that stitch. If you reverse it you can sew a diamond.


And this is how it ended up, with decorative dots in the middle. And in the bottom is honeycomb stitch.
This is how you sew it.


to get to the next row, skip one row.
Now you just continue on like before.

This is how my backside looks.

And the finished front.

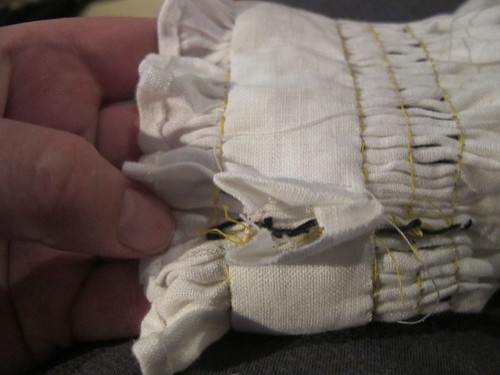
Then it is time to line your collar. My lining is a strip of fabric that is 5cm wide finished width, and as long as my neck circumference, the measurement that we tied of the threads on.

When sewing it on, be sure to catch each fold to sew it to the lining.

This makes sure that your smock stays put and looks pretty.
Do not sew the front shut before you cut the thread knots of, that will make it hard do take them away.

Now take your gathering threads away.

And now your collar is done! I have a pearl closure.

Pearls and thread loops.

A close up of the hemmed slit.

And the reinforcement again.

Now you are going to sew the sleeve seam and the side seams. Put your hemd with your wrong sides together.

And this is how you are supposed to sew. Leave 10 cm toward the X. This is were you are going to sew your sleeve gusset.

Like this.

Now sew your sleeve gusset.

Like this.

The sleeve gusset is also going t have felled seams, put it on your knee and it is easy to see when you work.

Fell the seams on the sleeve and the side seam to. And hem the sleeves and the bottom hem.

And now do the same thing to the sleeves as you did to the collar part. Make dots, sew dots, gather.
But here I gather against a bottle that have the same circumference as my hand. I don want to have a closure on my sleeve but I still need to be able to put it on.

And do some honeycomb smocking.

And then line it.
Remember to not sew it shut before you remove your gathering thread.
Remove gathering threads and sew shut.

Now it is done!

Close up on the collar.

Close up on bottom.

This is where your first seam ends up in the end. Not visible at all when you are wearing it.


Close up on sleeve gusset.


Finished sleeve.


The inside of the sleeve.

Back of hemd.

Back of collar.

How the honeycomb looks.

Inside of collar.

Ruffles on the collar.

As an addition to the button closure I also have a hook in the bottom of the collar, to keep in shut better, it fastens in a loop on the other side.

And then a picture of me wearing the shirt.
I hope you have found this tutorial helpful.
As always I give you, my inspiration for my outfits.
Really high collars


And also one, where I got the inspiration for the pearl closure from.