This tutorial is long due, I took most of the pictures two years ago so when I decided to redo the skirt on my 16th century German dress a couple of weeks ago I took the last pictures for the tutorial.
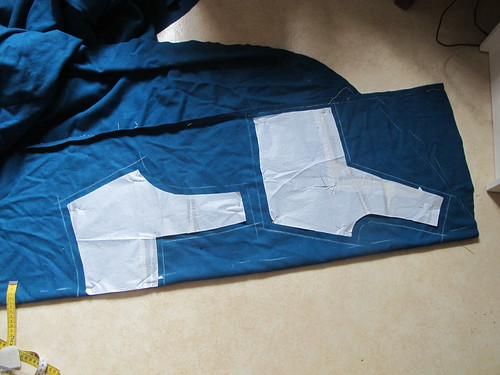
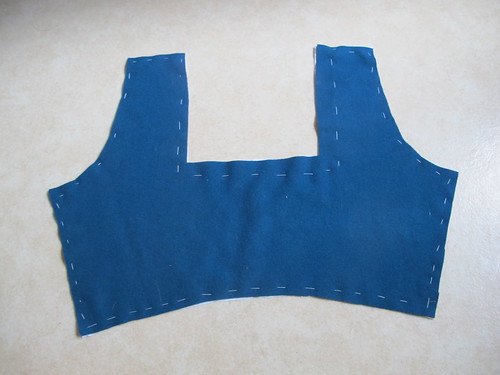
Start out by cutting the shell fabric, I have a blue wool fabric that is slightly fulled. The back piece is cut on fold, but not the front piece, as it will open in front.
The pattern is without seam allowances as you can see, I choose to have 1,5 cm seam allowance everywhere except the neckline and centre front, there the seam allowance is 1cm.
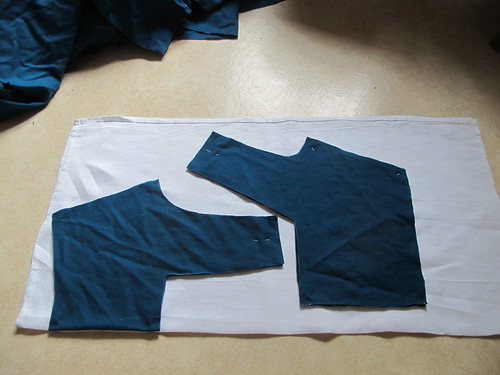
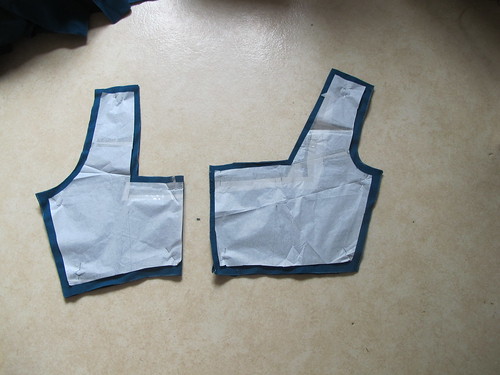
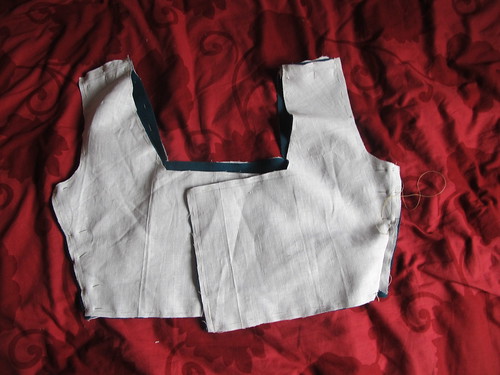
The I cut my linen lining, I use my shell fabric as pattern pieces in stead of the paper patter, it lays better on the pattern and you can just cut them the same size, no measuring seam allowances a second time.
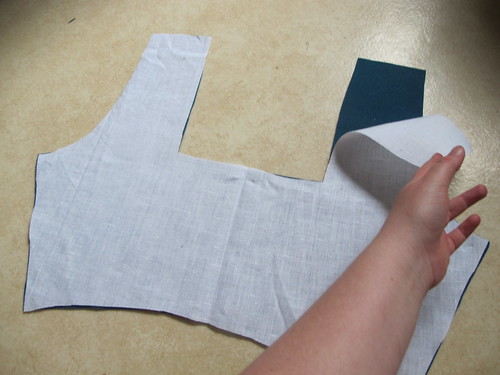
Put the shell fabric and lining wrong sides together.
Baste the two layers together, they will now be treated as one piece of fabric.
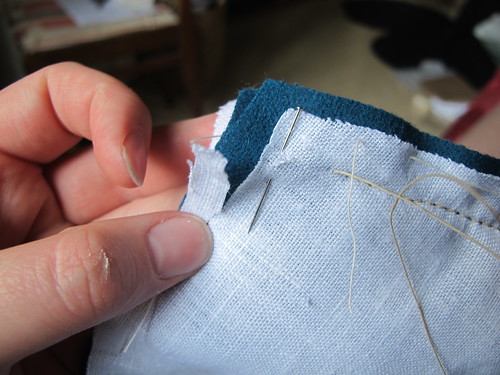
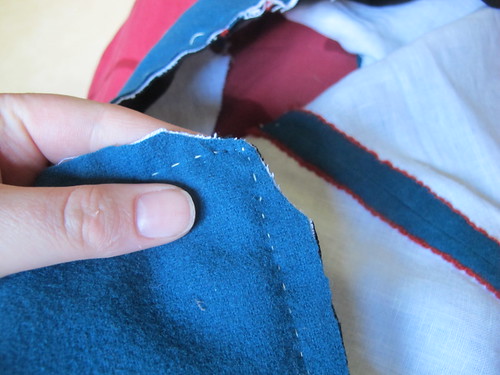
Put the pieces right sides together and pin the shoulder and sides seams together, I have made a sewing line with a pen so that my stitches will be straight, these lines will never be seen so no need to use any special pens.

I sew the shoulder and side seams with backstitches using waxed linen thread, as this is a tight garment so it is important that the seams hold up.
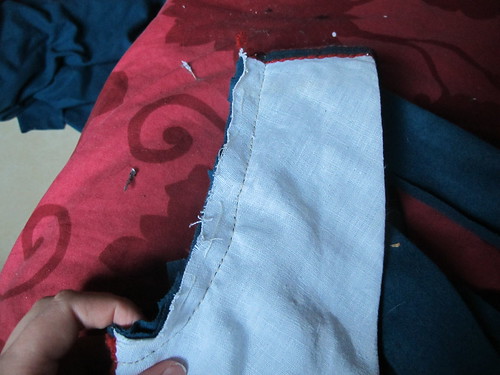
Before sewing all the way down to the hem I cut away some of the lining, this is so that when the bodice is hemmed the lining won’t peak out.
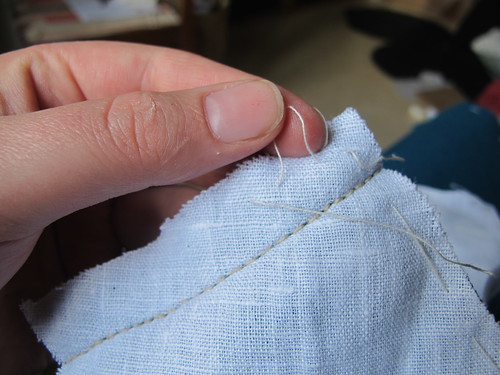
Then I take away the basting on the shoulder seams and side seams.
The lining is cut down in all the seam allowances in side seams and shoulder seams, to make the seams less bulky and to make sure that the lining won’t peak out when the seams are felled.
I press my seams flat with my iron and then I trim the seam allowances down to 1cm. You can start with smaller seam allowances from the start, but by cutting them at this stage you can mask if you have not sewn 100% straight. I think this make the seam allowances look cleaner especially if you have a fabric that is prone to fraying.

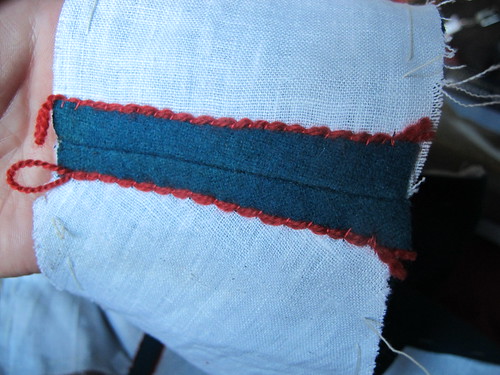
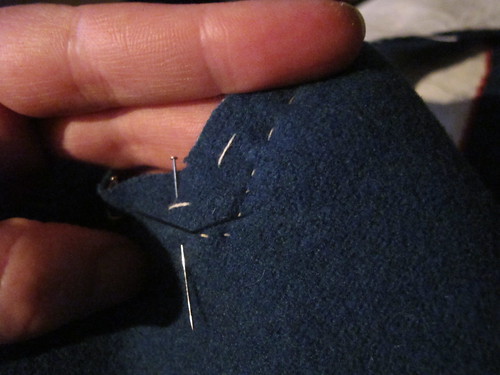
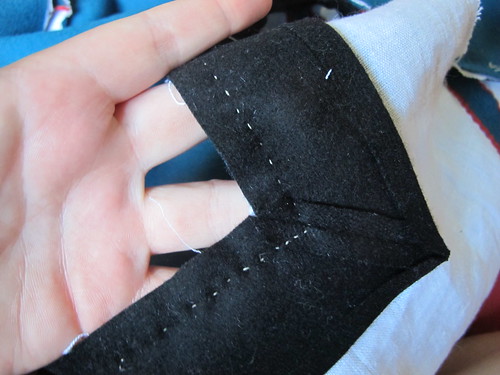
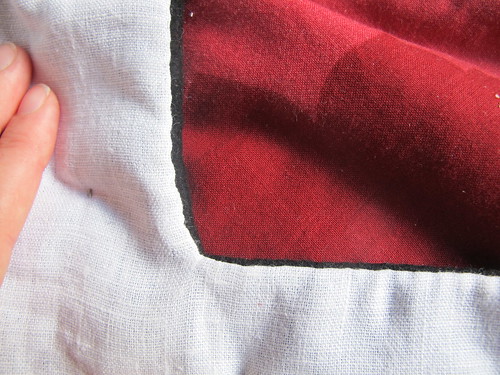
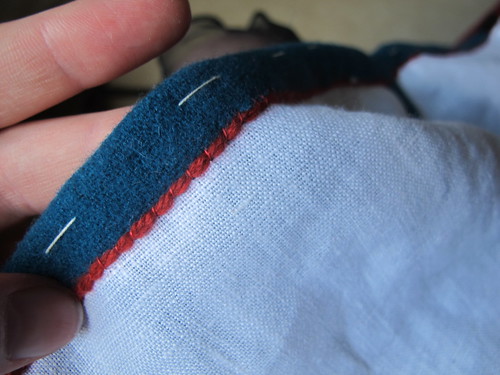
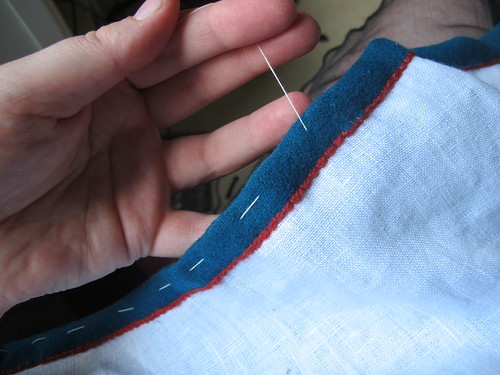
Then I cast the seam allowances down, I use a filler thread because it is pretty and it keep the edge from fraying. To be honest the use of filler threads like this is something that might not be 100% historically accurate, the use of filler threads have been found on the garments from Greenland, but the findings is from the necklines only. But I do this anyway, as I find it historically plausible and pretty, but I wanted to make clear that it might not be correct.
But it is so pretty!
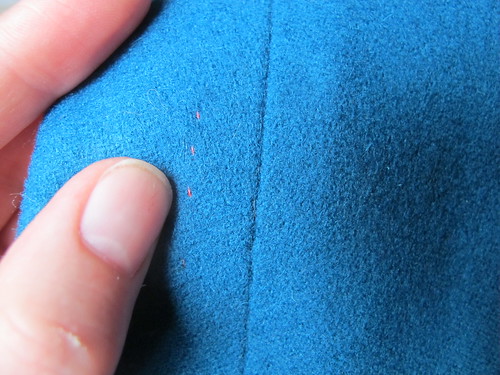
Take care when casting down the seam allowances to not go through the shell fabric, as I have done here, red might not have been the best choice of colour.
I do the same on the shoulder seams.
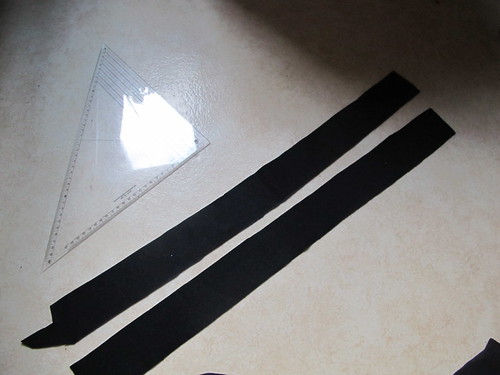
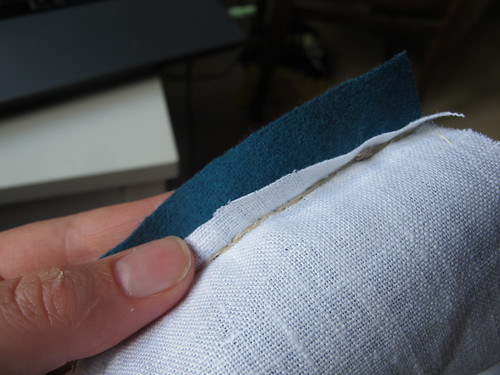
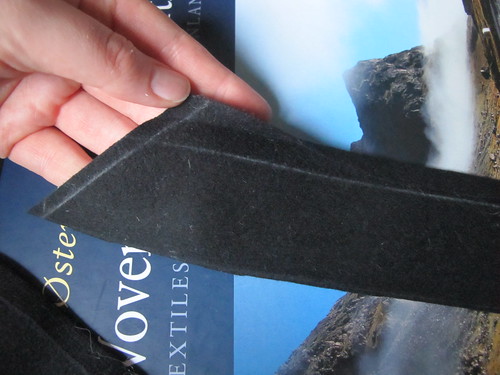
Then I cut out the fabric for my guards. The width is you choice, there are a lot of variation in the pictures, but they are all fairly wide. I have also added 1cm seam allowance on both sides.
I cut them longer then I really need, to have some fabric to work with.
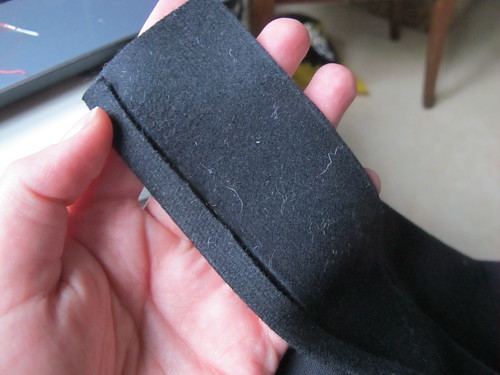
I press in the seam allowance on one side.
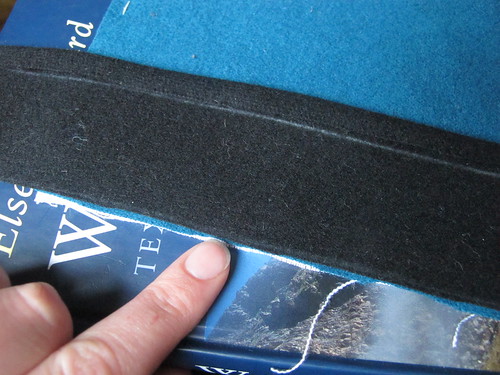
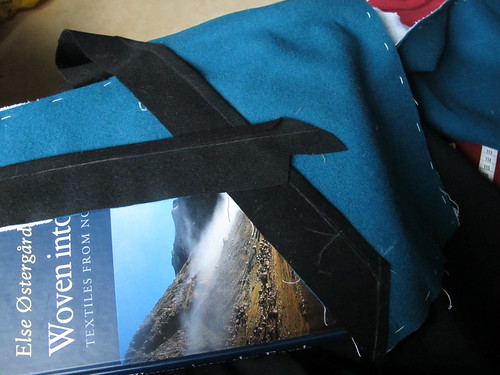
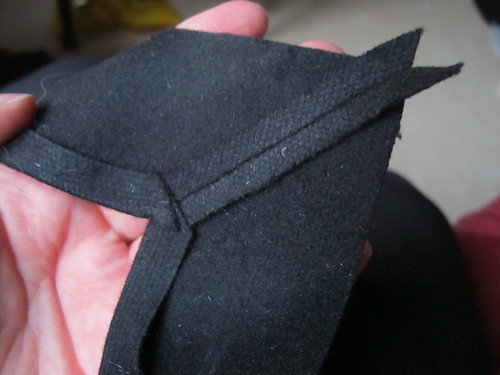
Then put the guard right sides together with the front opening, make sure that you the guard is sticking out in the top and bottom.

Mark the top of.
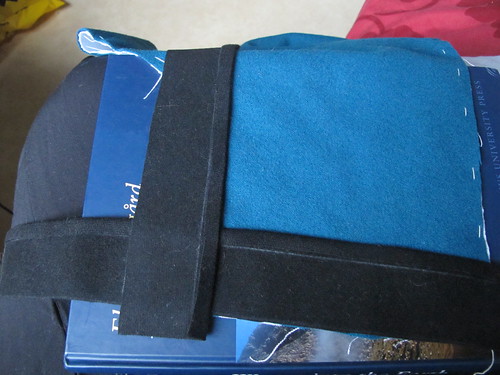
Then put the strip from the bottom of the neckline in the front.
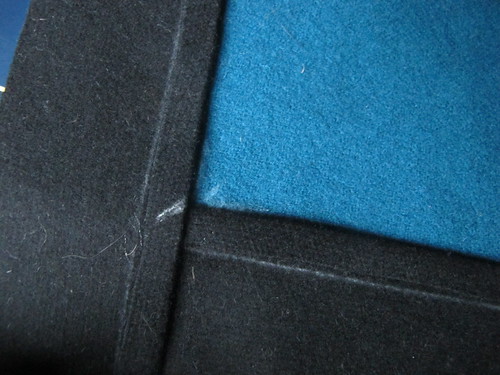
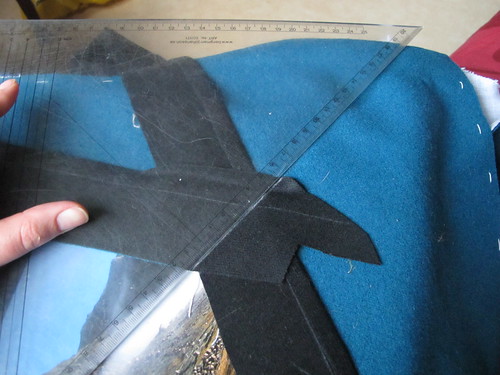
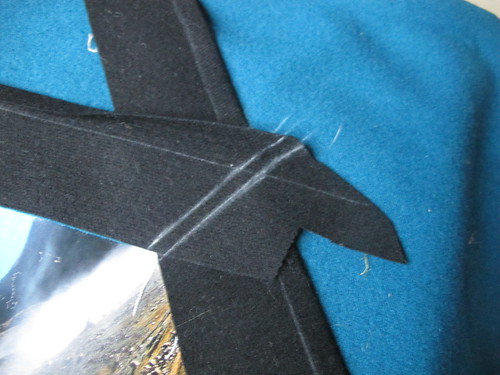
Mark the corners on both strips.
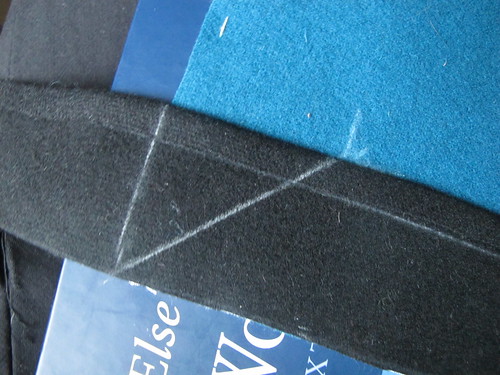
Draw diagonal lines on both strips connecting one corner to another.
That line is the seam line, I add 0,5cm seam allowance.
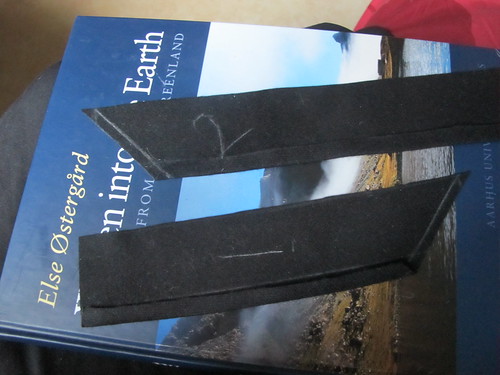
I always number my pieces to make sure that I know where they are supposed to go.
Then I keep doing the same thing for the whole neckline. Putting the strips right sides to the bodice, marking the corners, drawing seam lines and adding seam allowance.
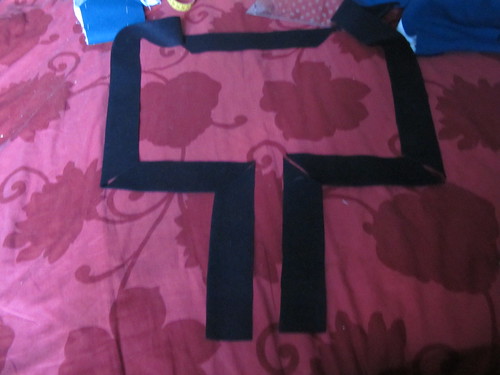
Do this for the whole neckline and front openings.
I sew them together in the right order using running stitches and silk thread, the reason for not using back stitches is that these go faster and on this seam there will be no stress so the strength if the back stitch is not needed. It is important to use the seams wisely. You are hand sewing this thing so why waste time by using a stitch that is unnecessary, time that can be better used doing other nice things.

I sew only to the pressed fold of the seam allowance, not all the way down.
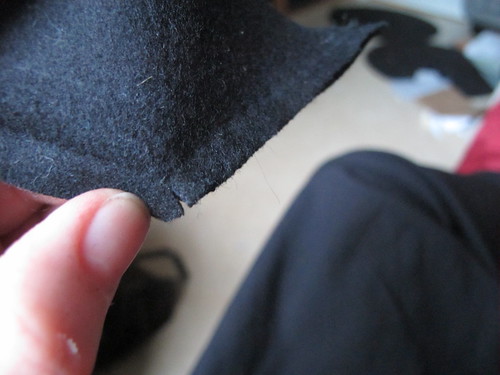

In some of the corners you need to make some cuts and to cut away some material to make the guards lay flat when you press the seams down.
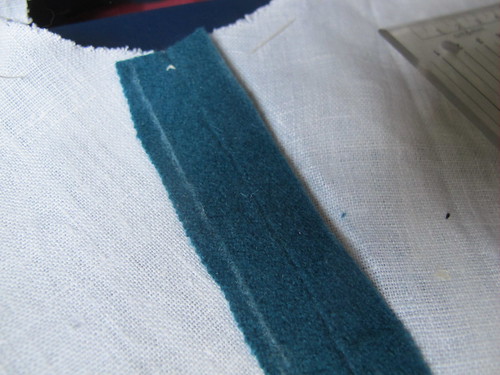
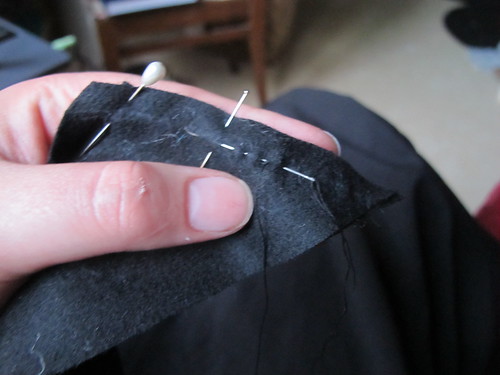
When the seams of the guard is pressed you put it right side to the lining of the bodice.
I have marked out my seam allowance on the neckline and centre front; 1cm with a tailors chalk.
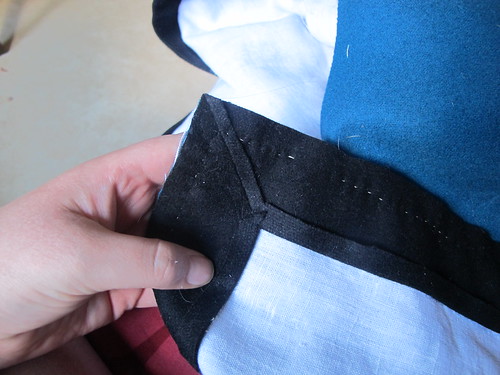
Then I sew the guards to the bodice using running stitches with waxed linen thread, make smaller stitches or even back stitches in the corners.
Then I trim down the corners to make them less bulky.

I take away the basing thread in the neckline.
I also cut away like this, to make it possible to turn the guards and make the corners nice and neat.

I trim down the seam allowances all around the front and neckline. The shell fabric is shortest, the guards are longest and the lining is in between.
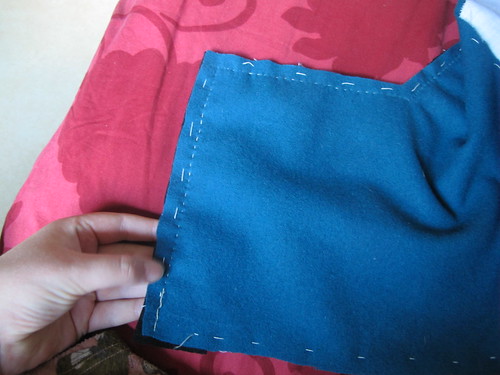
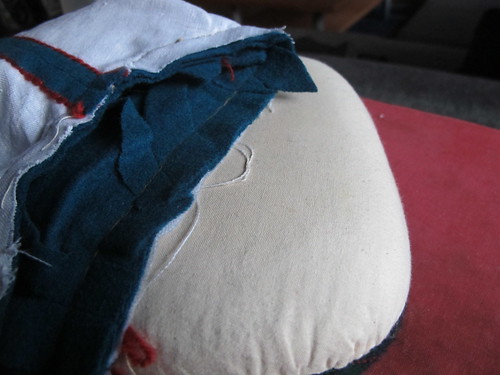
Turn the guards around and press the edges, make sure that the black is visible from the lining side, this is to make sure that the lining fabric will not peak over the edge when the dress is worn.
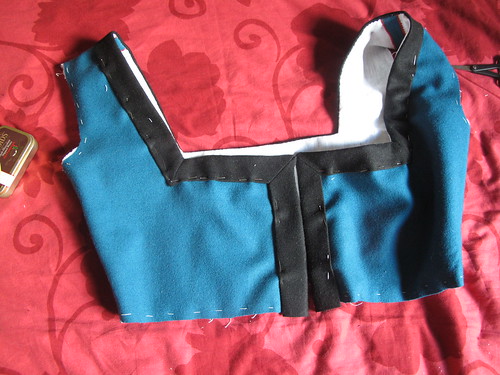
Pin the guards down.
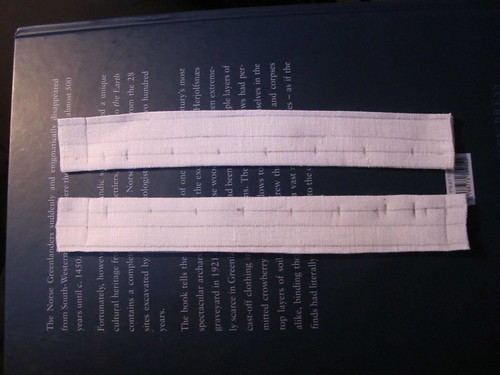
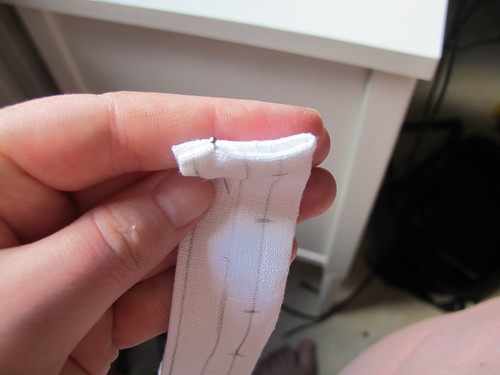
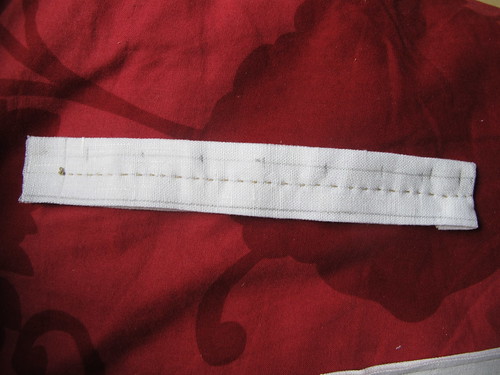
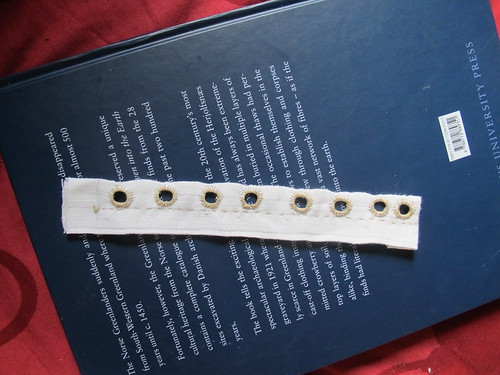
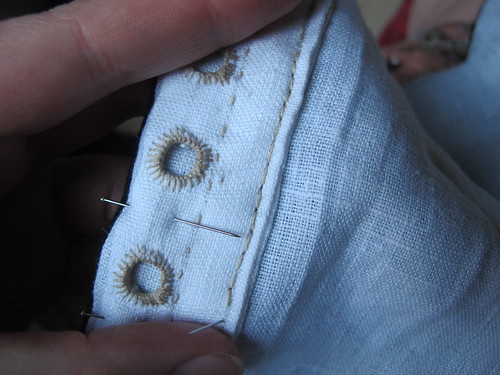
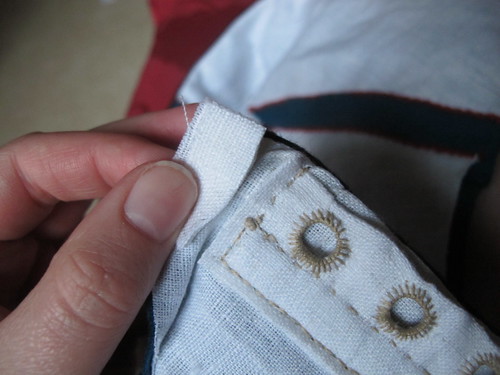
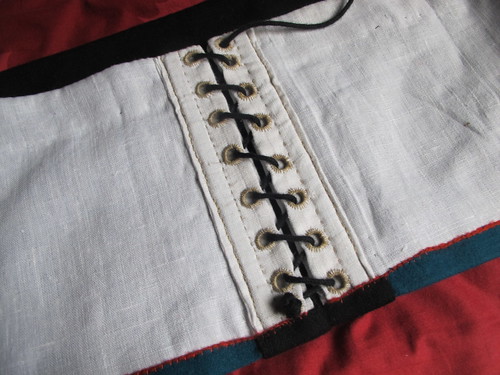
Now we take a break from the bodice and make lacing strips. They are made from the same linen as the lining, folded so that you fold the raw edges inside so that the whole strip have four layers of fabric. As you can see the lacing holes are for spiral lacing, that is the most common lacing type in the 16th century.
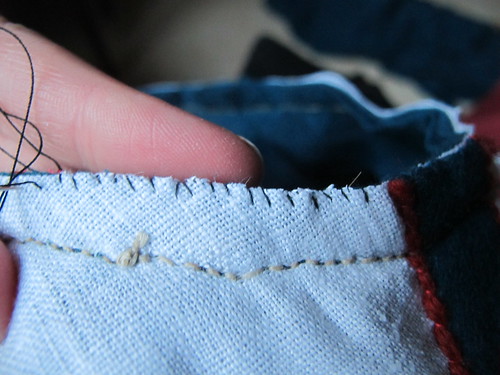
I sew a line of running stitches on one side of where I want my boning.
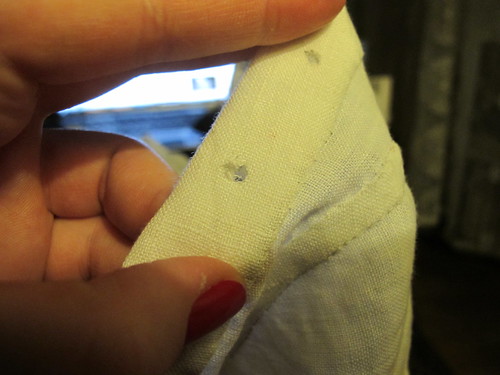
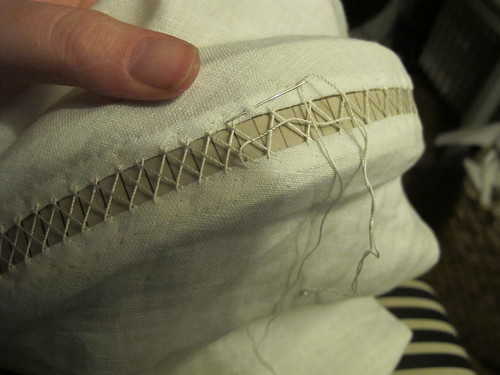
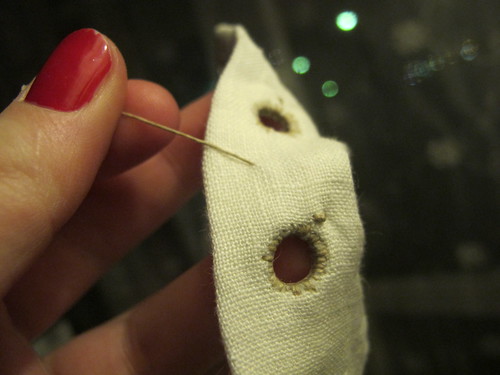
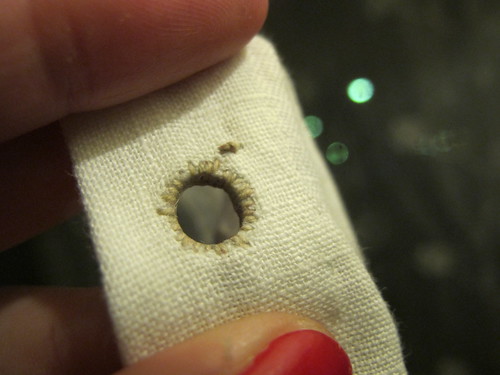
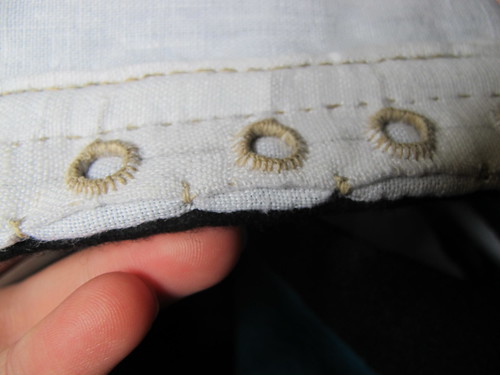
Then I make my lacing holes, the next pictures are taken from another project, as I forgot to take pictures. I start of by punching holes in the fabric with the smallest setting. I sew them with button hole stitch, as this is a period correct way to do both buttonholes and lacing holes. The knots on the buttonhole stitch makes the lacing holes and button holes more even and it protect the edge. Each stitch is a knot and that means that when the buttonhole or lacing hole gets a lot of wear so that it actually wears of threads the rest of the buttonhole will be intact. If you don’t have the knots the entire buttonhole might unravel.
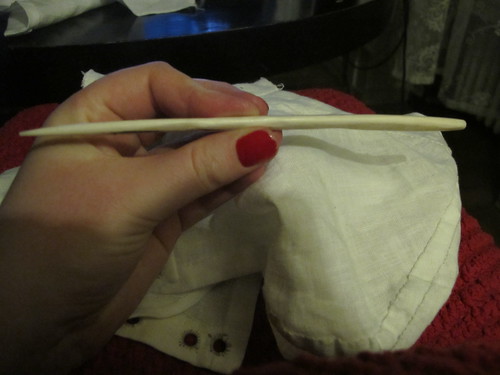
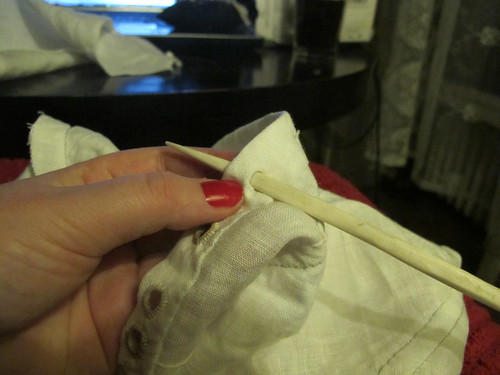
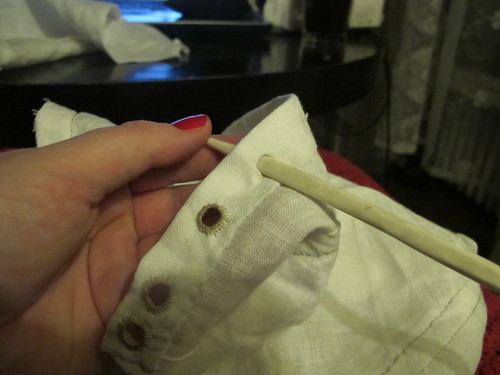
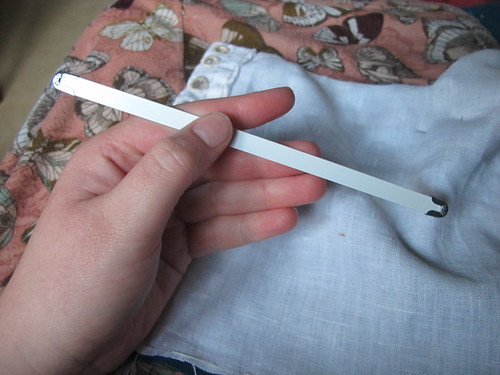
Then I widen the holes using my bone tool, I know a lot of people use knitting needles for this work, I made this bone tool to polish the edges of punched holes in leather, but it is perfect for making lacing holes as well.
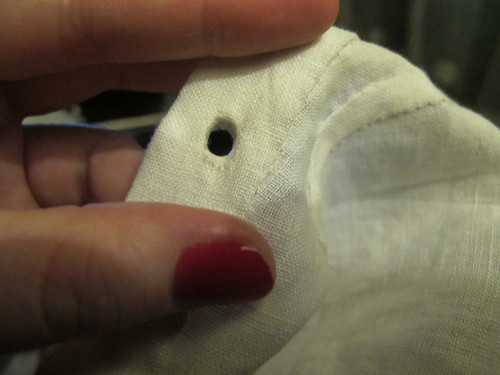
Make a hole as big as you want.
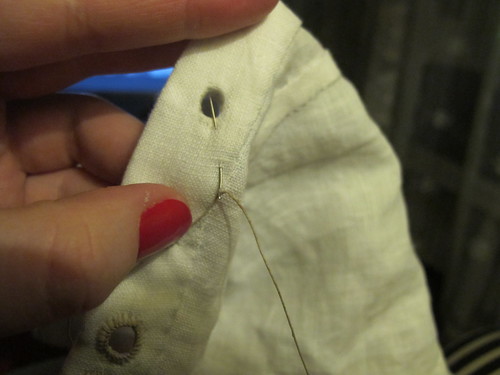
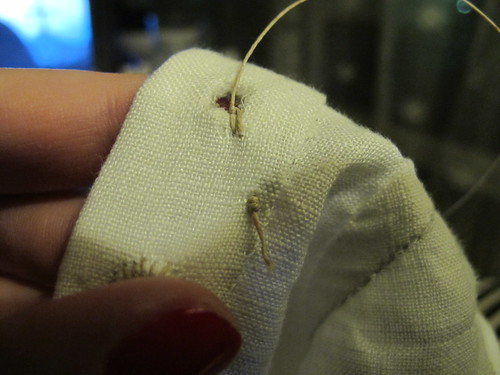
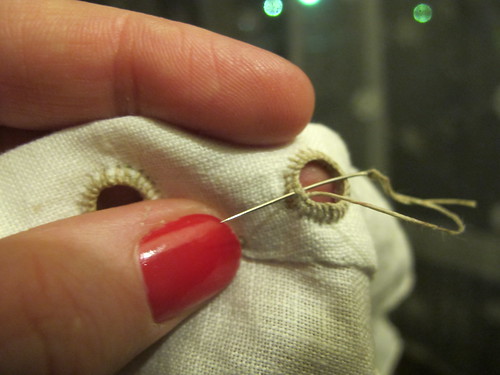
Thread a needle with waxed linen tread and make a knot at the end. I put the needle in a bit away from the hole and come up about 4mm from it.
Pull the thread through.
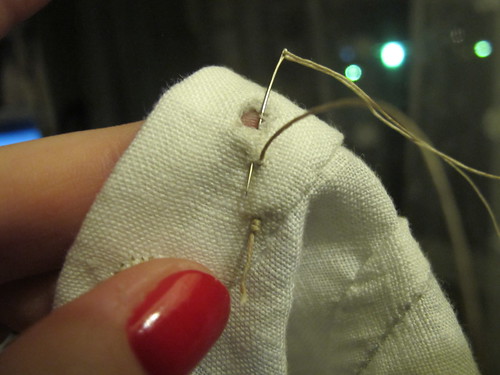
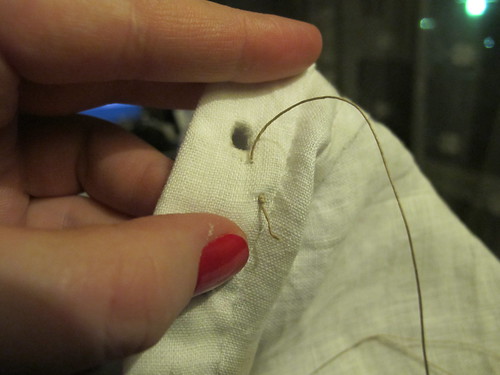
Put the needle through the hole and up through the fabric again, at the same distance from the hole as last time.
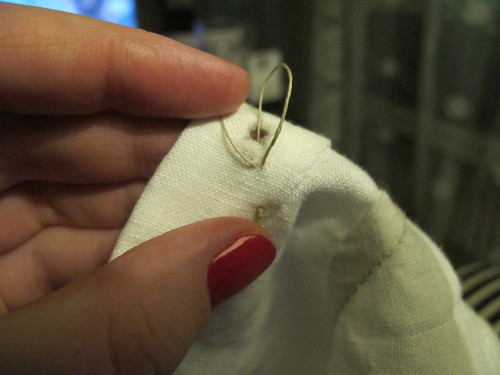
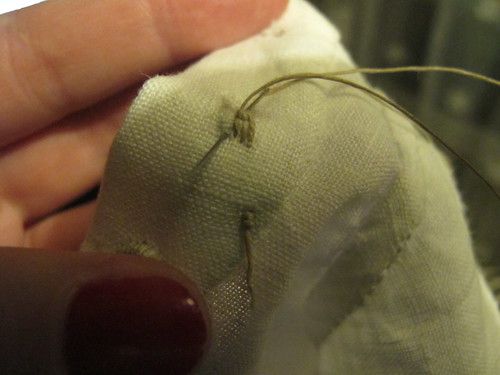
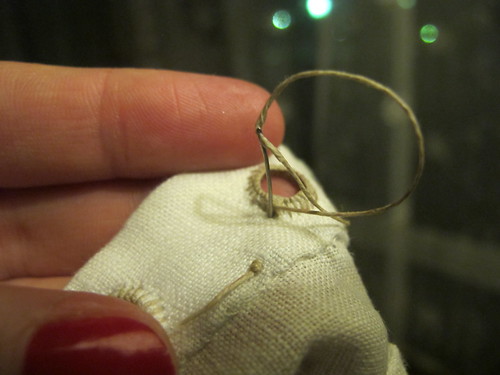
As you pull the tread you will see the loop that is forming.
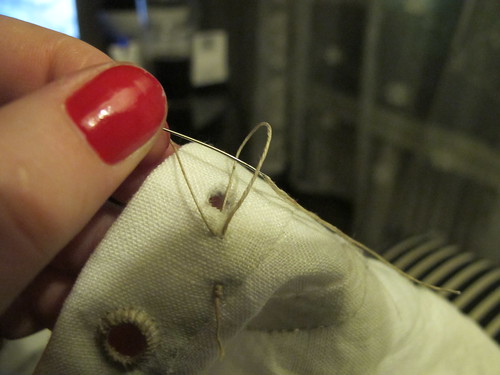
Put the tread on the left side of the loop, and then take the needle through the loop from behind. It is important that you put the tread on the left and come through from behind, this is what makes the knot on the thread.
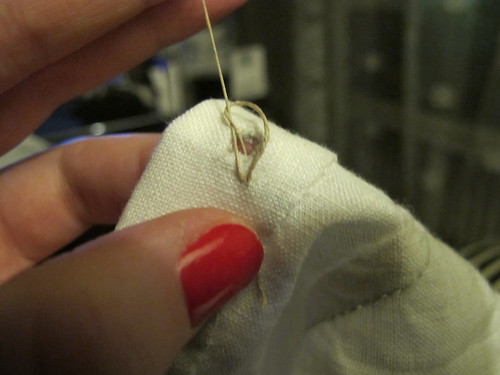
Pull the tread, see in what direction I am pulling the tread, this makes the knot end up at the edge of the hole. You can pull it so that it comes more up on the edge or even more inside the hole depending on how you pull the thread. It is a matter of taste where you place the knot.
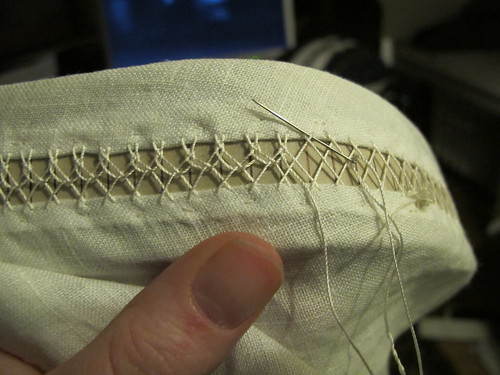
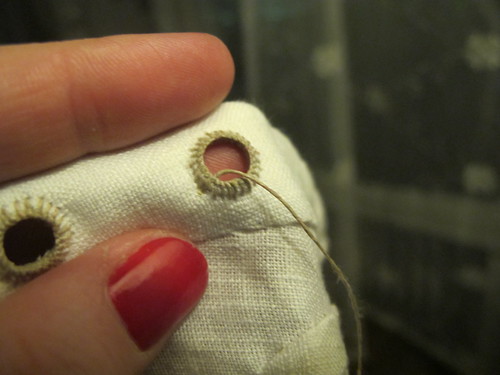
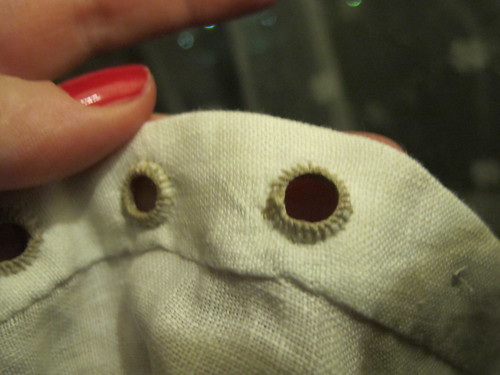
Do the same again and you will see that row of knots form like a pearl bracelet!
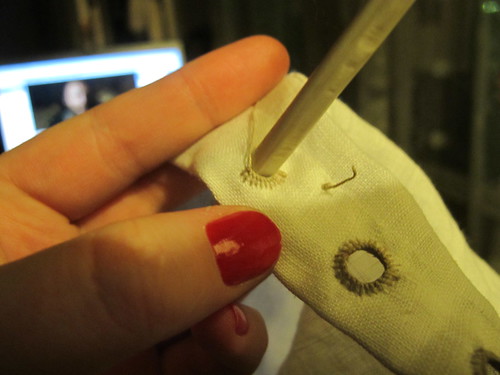
After some stitches I like to use my bone tool again, when you sew lacing holes it tends to shrink as you work. Doing this makes the hole bigger, you can get a lot more stitches in and the lacing hole itself gets stiff from all the stitches, no need to reinforce with metal rings at all.
Then you keep stitching until you come all the way round to your first stitch.
Here I go through the treads between the first and the second knot.
And then down to the backside. Doing this will make sure that there is a solid ring without gaps.

I secure the thread on the backside.
Take the needle through the layers and then up again.This is so that the end of the tread will not be visible. And if you cut the tread of just where you secured it the knot will unravel, having a cm of thread left will keep the knot secure.
Cut the knot of on the front and the tread of the back.
And then you do it all over again, and again and again.
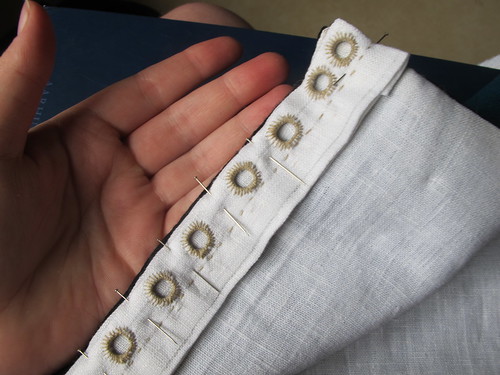
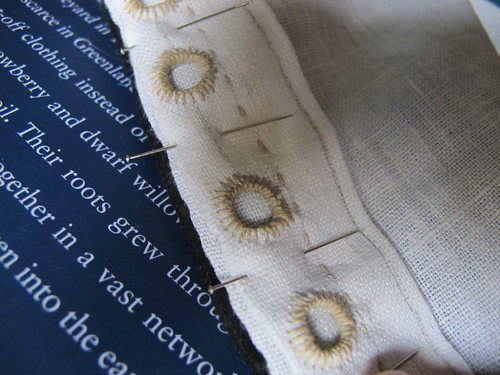
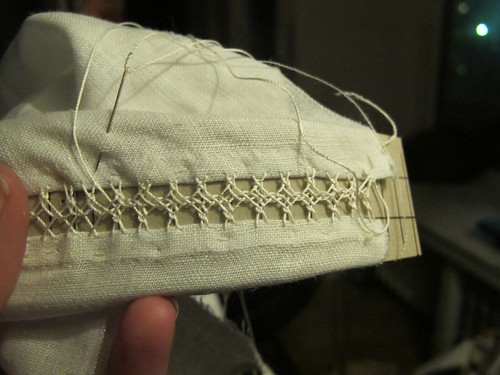
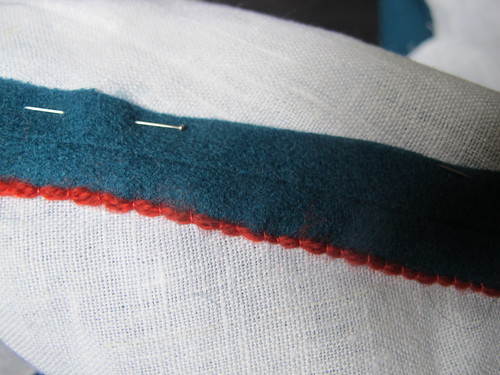
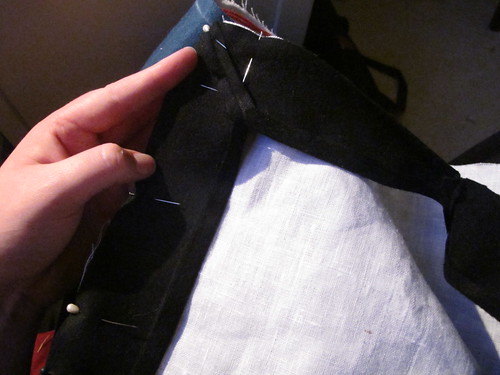
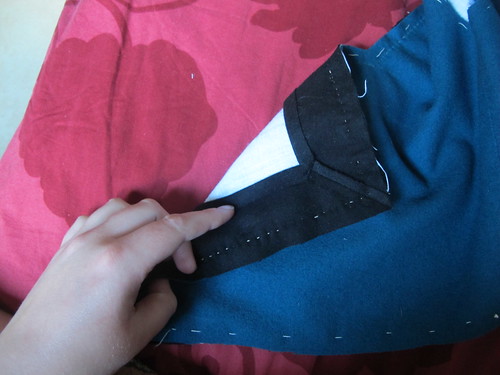
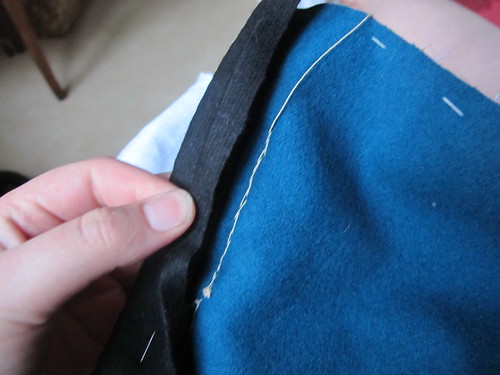
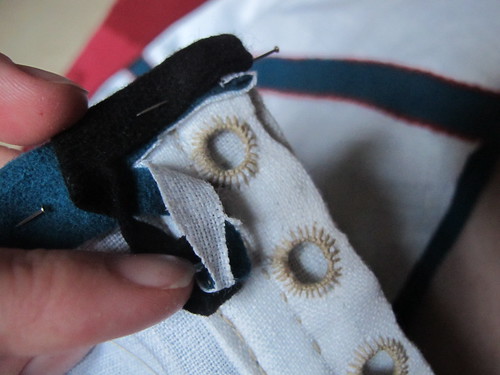
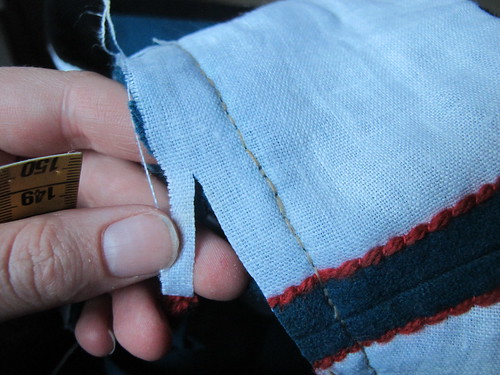
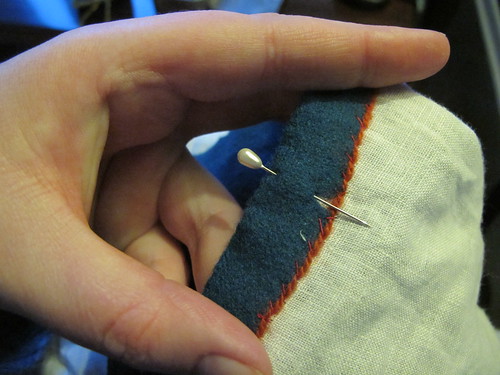
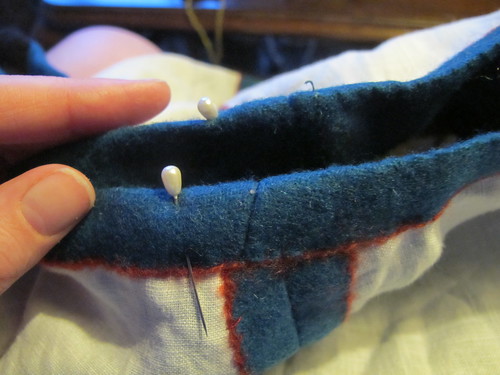
Then I pin the lacing strip to the bodice about 0,5 cm from the centre front edge.
Then I attach the lacing stitch with backstitches, through all the layers except the guards. This line of stitches forms the boning channel.
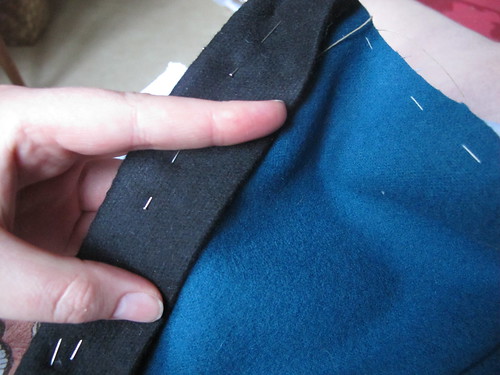
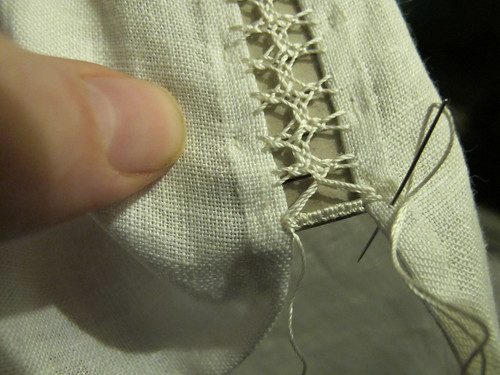
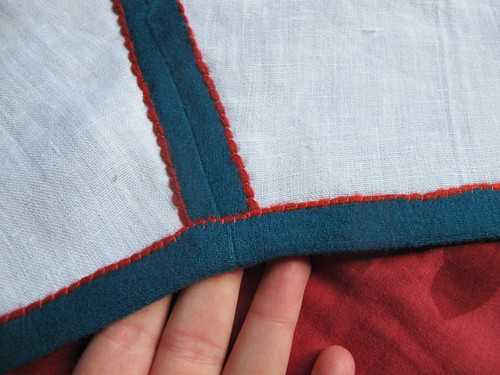
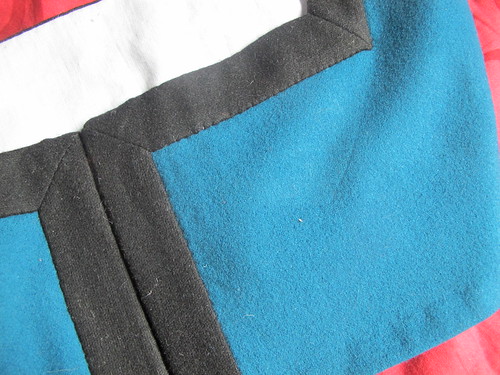
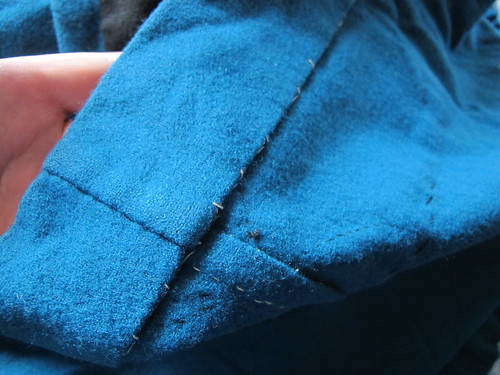
See how clever it is, the seam is totally hidden by the guards.
Here is where I stray from period correctness, I use a modern crinoline steel to help my lacing out. I guess the period correct version would be to use reed as you use in 18th century stays.

I secure the top and bottom with extra tiny stitches.

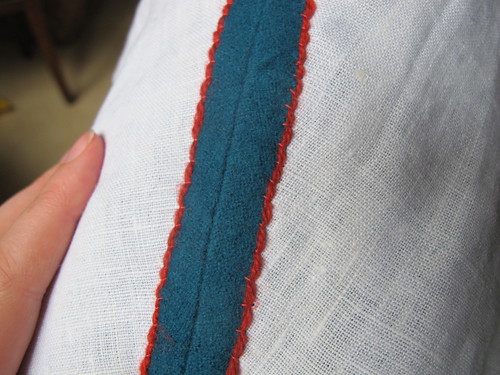
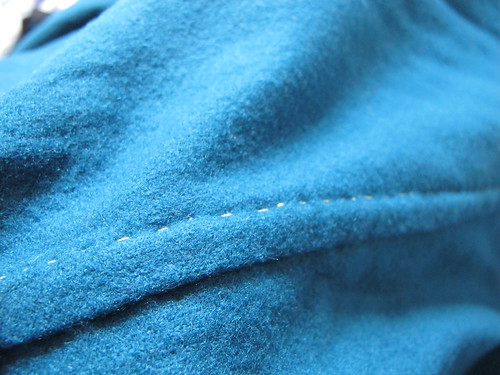
Now I sew the guards down, I sew with silk thread and with these stitches that makes the seam invisible.
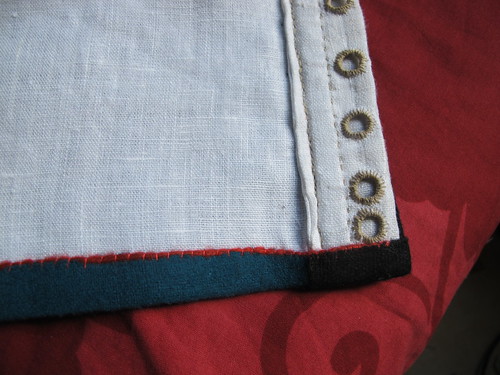
Then I trim of the end of the lacing strip.
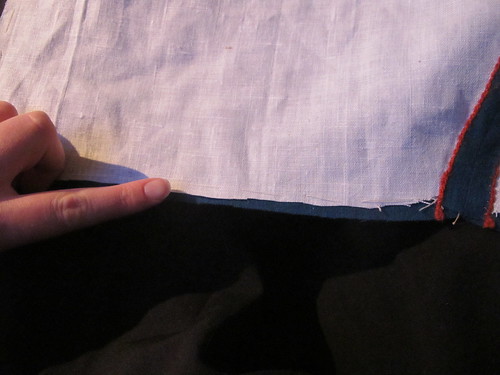
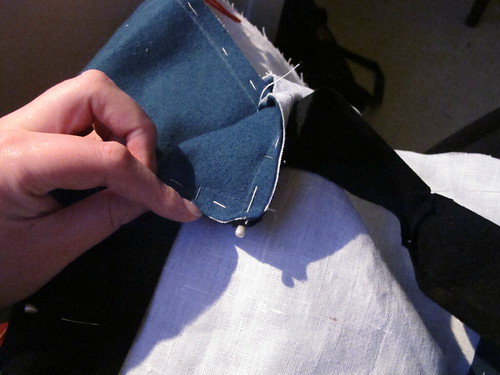
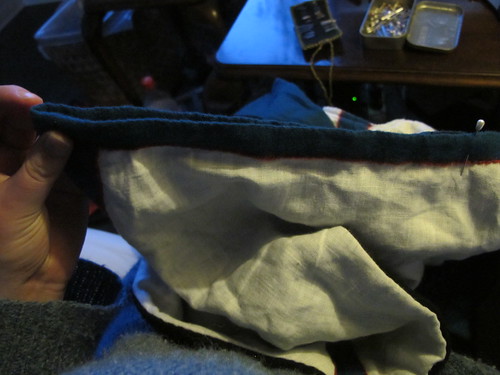
I trim some of the lining of to make sure that it won’t peak out when the bodice is hemmed.
Then I fold 1,5 cm up and press the hem, I trim some off just at my lacing panel.
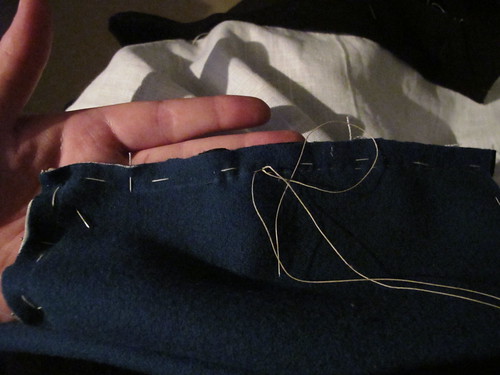
Then I sewing it the hem down with small stitches.
Then I pull away the basting thread at the hem.
All clean and pretty, but not done yet! My floor is not so clean ;) I have the habit of throwing scraps and treads on the floor, it is quicker for me that way, to clean it all in one go.
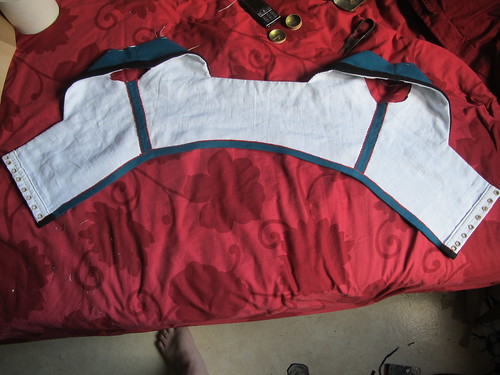
This is how it looks so far.
Now lace it up with a scrap string.

Put needles in between the lacing, this is to prevent the lacing from gaping.
Secure with stitches.
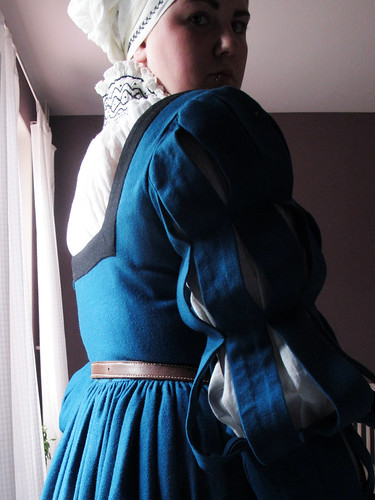
Now on to sleeves, this tutorial comes with a pattern of a simple s-sleeve but here you can see my fancy sleeve that is a adapted version of the s-sleeve.
I sew the sleeve together using back stitches, and then I sew it into the bodice also using back stitches.
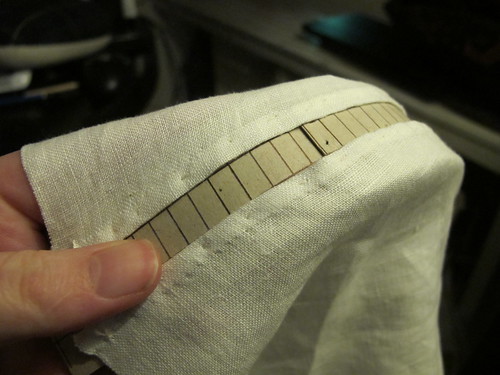
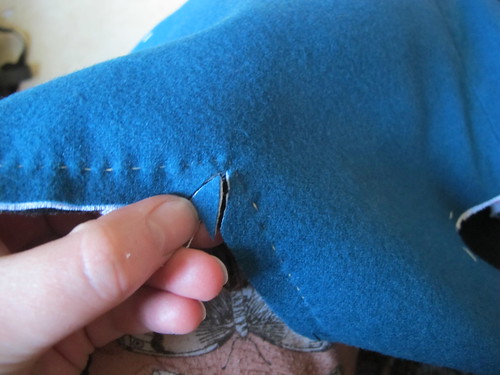
The sleeve head have added 3 cm of ease, the sleeve is 3 to big for the bodice arm holes. This is to make a pretty sleeve and those 3 cm is distributed at the top of the sleeve around the shoulder seam. It is not supposed to be a puffy sleeve, done correctly you will have no small pleats or ruffles in the seam. for wool 3 cm of ease is not that much is you sew in linen it will be harder to fit the sleeve.
Here you see the ease, but where the seam is there is no pleats or ruffles. To make a pretty sleeve this ease must be pressed down.

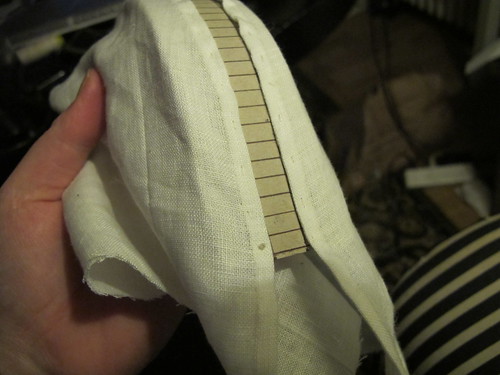
I put it on my tailors ham and add water.
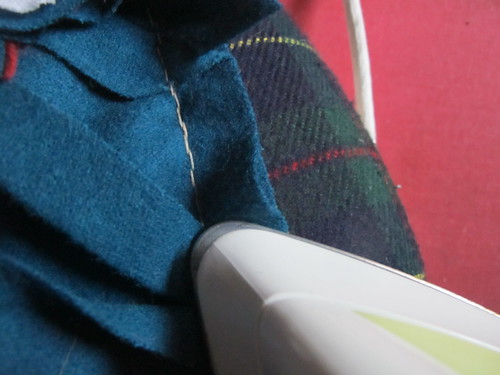
then I gently start to work the ease down. You will have to go easy to not press the ease into pleats. Add more water when you fell that is is dry and press until flat.

Here we see before and after, insane difference, this is why wool is awesome!
Now I trim down my seam allowance in the sleeves to 1 cm.
Then I cast the edges of all the layers together, this is all the finishing I will do on this edge, binding it would make it to bulky, but this is enough to keep it nice and together.
Remove all the basting threads left on the bodice.
Now on to the skirt, unfortunately when I took the photos I decided not to show you how to attach the skirt as I wore it as a separate piece. But is is much more period correct to have the skirt and bodice sewn together so when I decided to renovate my 16th century German dress and attach the skirt I took photos of that. But that means that I have no photos of how to sew the skirt part together.
But it is very easy. My skirt is made up by three widths of fabric sewn together with running stitches and then the seams are felled. In one seam there is a opening so that you can get in and out of the dress.
I choose three widths of fabric to make it wide enough in relation to my body. I am big, and to make the hem look on me as it does on the women in the woodcuts, to make the pleats as deep ad they need to be I needed three widths of fabric. If you are smaller you will do fine with less and it personal preference. I already have a good trossfrau body, round hips, small waist and big breast but I you need more hips the extra fabric will help you out. I like to joke and say I was built to for 16th century German fashion ;)
I have quite the wide hem on the skirt, this helps to hold it out in shape.
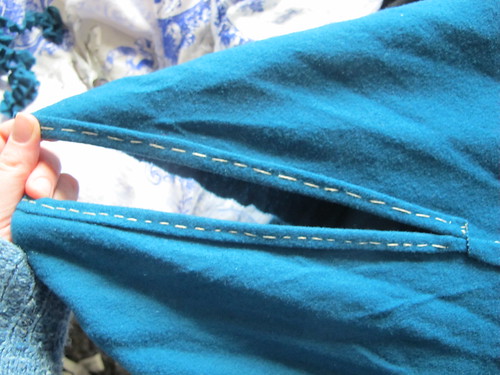
The slit in front, here you can see my stitching before I started tailoring school, sooo big stitches ;)
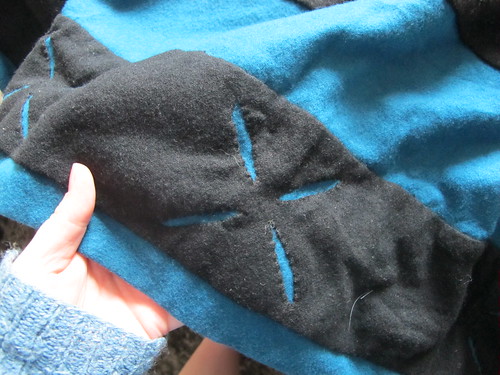
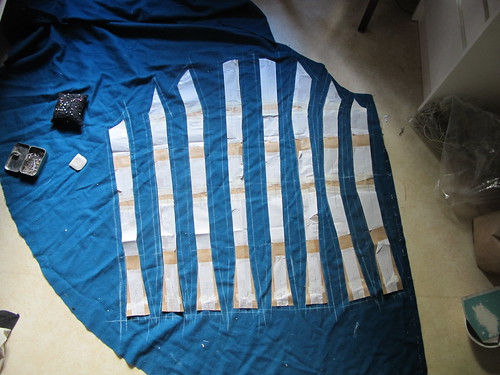
I have two rows of guards on the skirt, the cut-out is inspired by a woodcut, some people have puffs of silk coming out of these slashes, I wanted mine to be simple. I have also sewn down the slashes onto the skirt in stead of only hemming them. After a few incidents of getting stuck on low objects and benches and ripping the slashes or at some times part of the whole guard of the dress I decided to make it more secure.
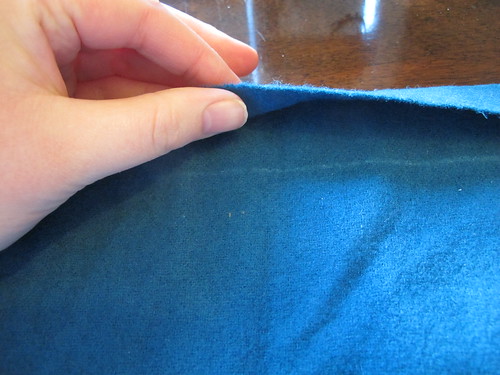
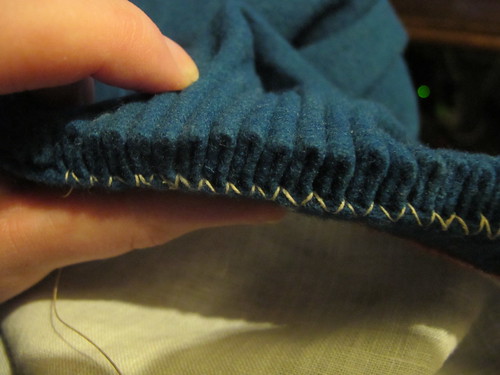
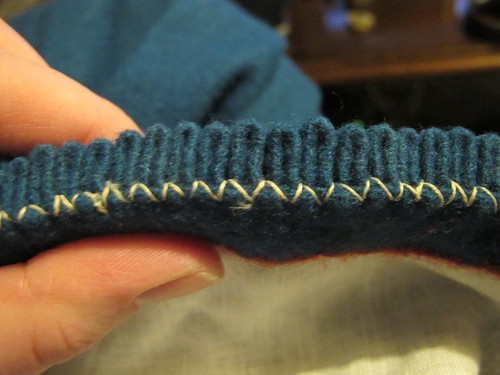
On the top of the skirt I fold down 3 cm. This is because I want to make the cartridge pleating in double fabric, to make the pleats even fuller.
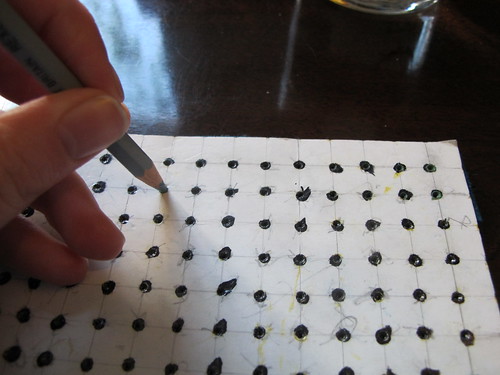
Using my smock guide I mark out two lines of dots that are 1 cm from each other and 1 cm from the edge.
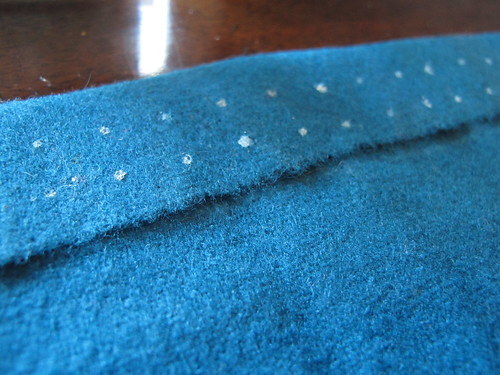
Like this

Then I divide the skirt into four parts, this is to make gathering the skirt even easier, I make marks with some thread.
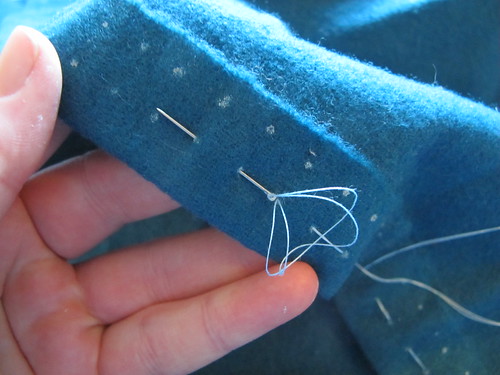
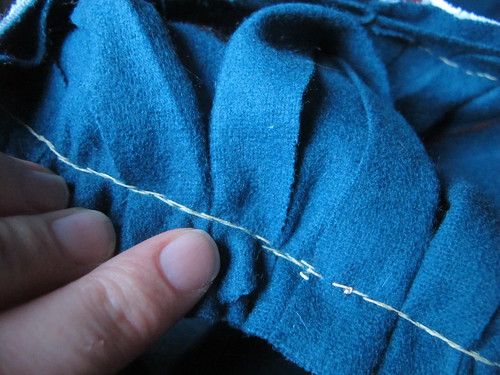
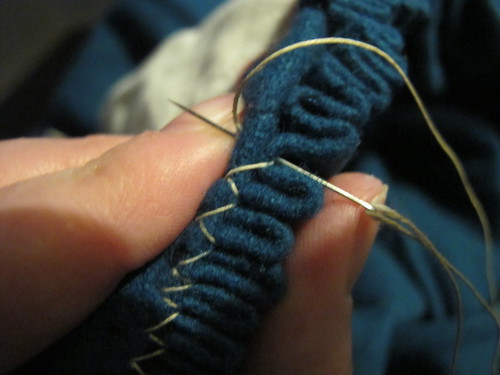
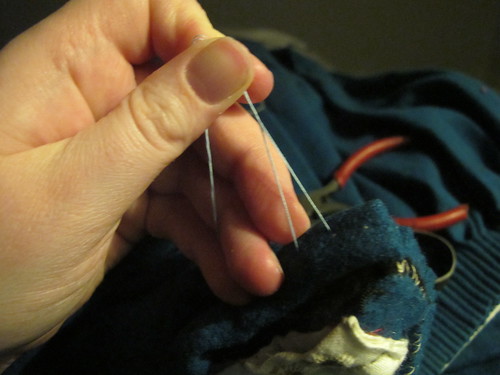
Then I sew the gathering treads, down one dot up at the next.
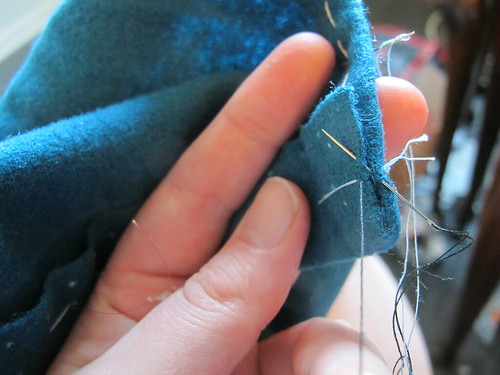
At the slit I sew the edges of the fold and the skirt together.

I sew two lines of gathering stitches that I secure in one end.

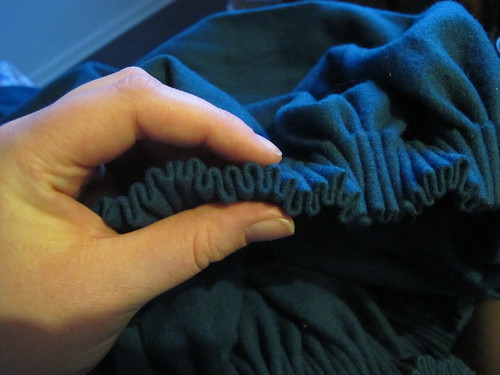
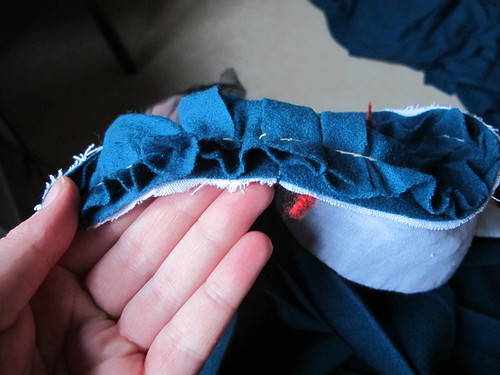
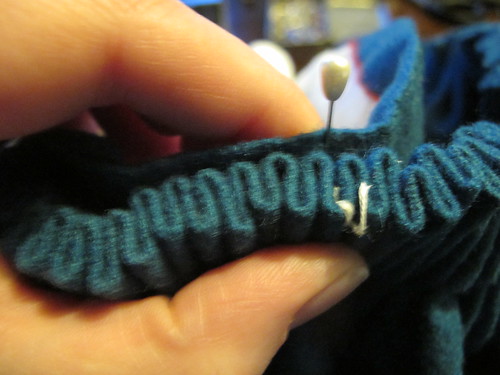
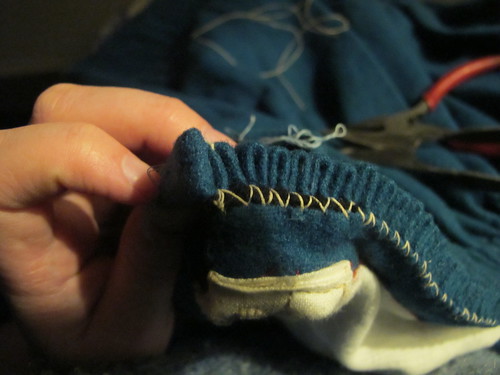
Then I pull the treads, look at the pretty cartridge pleating.
I also mark the bodice in four equal parts.
Then I put the markings at the skirt to the markings on the bodice right sides together.
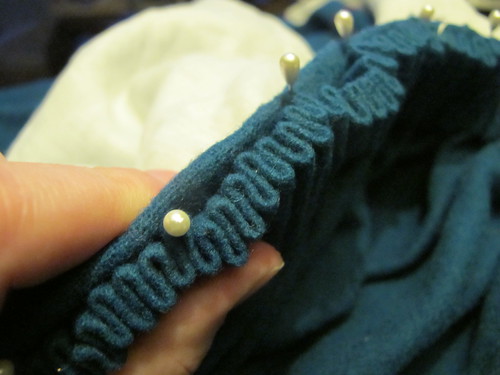
Now it is easy to gather the skirt evenly, put some pins as I go along.
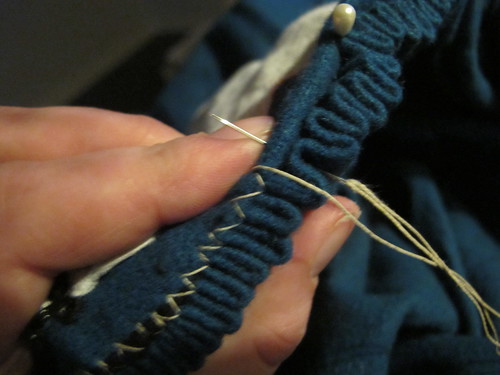
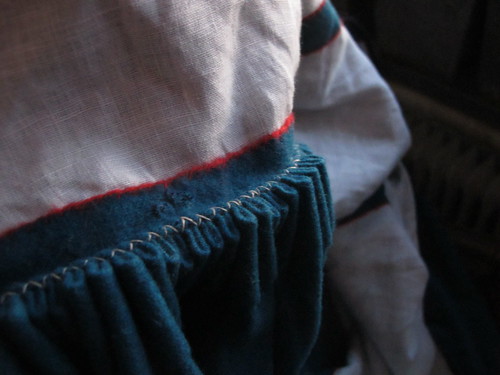
Then I stitch the skirt to the bodice. I do it with two stitches at each pleat, to make it strait.
Also the skirt is kind of heavy and these stitches need to be able to hold that weight.
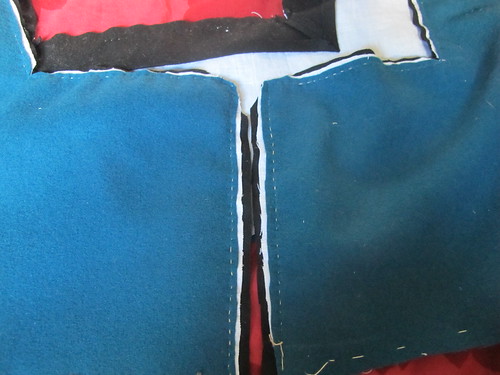
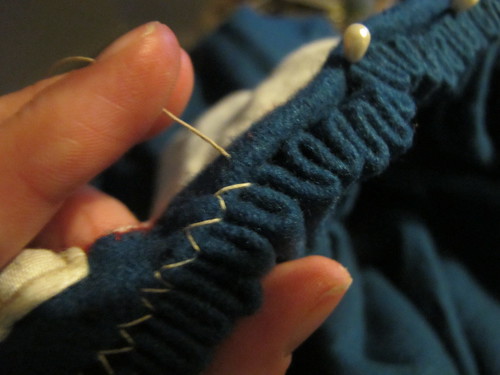
Look all neat and nice, I love cartridge pleats!
This is how it looks at the front opening.
When you are finished with the seam you can pull the gathering treads out.
As you can see the cartridge pleats “stands open” inside the dress, this gives you the extra hip boost that will give you the correct 16th century hips, and for us that already have 16th century hips naturally; we get the superfrauhips! More hips is good, the German ladies all seems to have a lot of them.
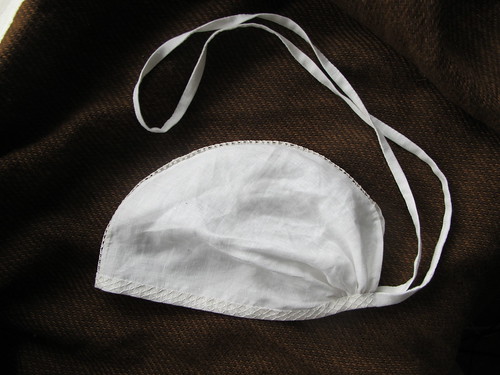
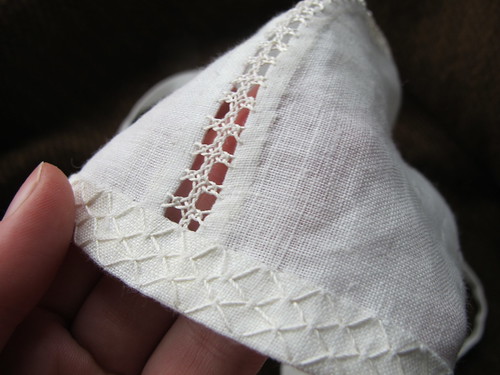
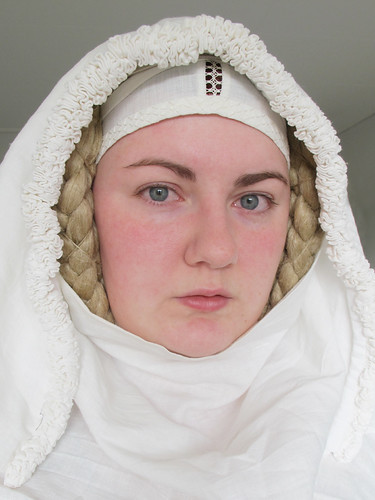
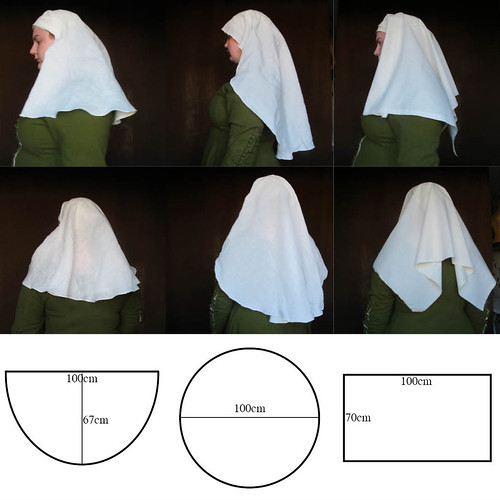
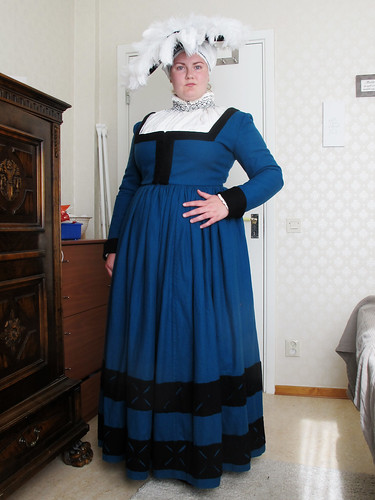
And now, you are actually DONE! With the dress that is, the list of stuff you need now is long, this is why the 16th century German women never gets boring. It is easy to give one dress many looks by simply changing the chemise, the veil or the size of you wulsthaube. Throwing on another hat, getting a fancy new gollar. I have tutorial for most of the details to make a 16th century German outfit in my tutorial list


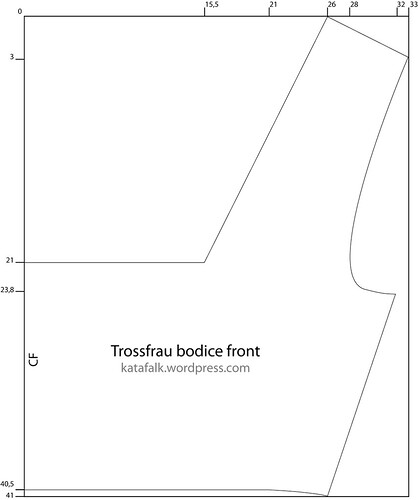
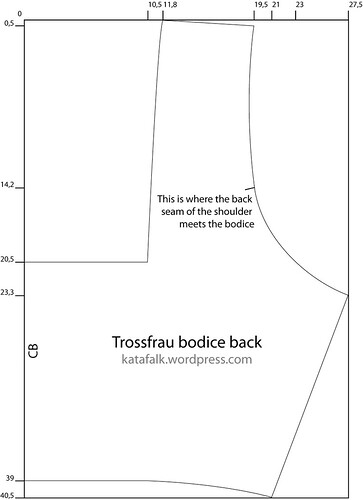
Here is the pattern.
It is in cm as always and made for me.
Bust: 118cm
Waist: 94cm
Remember to do a mock-up before cutting into the real fabric.