Catherine of Alexandria

My Patreons have decided, here comes the post about my Catherine of Alexandria!

In Fraternis Militia Carnis we some times hold a carnevale. A medieval feast with medieval dress out. It is fun with games and as usual with Carnis there was a lot of good food.

Catherine of Alexandria - 1

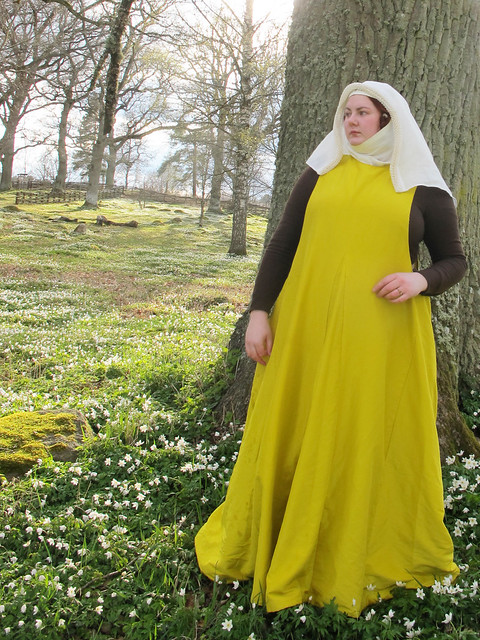
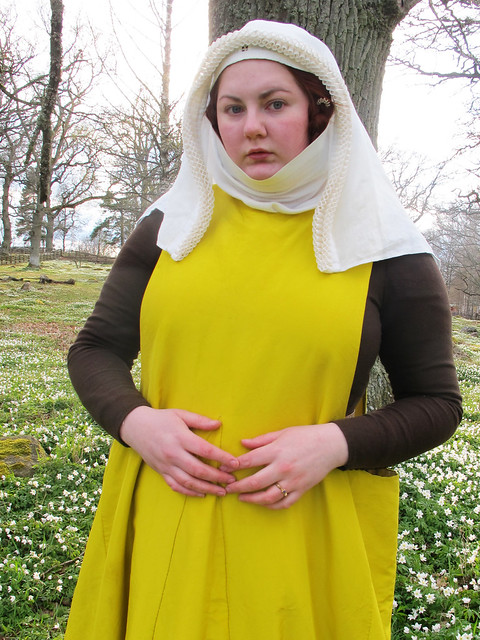
My first year as a trial member of Carnis was 2016 and that year we held a Carnevale at our annual meeting. It was a bit hard to come up with an outfit that fitted, what did they dress up like in the 14th century. In the 16th century there are a lot of pictures but for 14th, not so much. So I decided to dress up like a Saint. To be specific; Catherine of Alexandria. There are some photos on Carnis blog of me and some of the other members, an amazing deer for example! Click Here to go to it.

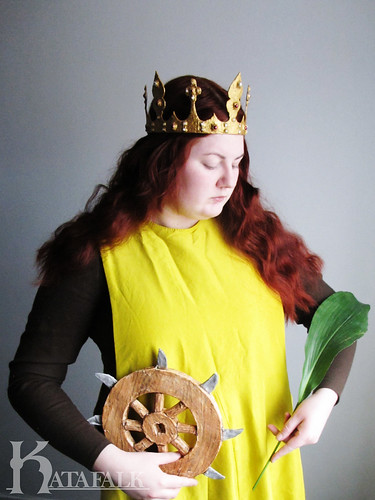
If was mostly because my name is Cathrin and there would not be that much work in fixing a costume but also because she was a very popular saint during the medieval era. She is often depicted dressed very finely with gold and a crown as she was a princess. As she was unmarried when she died she is often shown with loose long hair.
Her attribute is the breaking wheel that she was condemn to die by but did not. She also often wears a martyrs palm or the sword that was used for her actual execution

Catherine of Alexandria - 2

So I needed a fancy overdress, so I choose to make a silk side-less surcoat in yellow as I would probably get use of that later on. I lined it with a thin wool to make it fall nicely. I have blogged about the side less silk surcoat before. Check it out  Here ! It comes with a pattern.

Catherine of Alexandria - 3
Catherine of Alexandria - 4

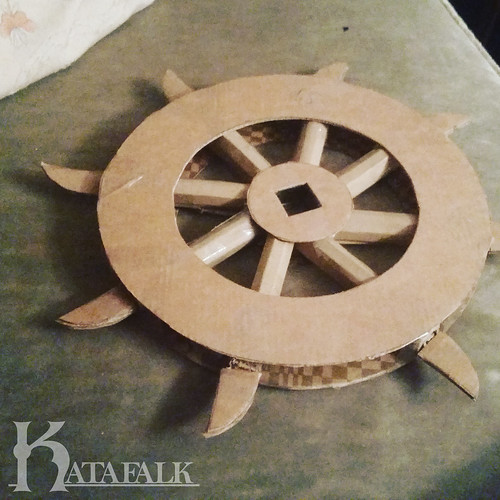
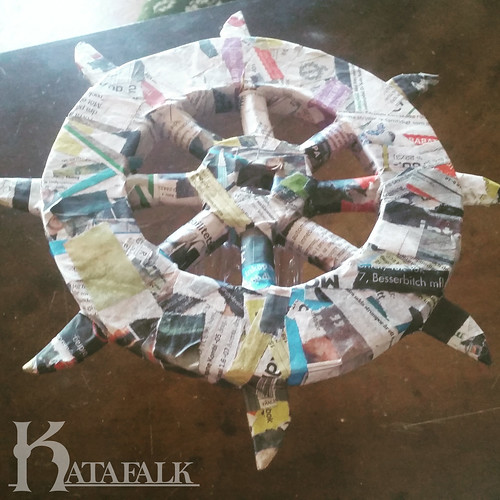
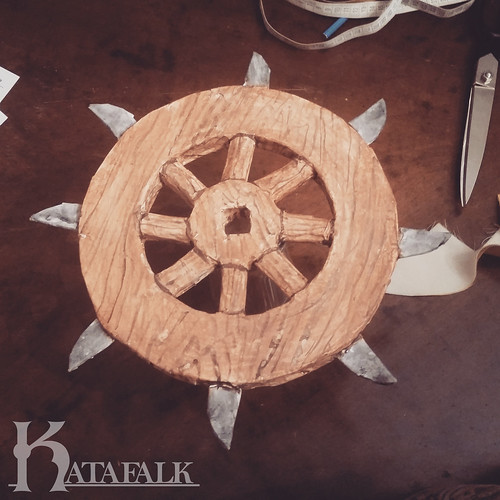
Then I needed a breaking wheel. It is often shown as a very big wheel, but I decided to make it smaller and also as it was “only” for dress up I made it out of an old cardboard box that I covered in newspaper and glue and then painted to look like wood. Small, light and portable!

Catherine of Alexandria - 5

On to the crown. Here I was at a loss. How to make a medieval looking crown, but not spend tons of money on it but not having it look like a paper crown that you had as a child.
Then it hit me, as I kid in Sweden I played a lot with salt dough. it is cheap as it is only salt flour and water. It air dries and if fairly easy to work with.

Catherine of Alexandria - 6

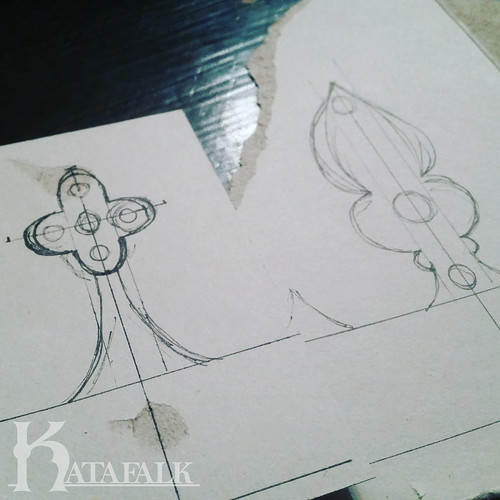
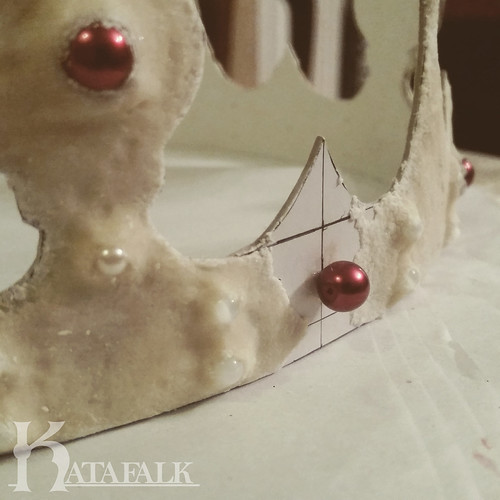
I started out with cutting a base of thick cardboard and based the shape on several medieval crowns. Then I glued beads onto the cardboard, as a crown needs gems.

Catherine of Alexandria - 7

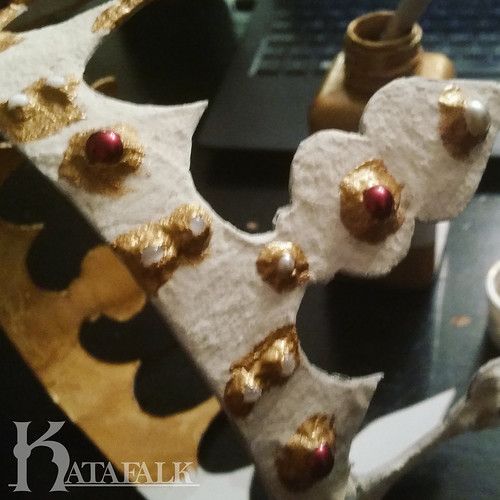
Then I covered it all in salt dough. It shrinks a bit when it dried so I had to touch it up a bit but it worked fine.

Catherine of Alexandria - 8

Then it was all covered in golden paint.

Catherine of Alexandria - 9

I did my best with the “martyrs palm” I got the only big enough green leaf at my local flower shop, some times you can not get it all.

Catherine of Alexandria - 10

You cant go wrong, posing with a book as a saint ;)

In about a month we have a new carnival coming up and I have yet to decide what to do, but I have several ideas on things that might be good. You will of course see it as well, in the end.

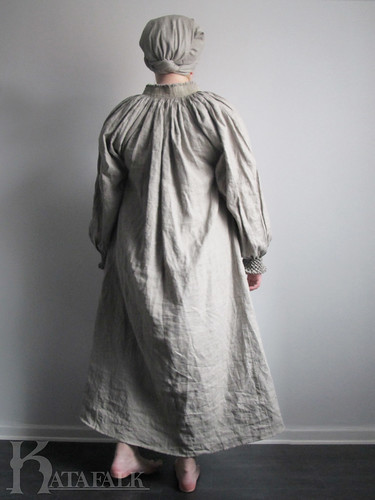
16th century German unbleached long smocked shirt

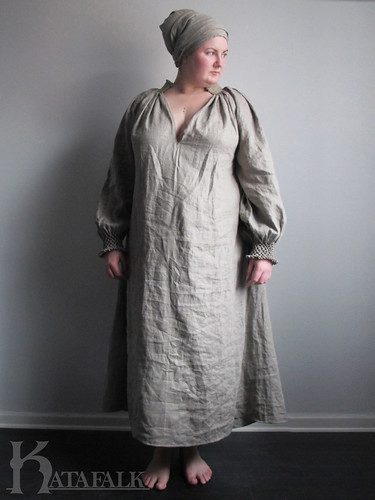
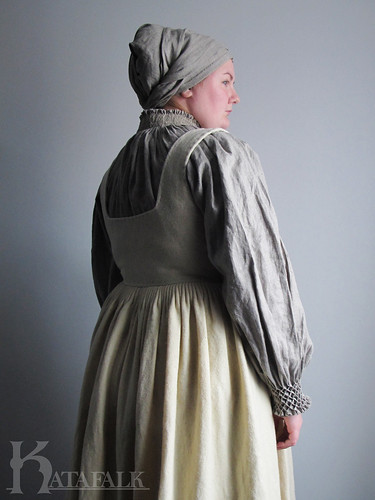
When I made my new plant dyed 16th century German dress I knew that I would need to make a new smocked shirt as the old one was so fancy.


smockedgerman-1

So I decided on a medium weight unbleached linen fabric.
This time I decided to make the shirt longer then the last time and also make it less wide.

smockedgerman-2

The shirt is sewn just as my last smocked German shirt, but with the addition of two gores, one in each of the side seams.
But other then that one can follow the assembly instructions of the white smocked shirt to the letter.
They can be found HERE

The good thing with this version is that there is not that much fabric in the collar, so you will save time on marking out dots, and also, the smocking is a bit different here, more suitable for the English smocking.

smockedgerman-3

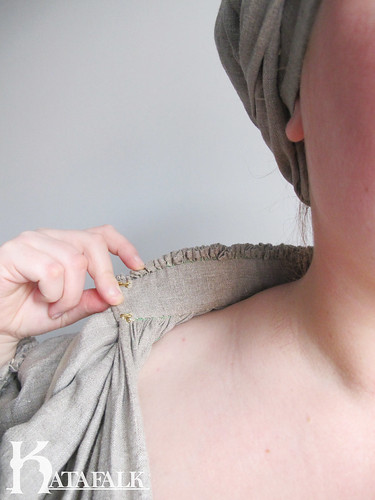
It is lined in the neck with the same linen fabric, and closes with two small brass hooks on one side and two thread loops on the other side.

smockedgerman-4

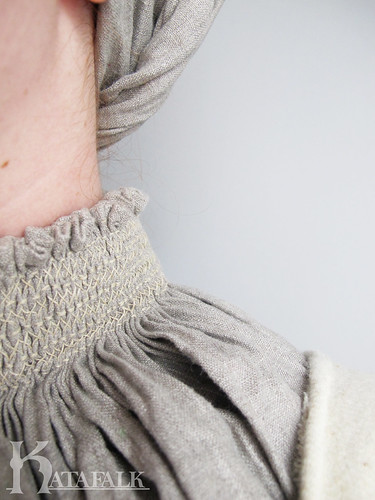
Here you can see the smocking on the collar, done in a unbleached linen thread, making it nice, neat and subtle.

smockedgerman-5

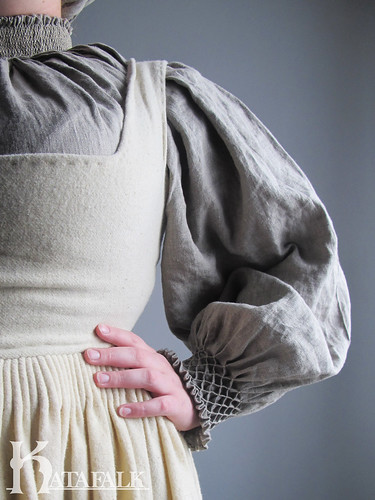
The width of the sleeves are gathered in the bottom with a simple honeycomb smock.

smockedgerman-6

It is very nice and subtle, here it is worn under the underdress.
You can also see the new steuchlein I made to match the new smocked shirt.

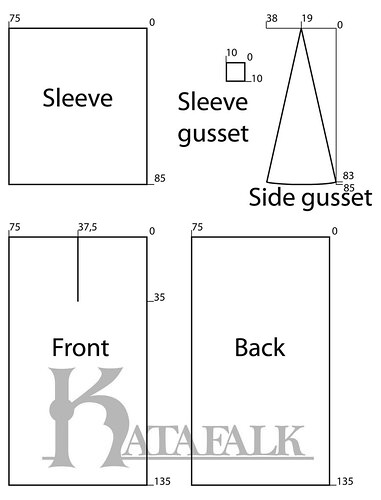
Here is the pattern As always it is made for me and it is in cm.
So when using this, please make a mock up and check it against your own measurements.

smockedgerman-7

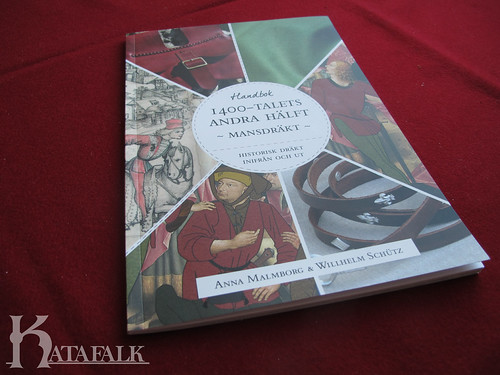
Recension – 1400-talets andra hälft. Mansdräkt


Titel/Title: Historisk dräkt – inifrån och ut: 1400-talets andra hälft – Mansdräkt
Författare/Author: Anna Malmborg & Willhelm Schütz
Förlag/Publisher: ChronoCopia Publishing AB
ISBN: 978-91-981056-2-9

1400-talets andra hälft - 1

Review:Second half of the 15th century – Mens clothing.
This is my first book review so stay with me. This is a book that is currently only available in Swedish so I will so something that I usually do not do, write this review in both Swedish and English. And I do hope that this book will be available in English as well.

Här kommer min första bokrecension så håll ut. Den här boken finns för tillfället endast på svenska så jag kommer att göra denna recension både på svenska och på engelska, något som jag inte brukar göra. Men jag hoppas att den här boken kommer att bli tillgänglig på engelska också.

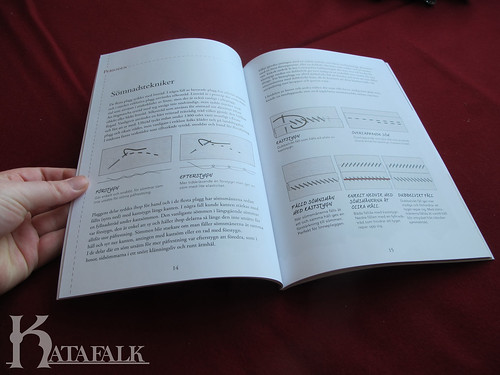
Det är en nätt liten bok, eller man kanske istället skulle kalla det för häfte. 48 sidor proppfulla med information skriven av Anna Malmborg som har bloggen Renikas Anachronistic Adventures och Willhelm Schütz.
Det är en mjuk pärm och formatet är lätthanterligt och trevligt.

It is a neat little book, or perhaps one should call it a booklet. The 48 pages are filled to the brim with information written by Anna Malmborg that runs the blog Renikas Anachronistic Adventures and Willhelm Schütz. It is a soft cover and the format is easy to handle and over al very pleasant.

1400-talets andra hälft - 2

Jag har precis blivit inlurad i 1400-talet, mitt första event var Gimmingehus i somras, ett väldigt trevligt event och jag kände att 1400-tal ska det bli mer av. Det är aldrig enkelt att vara nybörjare i en ny tidsperiod oavsett hur van man är vid research och att titta på tavlor, vad jag hade behövt hade varit en liknande bok för kvinnodräkten (den boken är på tryckeriet just nu).

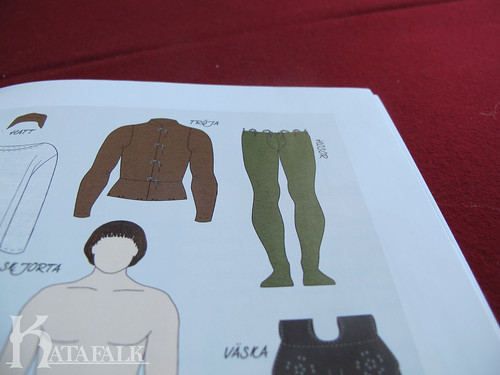
Boken är just det, en handbok för hur man kan göra för att få det rätt från början. Man börjar med att prata lite om den historiska kontexten, för att gå vidare till tidsperiodens formspråk, tyg, färgval och sömnadstekniker.
Det känns som om den är inriktad till den som är nybörjare och vill ha en ingång i hobbyn. Man pratar om hur det ser ut i stora drag och påpekar att det finns andra varianter. Men att om man tittar på detta så kommer man inte göra fel.
Det är en bra grundplåt för att sedan gå vidare och göra mer research själv.

I have recently been tricked into the 15th century. My first event was at Glimminge house this summer, a very nice small event and I felt that the 15th century was worth visiting again. It is never a easy thing to be a beginner at any period, regardless on how used to research you are. I would really have appreciated a similar book for the clothing for the women. (a book that actually is at the printer just this moment).

The book is just that, a handbook on how to do things to get it right from the beginning. It starts out with taking about the historical context to go on to the basic look of the period, fabric, colour choices and sewing techniques.
It feels as if it is made for the beginner that wants a simple way into the hobby. It speaks about the big picture but also points out that there are other varieties. But that if you do it this way you will not do it wrong. It is a good base to later take it a step further and do more research.

1400-talets andra hälft - 3

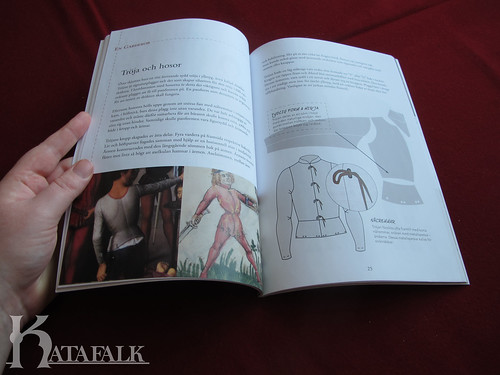
Man beskriver mannens garderob tydligt, plagg för plagg med teckningar som stöds med bilder från samtida konst. Det är bra då man då kan få en guide till hur man ska titta på konsten, och lura ut vad det är man faktiskt ser. Det finns även mönsterskisser som visar i stora drag hur mönster kan se ut, utan att vara så exakta så att man kan kopiera upp dom. Det är ett kroppsnära mode på 1400-talets andra hälft och alla mönster måste byggas på den egna kroppen. Men det är alltid en hjälp att veta åt vilket håll ens mönster bör luta.
Varje plagg har beskrivning av olika varianter och även ett förslag på vilket tyg man bör välja som en utgångspunkt.

The wardrobe of the man is thoroughly explained, garment per garment with drawings that are supported by art from the period. This is good because it is a good guide on how to look at the art from the period, to figure out what you are actually looking at. There are also sketches of how the patterns of the garments might look like without them being so exact that you can copy them right of. The fashion of the second half of 15th century is tight fitting and all the patterns you use must be based of your own body. But having a guide of how the patterns might look like is always a good help.
All the garments also have a description on different varieties and also comes with a suggestion of what fabric you can use as a start.

1400-talets andra hälft - 4

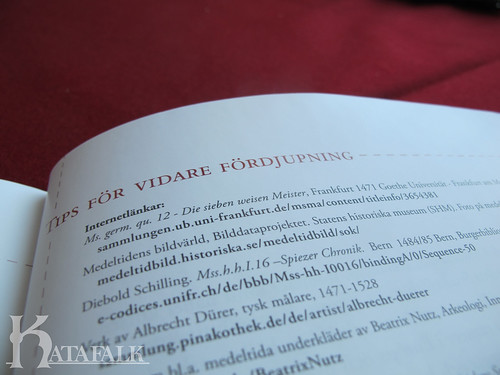
Det bör sägas att detta inte är någon ingående undersökning av hur 1400-talets andra hälft såg ut in i minsta detalj med alla varianter som finns. Det är en lättsmält nybörjarbok där fokus ligger på att göra något som fungerar, en bra stadig grund. Sedan finns det en sida med tips till vidare fördjupning, länkar och böcker som man kan titta på för att komma längre med sitt återskapande.
Men är man det minsta intresserad av att börja med 1400-talsreenactment som förutspås bli det nya svarta inom historiskt återskapande (vid sidan av 1600-talet) så har denna bok verkligen en plats i bokhyllan.

Jag hoppas och tror att boken om kvinnokläder som även den snart kommer ut är lika bra och det vore trevligt om de båda kan släppas även på engelska. Håll utkik på bokseriens Facebooksida Historisk Dräkt för att hålla dig uppdaterad.

One should be aware that this is not a deep ingoing research of how the second half of the 15th century look with all the different version and details. It is a easy digested beginners book where the focus is on doing something that works. A solid base.
But there is a page with references to both books and hompages for the person who would like to dive deeper into the 15th century.
But it you are the least interested in trying out 15th century re-enactment that is said to be the new black (at the side of the 17th century), this book have a clear spot in your bookshelf.

I hope and believe that the book about the costume of the women that is son to be released is just as good and it would be nice if both the book can be released in English.
Keep and eye out at the book series Facebook page Historisk Dräkt to keep yourself updated.

1400-talets andra hälft - 5

How to wear a veil and a wimple

veil-1

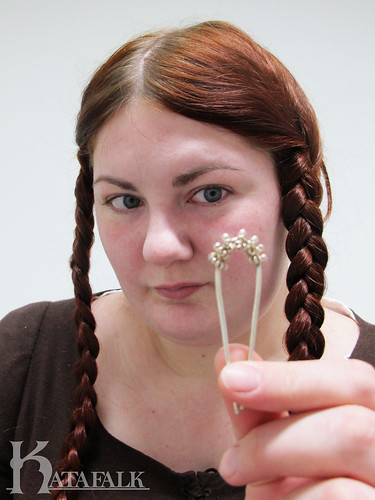
This is a tutorial for when you have long hair, but have that pesky bang that is long enough to braid in, but when braided in and your braids are doubled sticks out in the worst places.
You can of course use this when you have a shorter bangs than I do.

veil-2

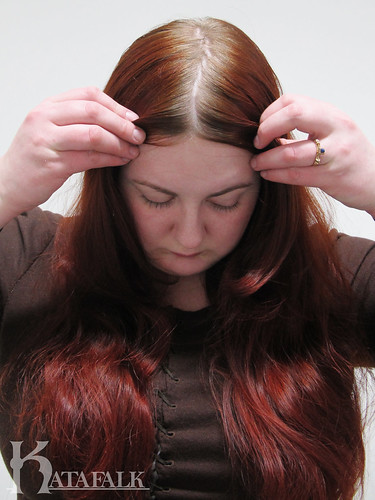
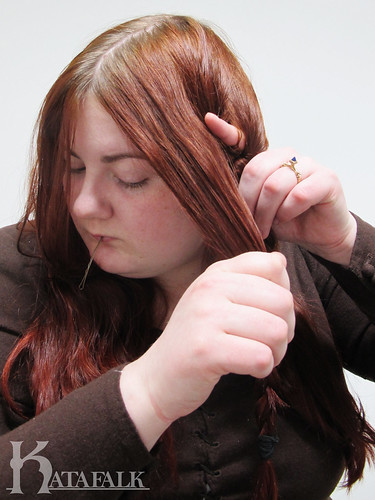
Start with brushing your hair out and parting it. The part does not have to be super neat, as you are putting both a linen cap, veil and wimple over it.
But you still want it to be kind of even, so that your braids does not end up with braids that look different.

veil-3

Separate your bangs from your lengths.

veil-4

If you have a lot of hair like me, using all the hair in your braids can make them a bit to fat.
So I divide the lengths, two thirds for the braids and one third that will be put up in the back. You might want to try different ratios out, depending on how much hair you have.
If you have less of a mane you can skip this part and use all your hair in your braid.

veil-5

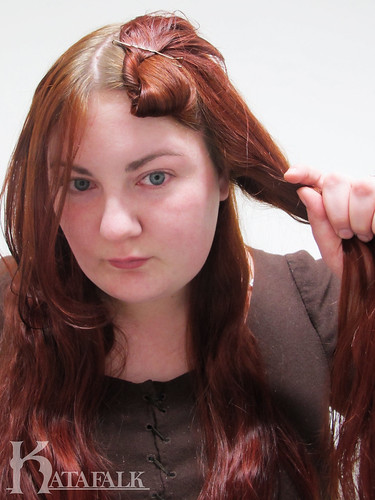
At this stage I put my bangs up, to make sure that they do not get into the braids.
If you have lots of flyaway hair you can either add some coconut oil in to your hair, or some kind of hair wax. I use a organic hair wax that smells slightly of oranges.
This will give you smoother and pretty looking braids.

veil-6

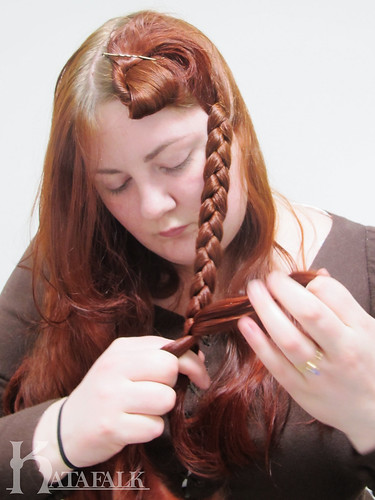
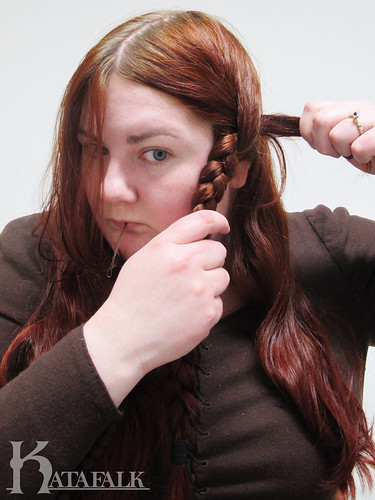
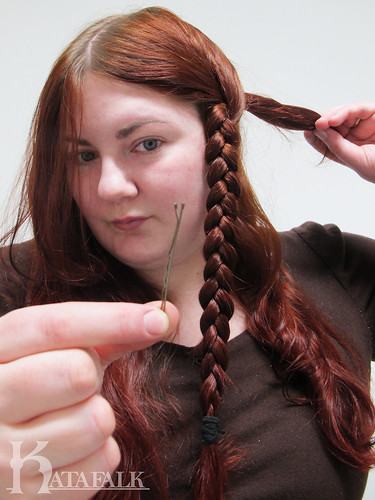
Now lets start the braiding, I do a simple three strand braid, making sure to pull the braid forward when braiding. If you braid them straight down, they will lay to far back on the side of your head.
You wan them to be placed right in front of your ears, because hearing seems to be unnecessary for a lady.
Secure the ends with a hair tie of your choice, I cheat and use small rubber bands.

veil-7

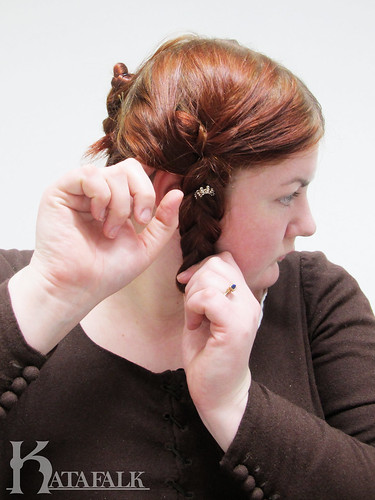
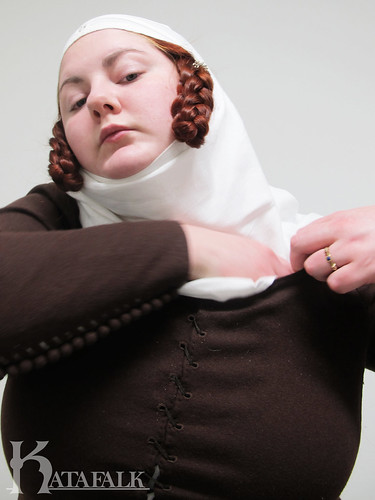
It is time to hide those bangs away. At the base of the braid, poke your fingers trough and use your finger to hook your bangs as if you were
crocheting.

veil-8

Pull your bangs trough making sure that the bangs are smooth and pretty.

veil-9

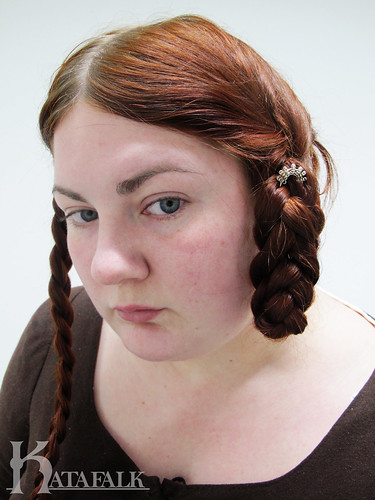
Secure the bangs in the back with a hairpin, making it look as if those bangs are smoothly braided into the braid.

veil-10

Rinse and repeat and do the same thing on the other side.
The look of absolute boredom is optional.

veil-11

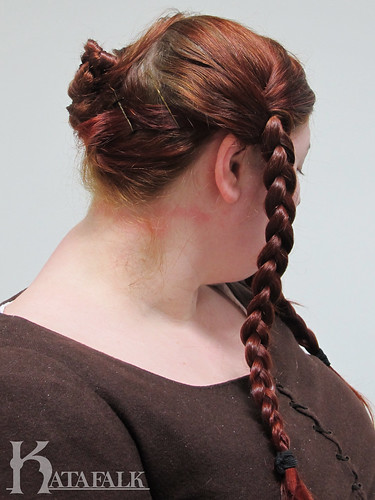
I have put all the rest of the hair up in the back, first braiding it and then
pinning it up.

veil-12

Double your braid and fasten it using a big U-hairpin.
I have a fancy silver replica of the London findings.

veil-13

I usually put the hairpin in straight, this will make the braid look a bit crooked.
Then bend the braid so that it becomes straight again.

veil-14

Poke the ends of the braid in.

veil-15

At this point you can add whatever kind of headwear you want. as long as you cover the back of the head as you have used modern hairpins.
I will show you how I wear a frilled veil and wimple.
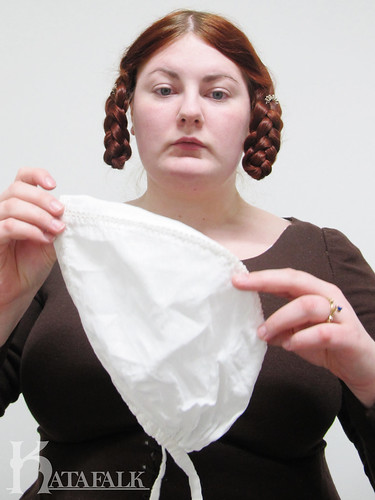
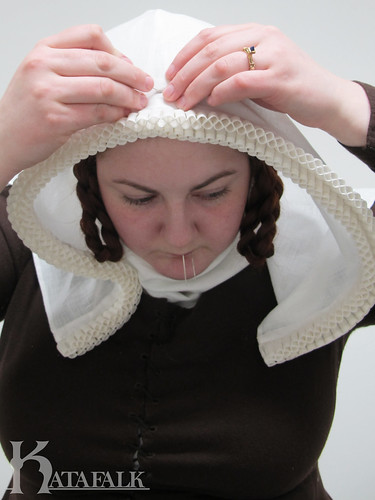
So lets start out with the linen cap.

veil-16

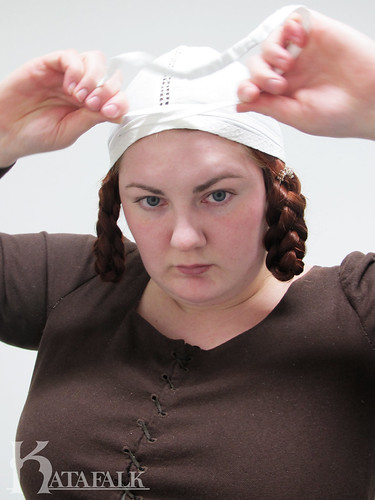
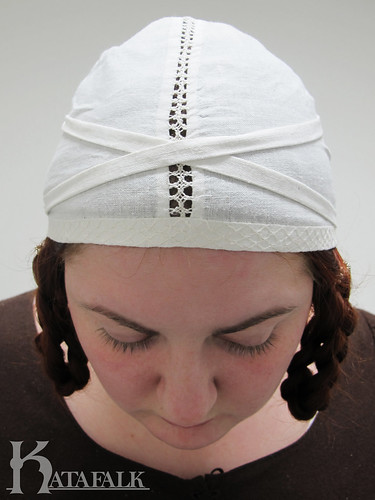
Centre the cap on your head and tighten it with the ties, crossing the ties in the nape of your neck, then pull them up and cross them again at the top of your head, and lay the loop around the back of your head.

veil-17

All secure and tight!

veil-18

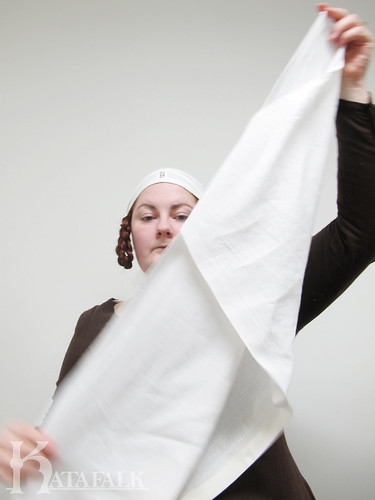
I use a rectangular wimple with the measurements of 150*60 cm.
It is of a weight that matches the veil I am wearing and is hemmed at all sides with a small double folded hem.

veil-19

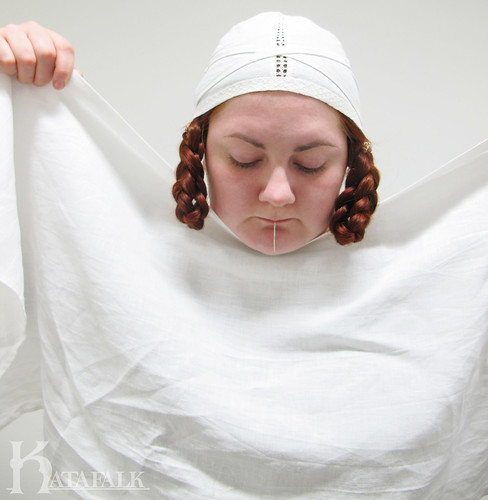
Centre it under your chin, making sure that the braids are on the outside.

veil-20

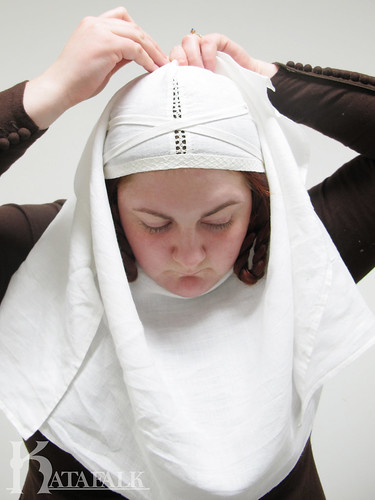
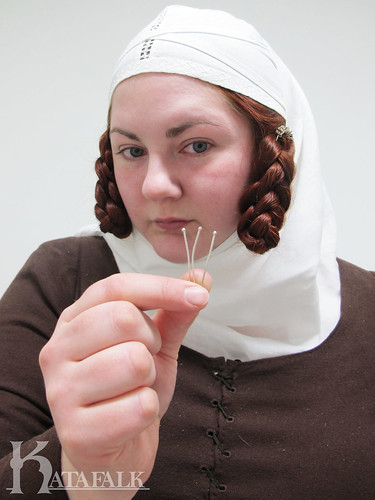
Pin the wimple with a needle at the back of your head.

veil-21

If you are short on reproduction pins, use a modern pin here, as this pin never will be seen. I some times also pin the wimple shut in the back with one pin, if it is a windy day.

veil-22

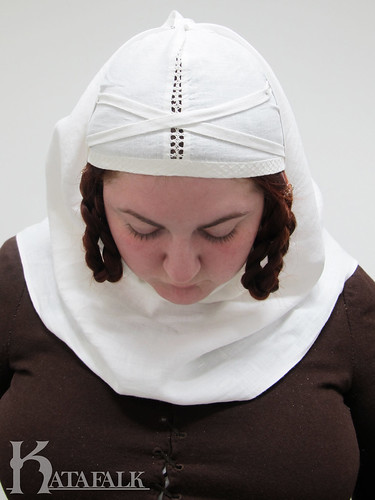
You can choose to wear the wimple on the outside of your dress or inside, this is a matter of personal choice. I usually wear it on the inside and secure the neckline with a few pins.
I pin them so that they are not visible from the outside.

veil-23

Now lest bring out the pretty reproduction pins as they will be visible.
I have these silver pins that are 4cm long. It is a length I like. If they are shorter than that I find them to have a tendency to slip out.

veil-24

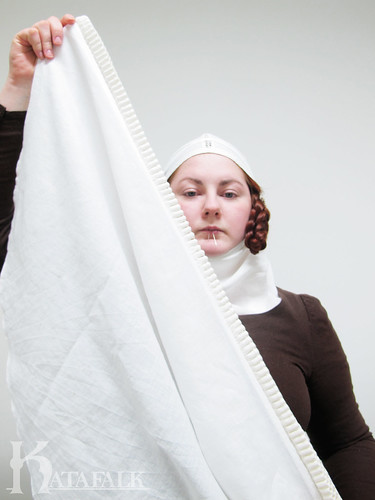
I have a love for half circle veils, this one is 100cm long and 70cm wide.
Onto the straight edge, my small starched frills are attached.

veil-25

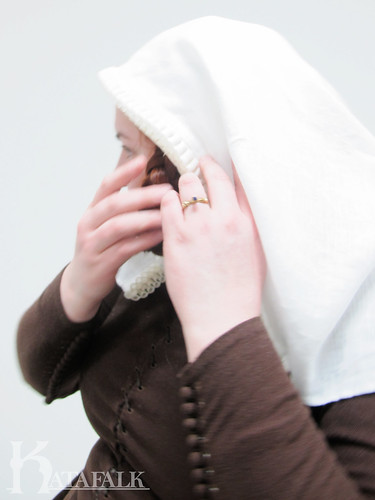
Centre the veil on your head.
Master the “looking in the mirror with pins in your moth“
super serious look.

veil-26

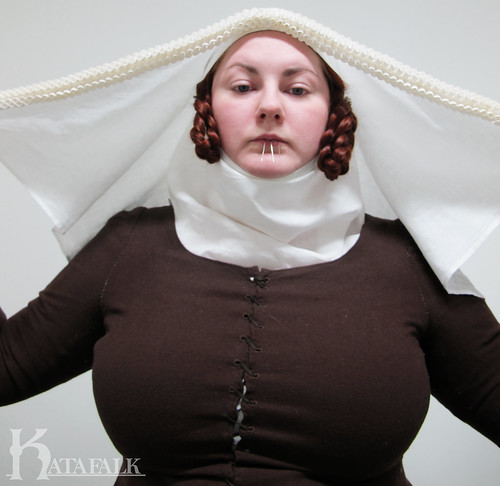
Put a pin at the top of your head, make sure to catch the linen cap.
You want the veil firmly attached to your head.

veil-27

Pin the veil at the sides as well. Now make sure to also catch the wimple.
If it is a windy day you can also put a pin at the back of your head, at the nape of your neck. Veils have a tendency to not behave in the wind and flip over into your eyes.

veil-28

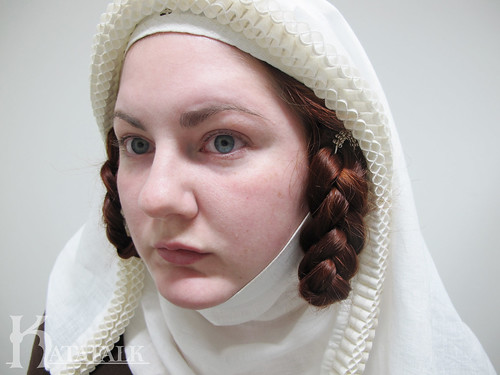
And now you are done! Go forth and be fancy!

veil-29

How to set a sleeve

För denna beskrivning på Svenska; klicka här!

Some words before we start

A lot of people find setting sleeves to be the hardest part about sewing. That is why have made this small troubleshooting manual to make your future sleeve setting a bit easier.
It is written from the point of getting a “god looking sleeve”. One should note that a good looking sleeve is not always a historically correct sleeve. Some creasing and pulling is accurate and you have to decide on either pleasing your modern eye or your historical and also choosing between form and function.
There is no way of you always getting both pretty and functional.

This guide is written so that you will understand what is happening with your sleeve and what you can do to make it more visually pleasing, or to choose the more historical sleeve that will often times give you more movement than the modern sleeve will give you.

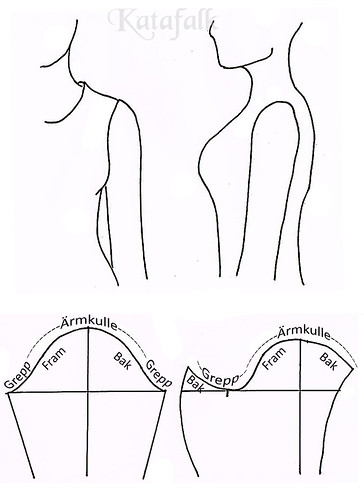
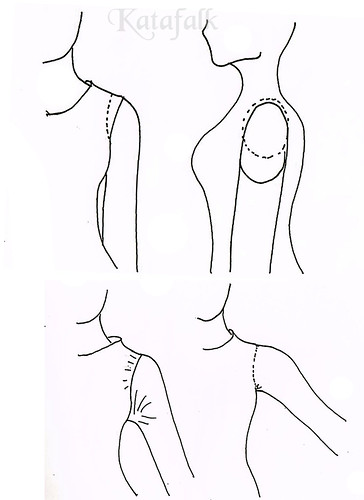
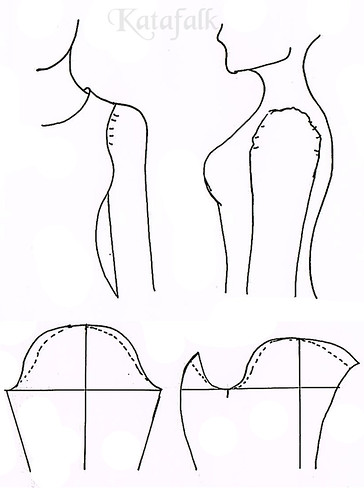
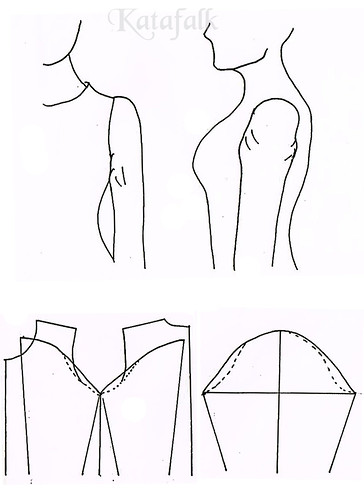
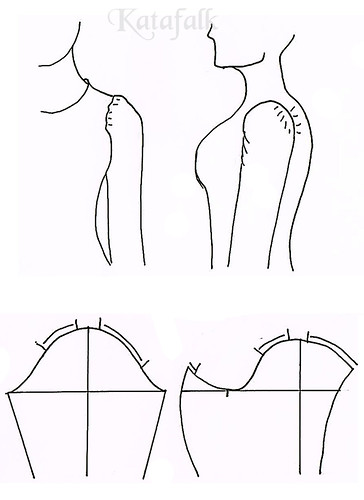
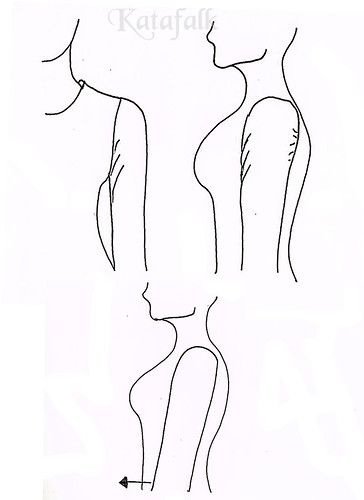
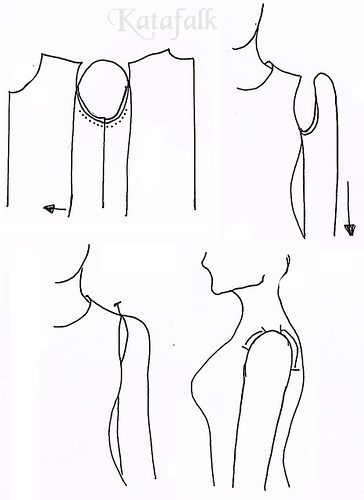
The sleeves will be shown from straight ahead and from the side. It shows what is happening with the sleeve on the body with the pulling and creases that might appear.
The sleeve will also be shown flattened as a pattern piece, both as a sleeve with the seam under the arm. but also as a historical s-sleeve. The solid line shows what we are starting with and the dotted lines shows how a “correct sleeve” looks in comparison. Note that a “correct sleeve” in this case is the more visually pleasing sleeve.
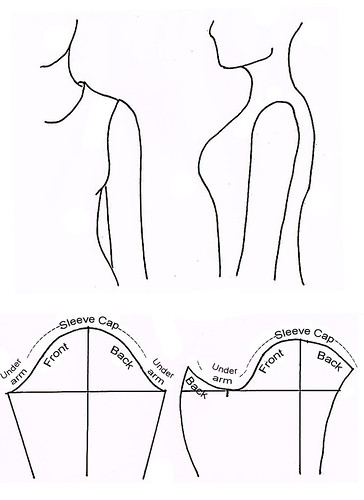
settingsleeves-1B

The armhole is the most important thing
The most common mistake people make when setting a sleeve is to have an incorrect armhole on their garment.
On a modern garment the armhole is often big, the bottom of the armhole is at the bust point and the sleeve seam is places a bit out on the shoulder.
A historical armhole is always smaller, it is first when they started to sell ready made clothing that they had to make the armholes bigger to make the clothing fit a bigger range of people.

How high the sleeve sit under our arm is very important to make sure that you get a good range of movement in you garment.
A lover armhole as shown as a solid line on the picture below will “lift” our entire garment when you raise your arms and you will get the feeling that there is a limit, you can not lift your arms higher. You can also get the feeling that he you lift your arm the seam will be pulled of your shoulder and it will pull both at the shoulder and armpit.

A more historical armhole sits a bit further into your body, as you can see as a dotted line on the picture below. It will give the ball of your shoulder more space and it sits tight up in your armpit. With this armhole you will feel that you can raise your arm higher without the garment is affected.
settingsleeves-2

Low sleeve cap
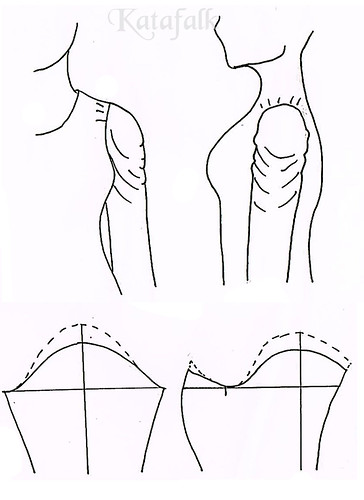
A clear sign of a to low sleeve cap is that some kind of creases in the fabric appears as the picture shows. It pulls from under the arm and if your sleeve is tight the shoulder sleeve might be pulled of the shoulder.
There are a lot of positive things about a low sleeve cap and also a lot of reasons that historical sleeves have a relativity low sleeve cap.

The lover your sleeve caps is the better movement your sleeve gets. The throwback is that you might have to live with the diagonal lines and pulling of the fabric and folds in the armpit. But as historical garments have a smaller armhole than a modern the result is that you will not need such a high sleeve cap.
That is why you can say that the lower your sleeve cap is the more movement your sleeve gets. Keep in mind that the best movement is given in a classic “t-tunic” with a completely straight sleeve and a gore under the arm.
But with that type of sleeve you will have to live with the fact that it does not sit completely smooth and pretty.

The set in sleeve is a choice that you make, if you want a pretty sleeve you will have to sacrifice the movement of the sleeve and vice versa. But as long as your armhole is small you will have a greater chance of getting a pretty sleeve with a low sleeve cap, than if you choose a bigger armhole that needs a higher sleeve cap.
settingsleeves3

High sleeve cap
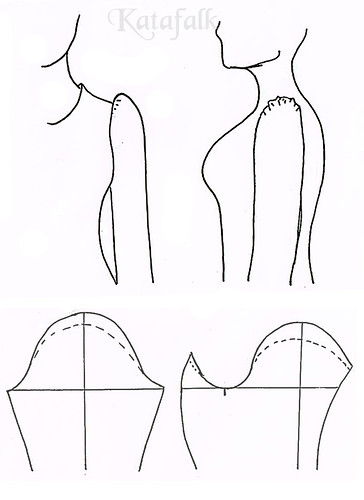
When you have a to high sleeve cap you will notice a slim puff sleeve at the top of your shoulder. It is high and it is clear that there is to much material in the top of your armhole.
A higher sleeve cap gives you a longer piece of fabric that needs to fit in your armhole. This might cause some puckering or gathers at the top of the sleeve cap, if you did not make a wider gathered sleeve by choice this is a clear sign that something is wrong.

You might want to say that a high sleeve cap always is the culprit in the drama about bad range of movement, but so is not the case. The bad range of movement is the result of a to big armhole that requires a higher sleeve cap if you wish to eliminate pulling and diagonal lines.
That is why you should not talk bad about the high sleeve cap, it is there because you want a nice smooth and well put in sleeve and can most often be found on modern garments that almost always have bigger armholes than the historical garments.

A historical armhole is always tighter against the body and smaller. It will therefore require a lower sleeve cap to get the same visual as the high sleeve cap in the modern armhole. The throwback with the modern armhole and high sleeve cap is that it will always have less range of movement then the historical one.
But it is your choice, do you sacrifice looks for function or the other way around.
settingsleeves-4

Slim sleeve cap
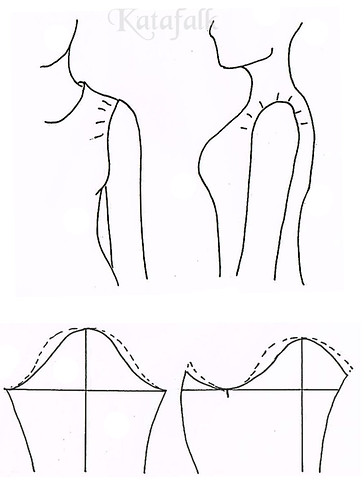
A slim sleeve cap will give you the feeling that it pulls a lot at the top of your sleeve. This is simply because there is not enough material to cover the ball of your shoulder. So the sleeve will pull fabric from your bodice and the sleeve seam will be pulled out onto your shoulder.

A modern armhole is bigger but also sits farther out on the shoulder than a historical armhole that is located on the inside of the ball of your shoulder.
This is why a modern sleeve often have a slimmer sleeve cap than what a historical garment needs. So when using a modern sleeve pattern when working on a historical garment you might end up missing an inch of fabric on your sleeve cap because the seam of the historical garment have been moved in further onto the body.

If you are only missing a inch or so you can solve this with the help of an iron. Using warmth and a bit of moisture, work in circular movements on the venter of your sleeve cap and sort of knead the fabric out.

This will of course only work if you are using wool, but in a fluffy wool fabric it might give you that extra inch of fabric if you are lucky. But be careful so that you do not distort the shape of your sleeve cap, remember that it is important to have a pretty shape.
settingsleeves-5

Wide sleeve cap
One way of seeing if your sleeve cap is to wide is to look at it from the side.
Does the sleeve feel unnecessary roomy in the sleeve cap? Then it might be that it is to wide. To have a wide sleeve is one thing, but to have a sleeve that is above everything else, wide at the top of your upper arm might not be that attractive, if you are not aiming for a “leg o mutton sleeve”

A to wide sleeve cap might also be notice by to much ease in your sleeve cap, so that when you are trying to set your sleeve smoothly you will get some tendency for puckering or gathers.

A wide sleeve cap is positive when you are making a puffed sleeve, then you need the extra width over the top of your upper arm so that the sleeve becomes not only puffy in the top but also lower down and to the sides.
But this is not often what you are looking for when wanting a smoothly set sleeve.
A mistake people do is to try and make it slimmer by taking away material in the seam under the arm. But is is important to look where it is puffy and only slim it down where it is needed, in this case only in the sleeve cap.
settingsleeves-6

The wrong fit of the bottom of your sleeve
To be honest I do not know the technical term for this area of the sleeve, but it is the area that is 2-3 inches beside your side seam/underarm seam. this is the area under your arm where the bodice and sleeve lays always exactly against each other.

This is why it is very important that these places have the exact same shape, as they are always going to lay against each other.
If they are not the same shape you will notice this as a “bubble” will form under your arm, as if it was just a few cm to much material only under your arm.
This is because you are forcing the bottom of the sleeve to lay flat against a shape that is different from its own.

The rule is usually that you should follow the shape of the armhole of the bodice if it has a nice shape. Put the sleeve pattern against your bodice pattern, front to front, trace the shape of the bottom of the sleeve of the bodice for 2-3 inches and then make sure that is connects with the sleeve cap line with a nice shape.
Do the same on the other side of the sleeve, put it back to back, trace the bottom of the armhole and meet the top of the sleeve cap line in a nice shape.
When you draw a sleeve the shape of the line is important, if it is smooth and not wobbly on the pattern the same thing will be true on the body.
settingsleeves-7

Incorrectly distributed ease
Does it feels that you have all this extra material on the front of your sleeve of the other way around, then you might have distributed your ease incorrectly.

But what ever is ease?
When you make a sleeve it needs to be a bit bigger than the armhole to be able to be put in nicely. The extra length of the seam of the sleeve needs to be eased in when you are setting your sleeve and the result is supposed to be a totally smooth sleeve without puckering or garters at the top.
If you have no ease at all you might end up with your armhole looking a bit gathered.

A higher sleeve cap needs more ease to sit correctly on your arm and a lower sleeve cap needs less. The result of this is that in historical garments you end up having less ease as the naturally needs less. This is because of the fact that they often have a lower sleeve cap.

You can say that you need 0,4-2 inches of ease depending on the material, but you can some times squeeze in even more.
The ease is distributed differently in the front and the back of the sleeve.
In the front it is concentrated over a short distance. This is because you need the extra width there so that the sleeve goes over the ball of your shoulder in a nice way without pulling.
At the centre of your shoulder, 0,6 inches on each side of the shoulder seam you need no ease at all.
At the back the ease is distributed over a longer distance, as you are flatter in the back of your arm.
settingsleeves-8

Wrong position
Does it pull in the back is is a lot of material in the front of the sleeve or the other way around? One might think that the problem here is incorrectly distributed ease.
It does give the same kind of feeling but in this case the problem is that the sleeve have been angled in the wrong direction when it was set, in the drawing below it was angled backwards.

A sleeve should be angled a bit forward to look good on the body. You can often see on historical garments that they often have a exaggerated forward facing sleeve.
This is also often combined with a sleeve that does not fall down to the sides of the body as a modern sleeve but is bent forward already in the pattern.

This might feel a bit of in the beginning when you are not used to it, but is most likely made in this way to give the prettiest sleeve when worn. If you think about it, it is not that often that you walk with your arms straight down, they are often a bit bent forward.
settingsleeves-9

To set a sleeve, step by step
Start by sewing the side, underarm and shoulder seams. Press them well and sew them down as you want.

Put one of the armholes of the bodice over your knee with the shoulder seam facing up. So that your knee peaks out of the armhole and you can see the side seam.

Put the sleeve right on top of the armhole and match the bottom up with the side seam. Make sure that you put it in the right way, the sleeve cap is always a bit more roomy in the front so that the ball of your shoulder will have room and flatter in the back. Also make sure that the sleeve is positioned right, a bit titled forward.

Then baste the bottom, 2-3 inches on each side of the side seam.

Turn the sleeve and garment right side out and hold it either in your hand or put it on a doll or better yet, the person you are sewing the garment for.
Make sure that the sleeve falls nicely, a bit tilted forward and that the area under your arm is smooth and nice, watch out for that “bubble”.

Using your hand, follow the sleeve upwards and simply lay the top of your sleeve cap against the shoulder seam. Make sure that there is no pulling in any direction and that is is straight.

Distribute the ease on each side of the shoulder seam by all the rules in the book and baste the rest of the sleeve.

Control the sleeve and adjust as needed after this guide.
Then sew in the sleeve for real.
settingsleeves-10

I hope that this guide might help you in some way, remember, the sleeve is your friend not your enemy.

Hur man sätter en ärm

For this tutorial in English; please click here!

Ett litet förord
Många tycker att det svåraste med att sy är att få till en snygg ärm. Därför har jag gjort denna lilla felsökningsmanual för att underlätta dina framtida ärmisättningar. Den är skriven med utgångspunkten att få en “snygg ärm“. Man bör notera att en snygg ärm inte alltid är en korrekt ärm rent historiskt. Vissa veck och dragningar är historiskt korrekta och man får ibland göra ett val mellan sitt moderna öga och det historiska och där välja mellan form och funktion. Det är inte alltid man både kan få kakan och även äta den.

Denna guide är skriven så att du förstår vad som händer med din ärm och vad du kan göra för att få den mer estetiskt tilltalande, eller välja den mer historiska ärmen som ofta ger dig mer rörelse än den moderna estetiken gör.

Ärmarna kommer att visas rakt framifrån och från sidan. Den visar vad som händer på kroppen med ärmen med de dragningar som kan framträda.
Ärmen visas även utplattad som mönsterdel, både som en ärm med söm under armen och även som en historisk så kallad S-ärm. Den solida linjen visar utgångsläget och den streckade linjen visar på hur en “korrekt ärm“ ser ut i jämförelse. Notera att en “korrekt ärm” i detta fallet är den mest estetiskt tilltalande ärmen.

settingsleeves-1

Ärmhålet är det viktiga
Det vanligaste problemet folk har när de ska sätta en ärm är att de har ett felaktigt ärmhål.
Ett modernt plagg har ofta ett ärmhål som är rymligt och därmed sitter botten av ärmhålet ganska långt ner på livet, ofta i höjd med bystlinjen och ärmsömmen trillar ut lite mer på axeln.
Ett historiskt ärmhål har alltid varit mindre, det är först när kläder börjar göras konfektionsmässsigt som man börjar förstora ärmhålen så att kläderna ska passa fler människor.

Hur högt ärmhålet sitter under armen är otroligt viktigt för att få in mer rörelse i ärmen. Ett lägre ärmhål som på bilden här bredvid visas med en solid linje gör att så fort du lyfter dina armar lite för högt så lyfter du även ditt plagg och du får känslan av att det tar stopp, du kan inte lyfta dina armar högre. Dessutom som du ser så kan du få känslan att när du lyfter ärmen så drar det liksom med sig axeln ut och det stramar på livet både vid axel och i ärmhålet.

Ett mer historiskt ärmhål sitter lite längre in på kroppen som visas på bilden med en streckad linje.den ger plats åt din axelkula och sitter tight upp under din arm. Med detta ärmhål upplever man att man kan lyfta armen högre utan att plagget följer med.

settingsleeves-2

Låg ärmkulle
Ett tydligt tecken på en för låg ärmkulle är att man får någon variant av de dragningar som bilden bredvid visar. Det drar från under armen och om din ärm är tight kan axelsömmen dras ned från axeln.

Det finns många positiva saker med att ha en låg ärmkulle och även många anledningar till att historiska ärmar ofta har en relativt låg ärmkulle.
Ju lägre ärmkulle du har desto bättre rörelse får du i din ärm. Nackdelen är att du kanske måste leva med dragningarna på ärmen och även eventuellt veck i din armhåla. Men då historiska plagg har mindre ärmhål än moderna så krävs det även en lägre ärmkulle för att få ärmen att räcka till.

Därför blir resultatet att man kan säga att ju lägre ärmkulle desto mer rörelse i din ärm. Tänk dig att den bästa rörelsen får du i en klassisk särk med helt rak ärm och ett ärmspjäll under armen. Men där får du leva med att ärmen inte sitter jättesnyggt och slätt.

Den isydda ärmen är ett val du gör, vill du att ärmen ska vara snygg får du offra lite av din rörelse och vise versa. Men så länge ditt ärmhål är litet så har du större chans till en snyggare ärm med en låg ärmkulle. Än om du väljer ett större ärmhål som kräver en hög ärmkulle.

settingsleeves3

Hög ärmkulle
När du har en för hög ärmkulle formas en smal puffärm ute på din axel. Det blir toppigt och det är tydligt att det är för mycket material i toppen på ditt ärmhål.
En högre ärmkulle ger dig en längre söm som ska få plats i ditt ärmhål. Detta leder till att du kan råka ut för att det blir lite rynkor på din ärmkulle, om du inte medvetet gjort en vidare rynkad ärm så är det ett tecken på att det är något som inte stämmer.

Man kanske vill säga att en hög ärmkulle alltid är boven i dramat om dålig rörelse. Men detta är inte fallet. Den dåliga rörelsen är resultatet av ett större ärmhål som i sin tur kräver en högre ärmkulle som man inte vill att det ska dra sig och få veck i armhålan.

Därför kanske man ska akta sig för att baktala den högre ärmkullen. Den finns för att man vill ha en slät och fint isatt ärm och hittas oftast på moderna plagg som ofta har större ärmhål än de historiska.
Ett historiskt ärmhål är alltid tightare mot kroppen och över lag mindre. Den kräver därmed en lägre ärmkulle för att få samma utseende som den höga ärmkullen i det moderna ärmhålet. Nackdelen med det moderna ärmhålet och den höga ärmkullen blir alltid att den får mycket sämre rörelse. Valet är dock ditt, offrar du utseende för funktion eller vise versa?

settingsleeves-4

Smal ärmkulle
En smal ärmkulle gör att du känner att det stramar mycket i toppen av ditt ärmhål. Detta beror på att det helt enkelt inte finns tillräckligt med material för att täcka din axelkula och därför så drar ärmen ut ditt liv och din ärmsöm på axeln.

Ett modernt ärmhål är större men sitter ofta längre ut på axeln än ett historiskt ärmhål som sitter innanför din axelkula.
Detta gör att en modern ärm ofta har en smalare ärmkulle än de historiska plaggen kräver. Detta kan göra att om du utgår från ett modernt ärmmönster när du syr sitt historiska plagg så kommer det att fattas flera cm på var sida om din ärmkulle eftersom den historiska ärmsömmen är inflyttad på kroppen.

Om du har en ärmkulle som bara är någon cm för smal så kan du med hjälp av ett strykjärn bredda din ärmkulle. Jobba med värme och fukt i cirkulära rörelser på ärmkullens mitt och liksom knåda ut ditt tyg.
Detta funkar självklart nästan bara på ylletyg men i ett lite fluffigt ylle kan du jobba ut din ärmkulle så mycket som två cm. Men akta dig så att du inte får någon annan konstig form på din ärmkulle, kom ihåg att det är viktigt att ha en fin form.

settingsleeves-5

Bred ärmkulle
Ett sätt att se om du har en för bred ärmkulle är att kolla från sidan. Känns ärmen onödigt bylsig i ärmkullen? Då är risken att den är för bred. Det är en sak att ha en vid ärm, men att ha en ärm som framför allt är vid i ovankanten över överarmen kanske inte är så fint, om du inte siktar på en fårbogsärm.

En bred ärmkulle kan också märkas som att du har lite för mycket hållning i din ärmkulle och då måste jobba in materialet så mycket att du får som små tendenser till rynkighet.

En bred ärmkulle är positivt att ha om du gör en puffärm, då behöver du ha den extra vidden över din överarm så att din ärm inte bara blir puffig i ovankant utan även längre ner på ärmkullen och över armen.
Men det brukar inte vara så uppskattat i en isydd vanlig ärm, då kan många försöka göra hela ärmen smalare genom att ta in i ärmsömmen. Men det är viktigt att titta på ärmen vart den är puffig och ta in bara där det behövs, i detta fallet är det bara i ärmkullen.

settingsleeves-6

Fel grepp
Greppet är det område på ärmen och livet som är under din arm. den är området som är 6-7cm på båda sidorna av din sidsöm/ärmsöm. Detta område ligger under din arm där ärmen och livet ligger alltid exakt mot varandra. Detta gör att det är viktigt att dessa har exakt samma form där de faktiskt alltid ligger rakt mot varandra.

Har de inte samma form så kan detta märkas som att det blir en ”bubbla” under armen, som om det vore lite för mycket material under din arm.
Detta beror på att du behöver tvinga ärmens botten i en annan form än den form den läggs emot.

Man brukar säga att det är ärmhålets på livet form som bör följas om den ser bra ut. Lägg ditt ärmmönster mot livmönstret och rita av formen på ärmhålet fram på ärmmönstret, följ livmönstrets form i 6-7cm och fasa sedan ut sömmen så att den möter ärmkullen i en fin linje. Gör sedan samma även på den andra sidan, rita av formen på ärmhålet bak på ärmen och möt ärmkullen i en fin linje.

När du ritar en ärm är linjens form viktig, om den är jämn och inte krokig på mönstret kommer den bli jämn och fin på kroppen.

settingsleeves-7

Felfördelad hållning
Känns det som om du har massa material fram på ärmen och inget alls bak på ärmen eller vise versa, då har du troligtvis fördelat din hållning fel.

Vad är då hållning?
När du gör en ärm så behöver den vara lite större än ditt ärmhål för att den ska kunna sättas i snyggt. Denna extra längd på ärmsömmen ska “hållas“ in när du sätter din ärm och resultatet ska bli en helt slät ärm utan rynkor. Saknar man hållning kan resultatet bli att man snarare upplever det som att ärmhålet ser lite rynkat ut.
En högre ärmkulle kräver mer hållning för att sitta snyggt på din arm, en lägre ärmkulle kräver mindre. Resultatet av detta är att man i historiska plagg gärna har väldigt lite hållning då de naturligt kräver mindre på grund av den ofta lägre ärmkullen. Man brukar säga att man ska ha 1-5cm i hållning beroende på vilket tyg man jobbar i men ibland kan man få in även mer.

Hållningen fördelas olika bak och fram på ärmen.
Fram centreras den över en kort sträcka, detta är för att du behöver den extra vidden där för att ärmen ska räcka över din axelkula. Mitt på axeln, ca 1,5cm om var sida av axelsömmen är du platt och där ska du inte ha någon hållning alls.Bak är hållningen utspridd över ett längre område, nästan ända ner till greppet.

settingsleeves-8

Fel ärmställning
Stramar det bak och är bylsig fram eller vise versa, det första man tänker här är kanske att det kan vara hållningen som är felfördelad.

Det ger lite samma känsla men i detta fallet är det att när man sytt i ärmen så har man vinklat den åt fel håll, här på teckningen har man råkat vinkla ärmen bakåt.

En ärm ska vara vinklad lite lätt framåt för att se snyggast ut på kroppen. Man kan se att historiska plagg ofta har en överdrivet framvinklad ärm.
Den framåtvinklade ärmen är även ofta i kombination med en ärm som inte hänger rakt ner som moderna ärmar utan istället är formad i en böj framåt.

Detta kan kännas lite lustigt i början när man är ovan, men syddes troligtvis på det sättet för att ge en så snygg ärm som möjligt när plagget användes, det är ju sällan man går med armarna rakt nedåt utan ofta har man dom lite framåtvinklade.

settingsleeves-9

Sätta en ärm, steg för steg
Börja med att sy ärmsömmen, sidsömmen och axelsömmen. Pressa dessa väl och fäll dom om de ska fällas.
Lägg livets ena ärmhål över knät med axelsömen uppåt så att dit knä kikar fram ur ena ärmhålet och så att du ser sidsömmen.
Lägg ärmen rakt på ärmhålet och passa in sömmen i botten. Kontrollera så att du sätter i den år rätt håll, ärmkulle fram är alltid lite bulligare för att axelkulan ska få plats och bak är den flackare. Kontrollera även så att din ärmställning ser fin ut, lite lätt framvinklad.
Tråckla sedan greppet, inte mer än det utan bara 6-7 cm om var sida om sidsömmen.

Vänd ärmen rätt och håll den antingen i handen, sätt den på docka eller bäst av allt ta på den på personen du syr till. Kontrollera att ärmen hänger slätt ner lite frammåtvinklad och att greppet är slätt och fint.

För din hand längst med ärmen och lägg upp toppen på ärmkullen mot axelsömmen, kolla av så att ärmkullen inte drar sig i toppen utan sitter rakt.
Fördela den hållning som nu finns på var sida om axelsömmen enligt konstens alla regler och tråckla fast hela ärmen. Kontrollera hur din ärm sitter och justera vid behov efter denna guide.
Sy sedan i ärmen på riktigt.

settingsleeves-10

Regency apron

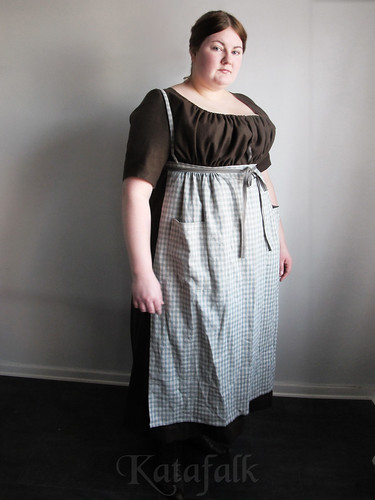
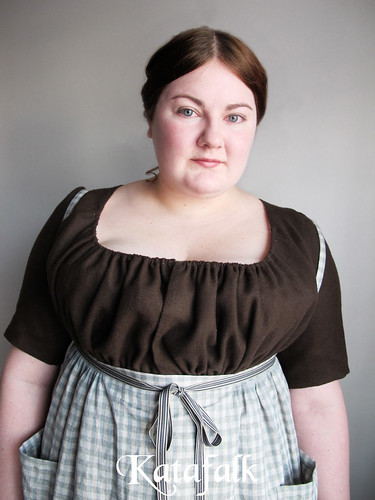
As I am making a simpler regency outfit I needed a apron. In Sweden patterned aprons are common for many time periods, both striped and squares. And I happened to have a piece of thrifted linen fabric woven in white, unbleached and blue that seemed perfect.

Also check these pictures out, blue checked regency aprons in art.
London 1803
British 1820
Dutch 1803

I also wanted some pockets on the apron something that also can be found in the drawings from this time even if this one from France from 1824 is a tad bit late.

Regency Apron-1
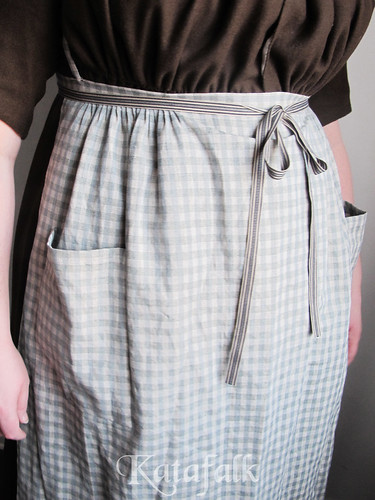
As my dress is not floor length but a practical working length the apron follows this, the apron is 93cm long and 87cm wide. And it is pleated at the sides with a smooth front.

Regency Apron-2
The pockets are of a reasonable size, 23*16cm and I choose to put them under the pleating in the sides. This makes them “open up” a bit and are easy to use.

Regency Apron-3
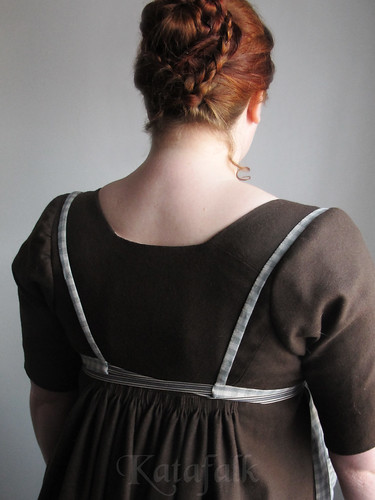
I decided after it was finished that I needed shoulder straps on it. I can easily see myself get really annoyed by the apron creeping down to my waist. Happily thin shoulder straps on aprons are not uncommon in this period. Just look at this apron from 1824 France.

Regency Apron-5
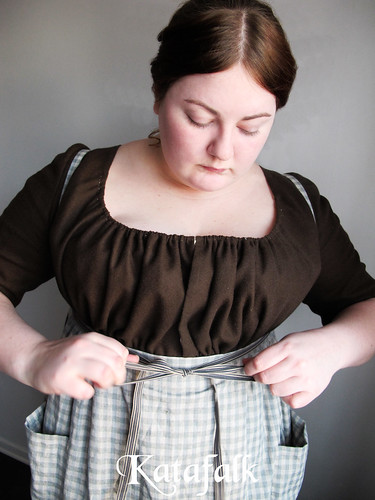
I used a woven cotton ribbon as a tie. To make the waistband in the apron fabric and to have it extend a bit to the back before adding a woven cotton, linen or silk ribbon as tie is a common practise on Swedish aprons from 17 to 19th century.
I tie it of in the front as can be seen on many drawings from the time.
Regency Apron-4

Yellow regency gown

I love to guest play in historical periods where I don’t really belong. I love the challenge of blending in without knowing so much about the period.

Yellow regency gown - 7

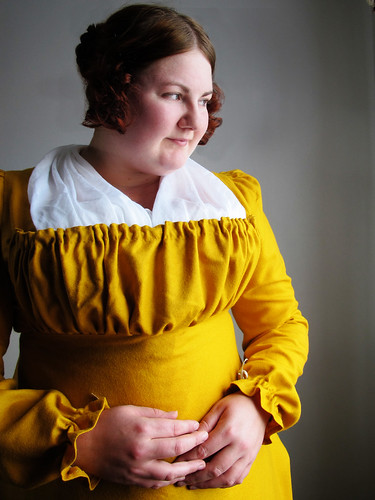
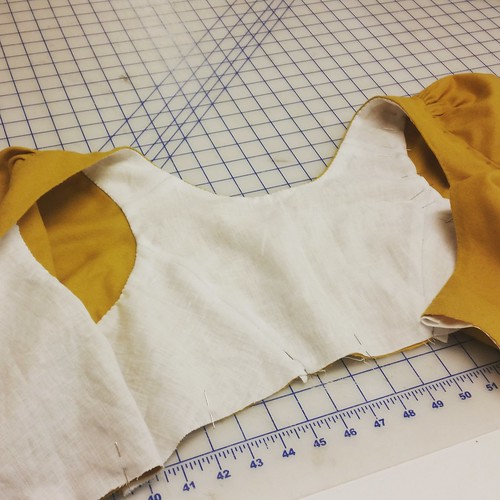
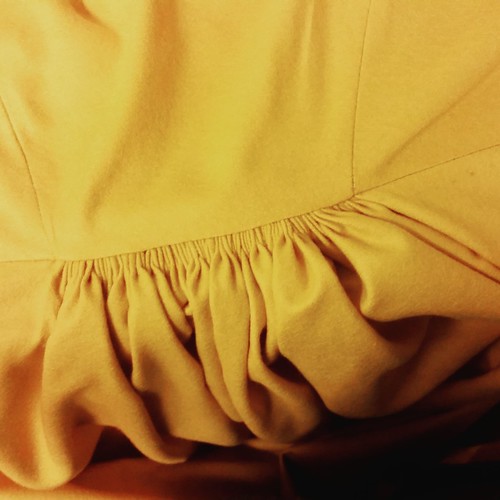
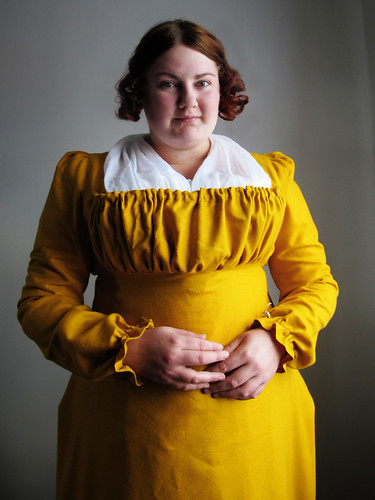
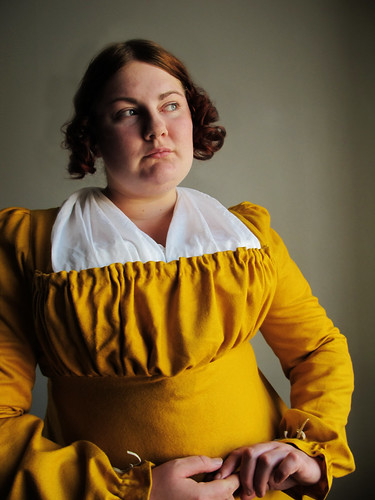
Last autumn I was invited to a “Waterloo victory feast”, as regency is not at all my period I of course needed to make a whole new kit. I stole my 18th century shift to be a bit lazy, and machine sewed a pair of regency stays and also took my 18th century underskirt; but the dress is all new and all hand sewn.

Yellow regency gown - 2

As it was autumn I wanted to make a dress in wool, most extant dresses are in silk or cotton but there is a original Danish dress in wool. I also happened to have some yellow thin twill at home that was actually going to become a 14th century dress that felt like a good choice.

Yellow regency gown - 1

I draped the pattern on my self based on extant dresses and decided that the “drop front” dress was interesting and a good thing to start out with.

Yellow regency gown - 3
Yellow regency gown - 4

The bodice is lined in a thin linen fabric but not the sleeves. I tried to aim at a shape of a 1810-1815 dress.

Yellow regency gown - 6

I have always loved the regency style but have been put of by it being a bit off for my shape, my body shape is “better” for the 16th-18th century, but I might have to admit that I have been bitten by the regency bug. Fabric for a new dress is ordered and also a spencer is planned. A red wool spencer have been on my wish list for at least 10 years now, it is kind of stupid that I have not made one yet.

Yellow regency gown - 5

Herjofsnes challenge No. 39

Herjofsnes challenge No. 39 - 2

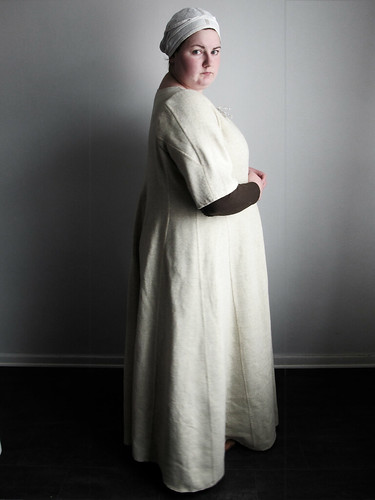
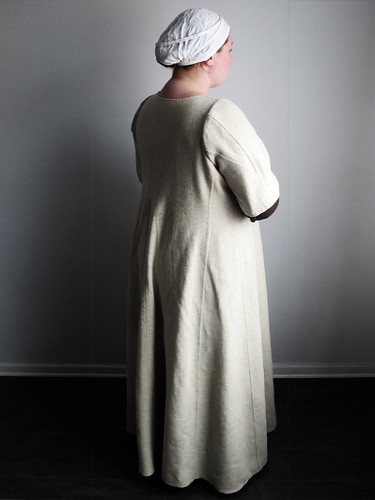
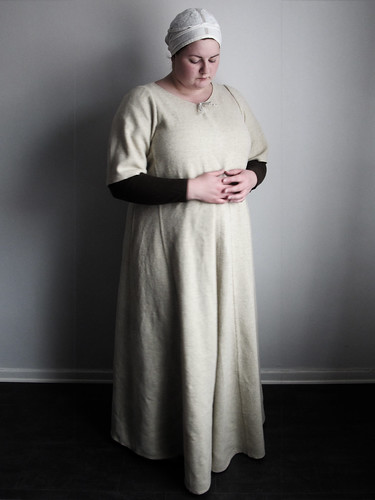
Earlier this year, Elina at Neulakko started the Herjolfsnes challenge on Facebook after a bunch of us realised that we all bought the same fabric with the intention that it would become a garment based on the extant garments from Herjolfsnes, Greenland. With the books “Woven into the earth” and/or “Medieval Garments Reconstructed” as a base and help.

Herjofsnes challenge No. 39 - 3
Herjofsnes challenge No. 39 - 4

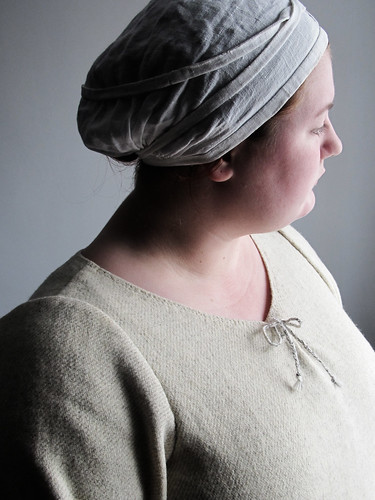
I decided to make a no. 39 based on the fact that there was no strange seams, no singling or tablet weaving involved. I wanted to take the “easy way out” as I always seem to make things harder and more complicated. I need to exercise simplicity.
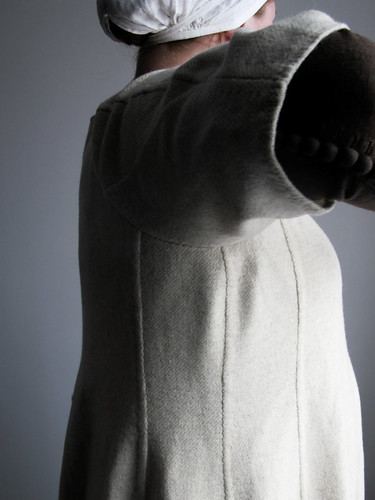
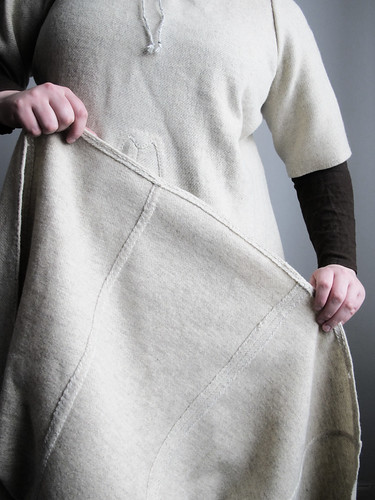
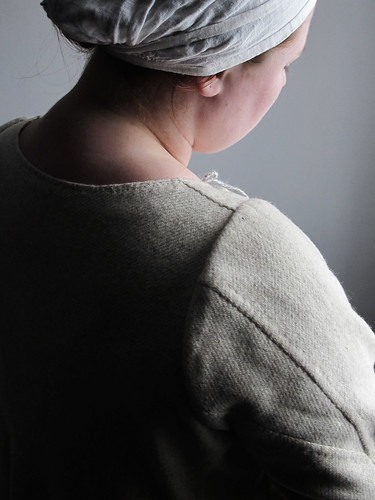
Also I really wanted to make a short sleeved overdress and the double pointed gore in front and back is so pretty.
Herjofsnes challenge No. 39 - 8

The fabric is a white/gray wool twill fabric from Medeltidssmode.se it is a bit fluffy but not to thick. It was very nice to work with and for this dress I decided to not use any measuring while sewing. Trying to get over my tailor training of exact measurement but trust my eyes.

Herjofsnes challenge No. 39 - 1

Herjofsnes challenge No. 39 - 13

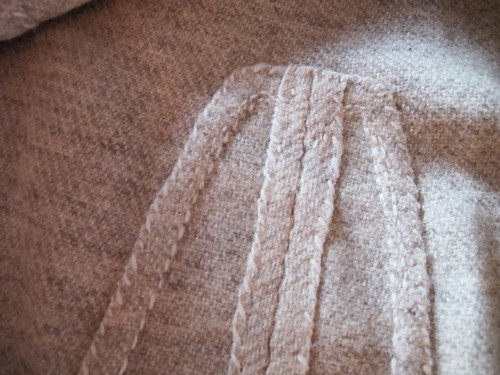
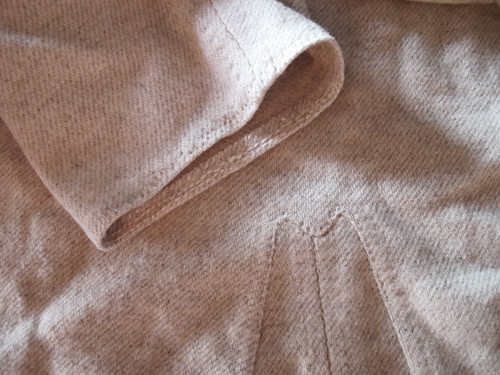
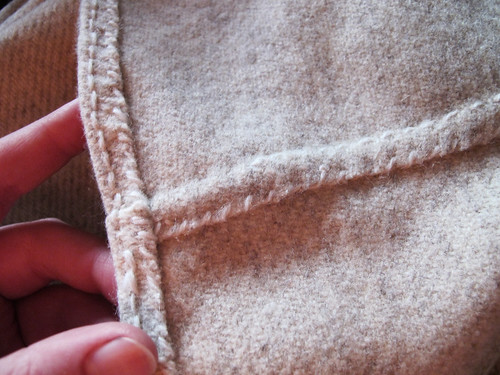
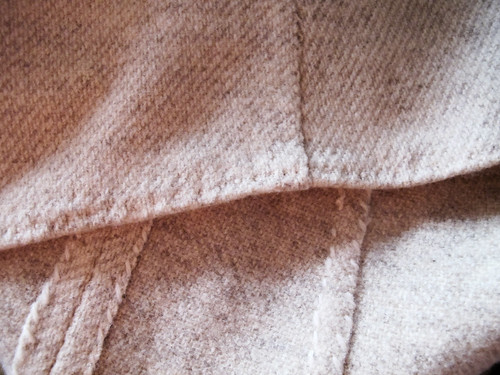
The dress is sewn with wool tread using only running stitches as the original. All the seams are sewn to the dress with overcast stitches.

Herjofsnes challenge No. 39 - 10

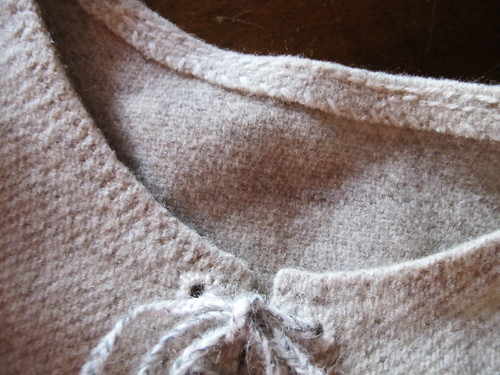
Both in the neckline, hem and sleeves 1cm is folded in and cast down. The extant gown have no filler threads mentioned at all so I decided not to use any either.

Herjofsnes challenge No. 39 - 11

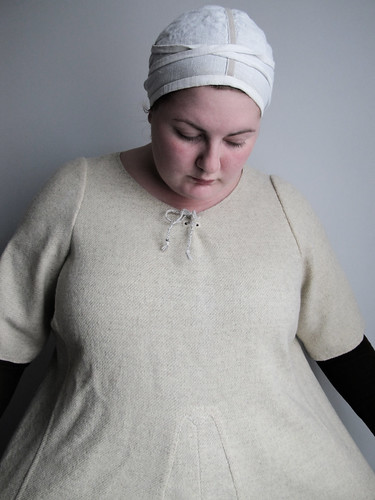
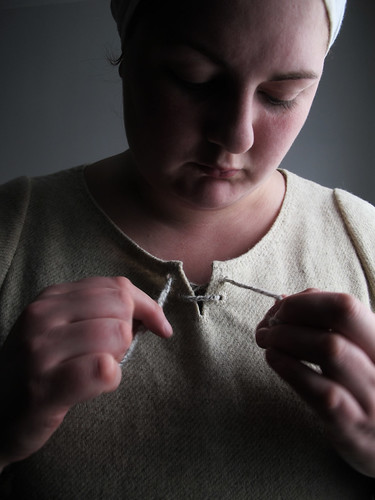
There is two rows of stab stitching at the neckline and sleeves and in the bottom hem there is one row of stab stitches. I also stab stitched the top part of the front and back gore as the original. It is a good way of defining and making a durable edge. Locking the seam allowances down and helps from stretching.

Herjofsnes challenge No. 39 - 12

Herjofsnes challenge No. 39 - 14

Herjofsnes challenge No. 39 - 15

Herjofsnes challenge No. 39 - 9

Herjofsnes challenge No. 39 - 6

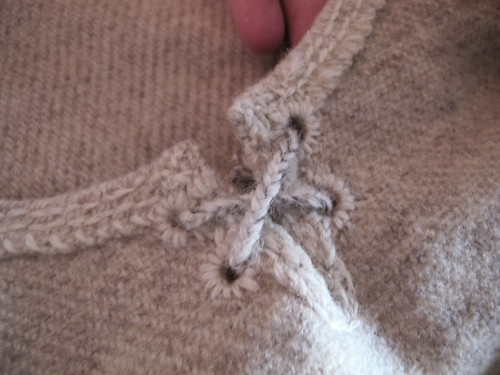
The neckline have two pairs of eyelets, the text does not mention anything about what the were sewn with but as all the other seams are sewn with wool, I used that for the eyelets as well.

Herjofsnes challenge No. 39 - 5

Herjofsnes challenge No. 39 - 7

Silk sideless surcoat

sideless surcoat - 8
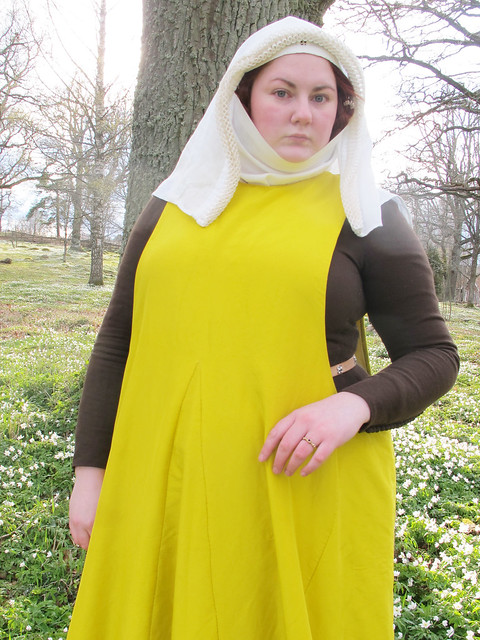
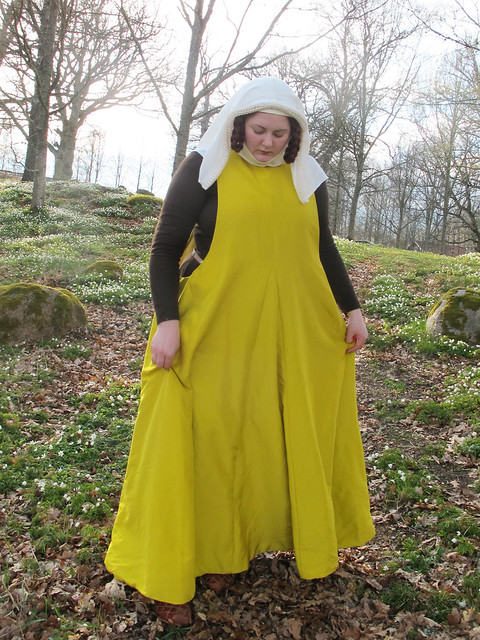
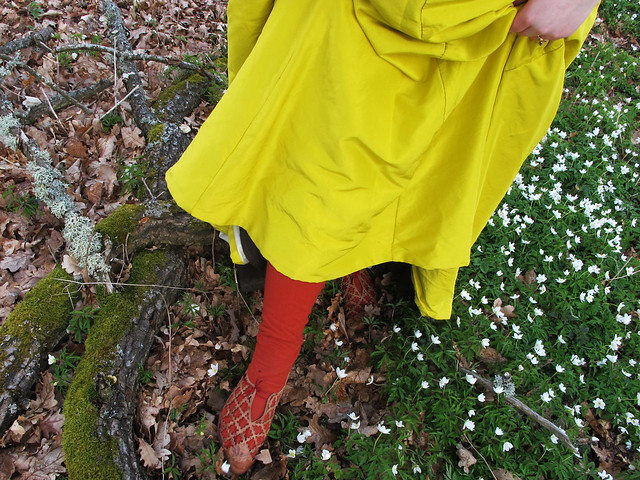
Being a trial member of the 14th century re-enactment group Fraternis Militia Carnis I was invited to the carnival at the annular meeting. I decided to dress up as a popular medieval saint, Catherine of Alexandria. For this I needed some “fancy clothing”. So I decided to make a yellow silk sidless surcoat, something that also have a home in my “normal medieval wardrobe”.

sideless surcoat - 7

sideless surcoat - 1
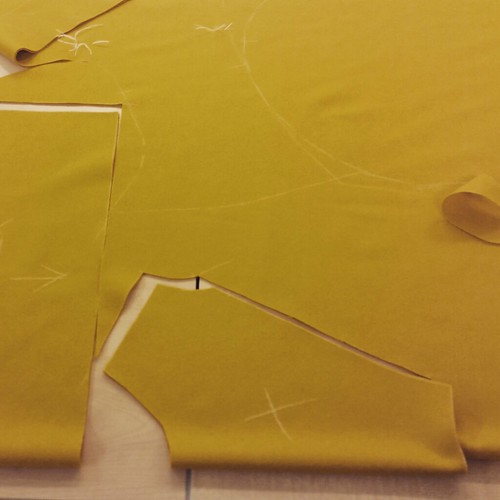
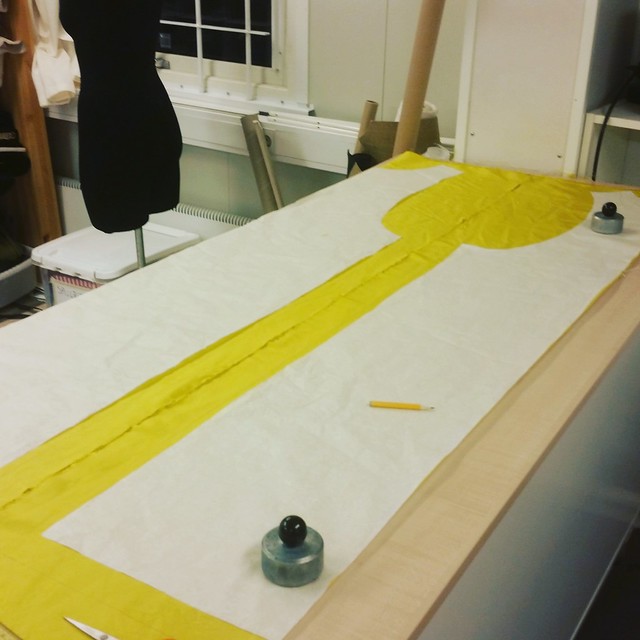
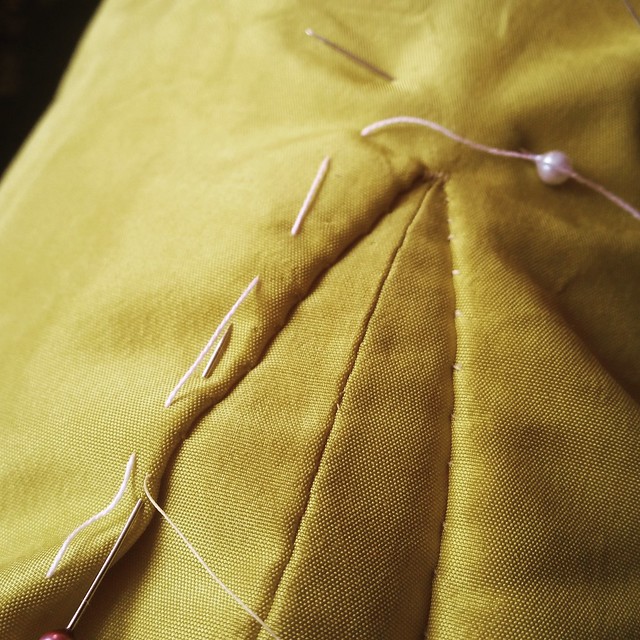
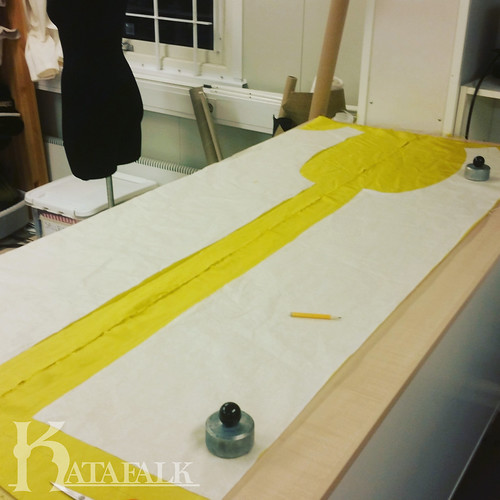
It is made in silk tafetta and is flat lined with a thin wool fabric to give the right drape of the fabric. I choose to machine wash the silk and wool before sewing, that was a good thing as I was spilled on after 30 minutes, meat on silk dress leaves a stain, but most came of after a go in the machine.

sideless surcoat - 2

sideless surcoat - 5
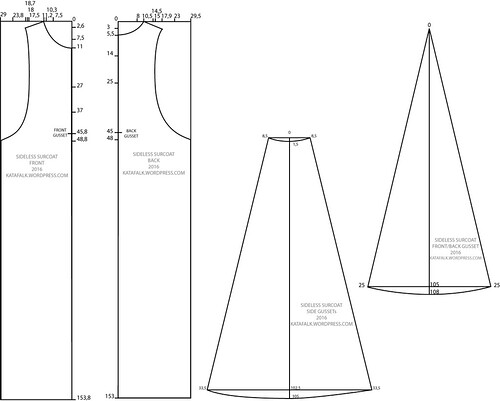
I also made a front and back gusset even if all extant sidless surcoats are with only side gussets. But based on manuscripts the fullness seems sometime to also be in front of the sidless surcoat. But if you wish to make it without I would advice you to make the side gussets a bit wider in the hem.

sideless surcoat - 6
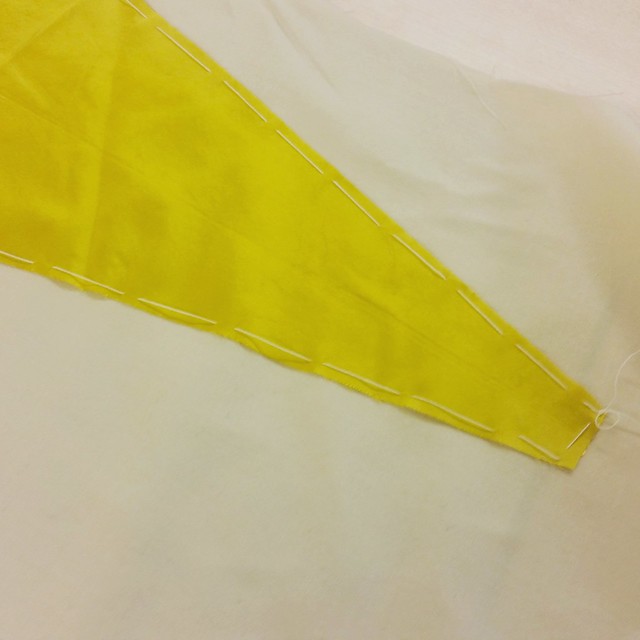
The whole dress is sewn by hand with running stitches with silk thread, back stitches are kind of unnecessary as there is no strain what so ever on the seams in this kind of dress. The seams are then sewn to the wool lining with not to big stitches.

sideless surcoat - 3

sideless surcoat - 4

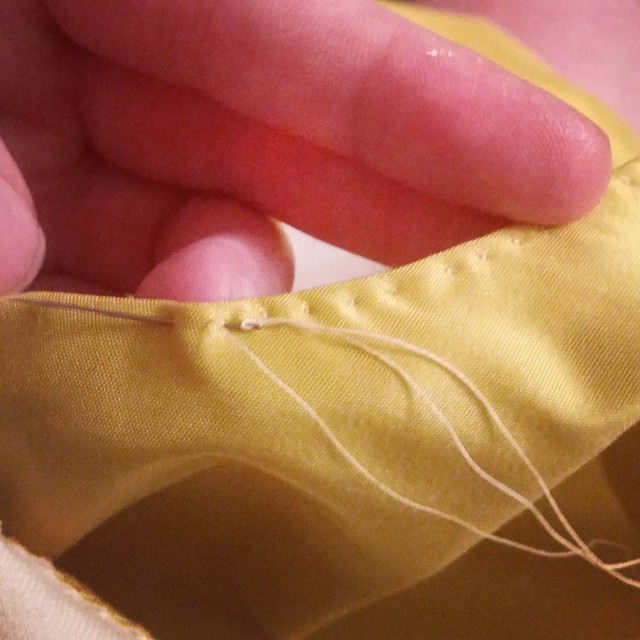
I finished the neckline with stab stitches and will probably do the armholes as well. I hemmed the neckline with a single fold, but the armholes with a small double folded hem, as you can see it when it is worn. The bottom hem is a wider single folded hem.

sideless surcoat - 9

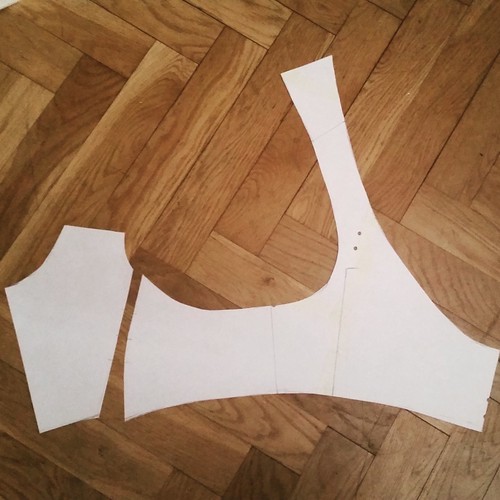
This dress was made for me who is 176cm long, bust measurement 120cm, hip measurement 130cm.
The pattern is made in cm, click it to see a larger version.

sideless surcoat - pattern