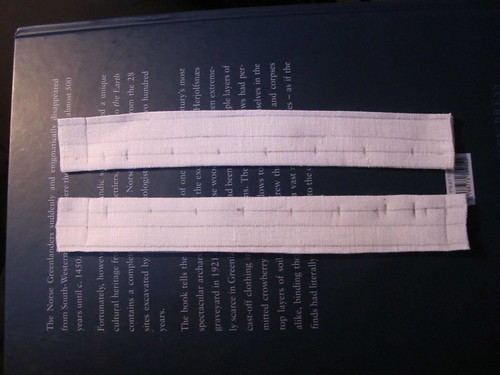
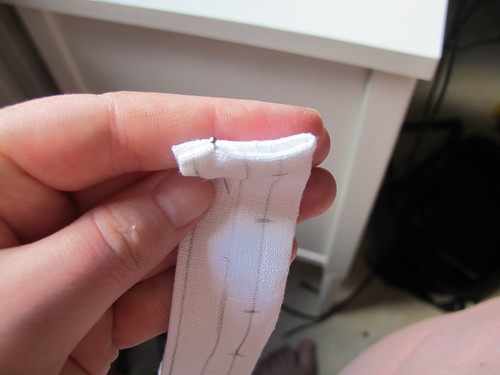
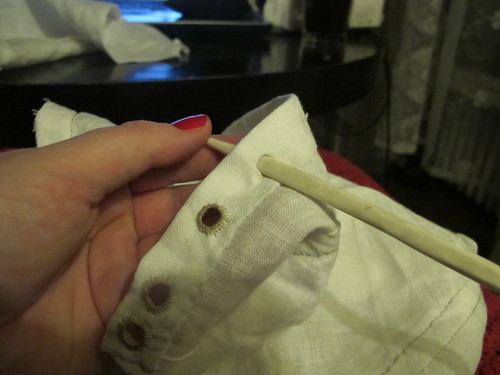
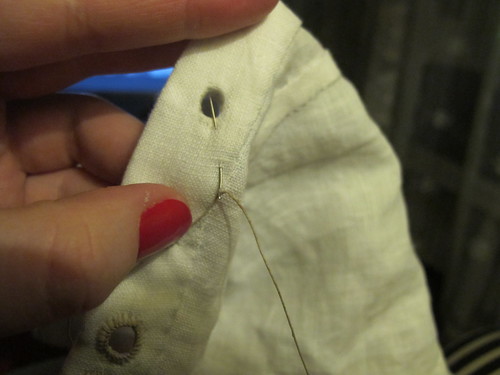
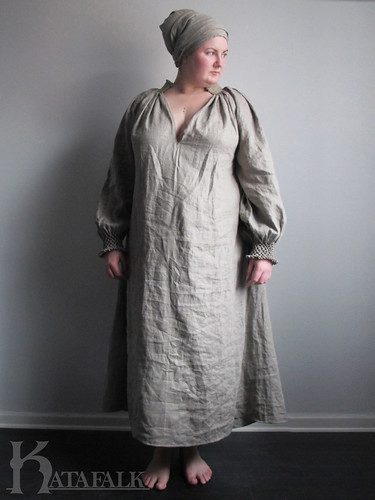
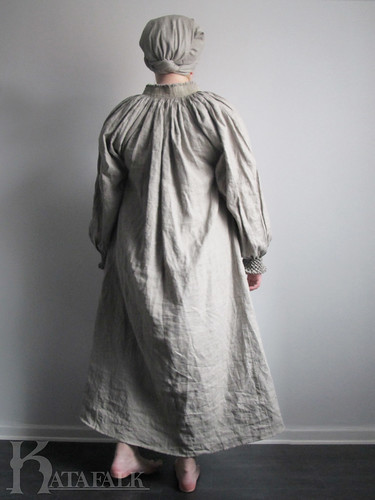
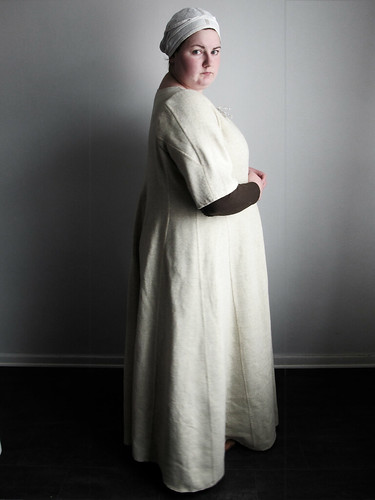
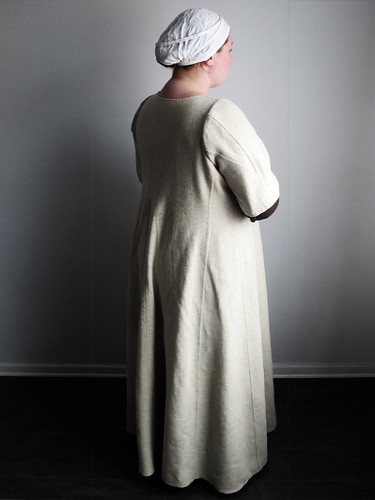
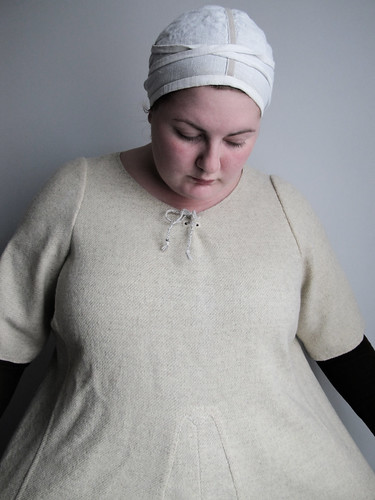
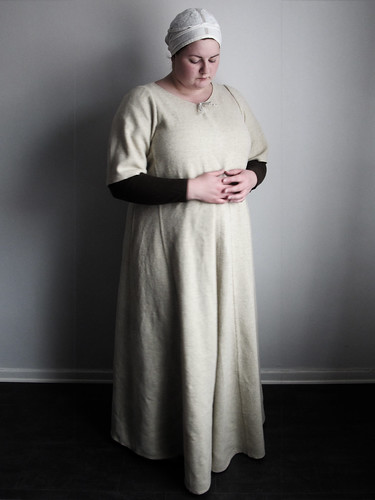
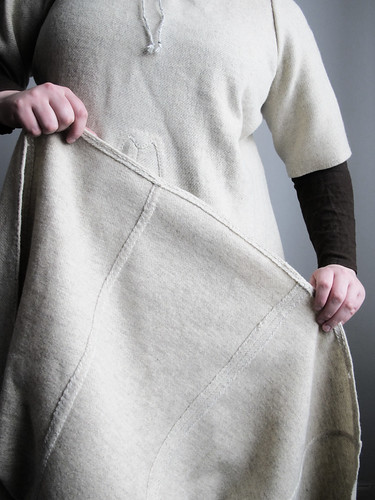
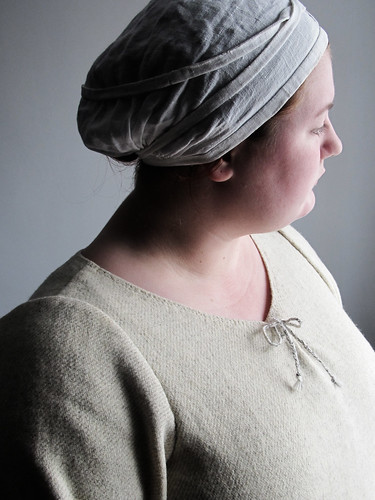
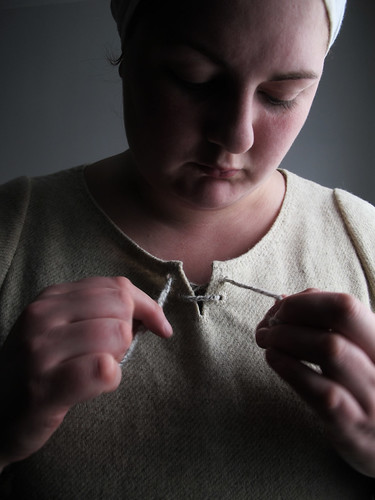
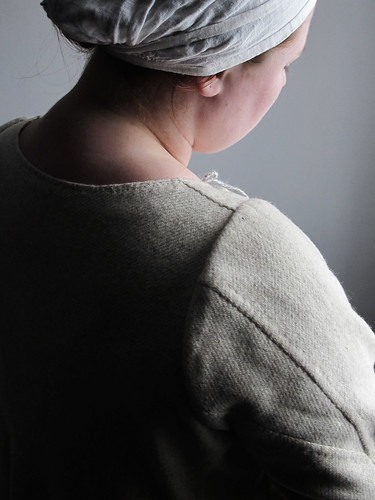
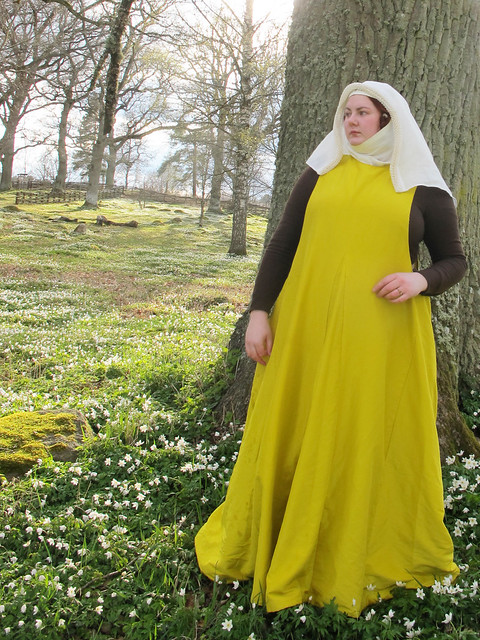
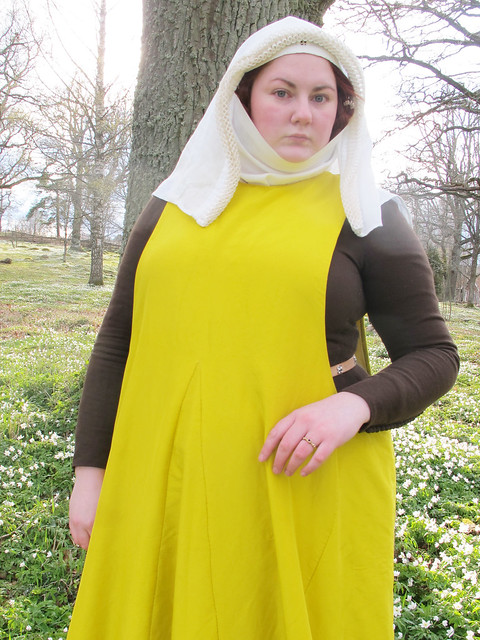
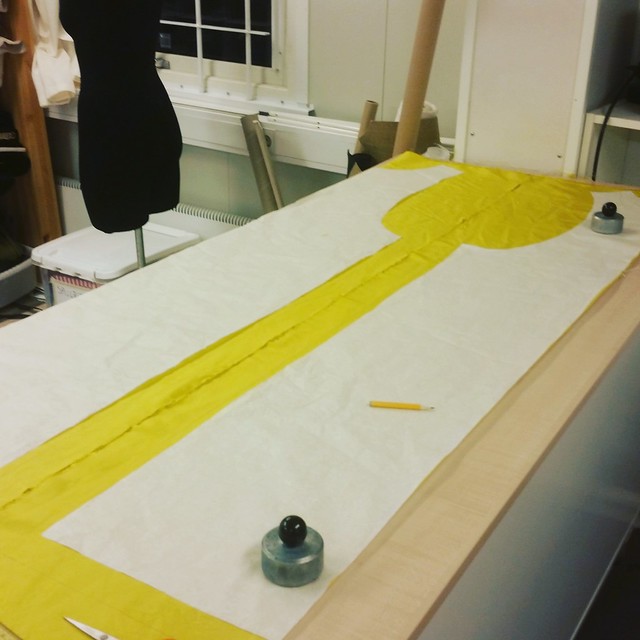
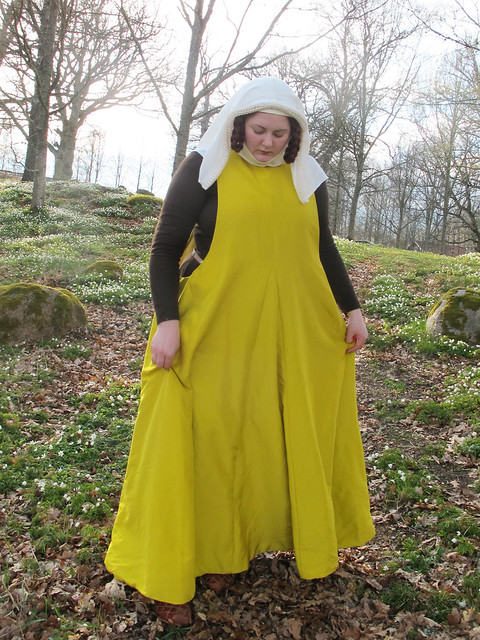
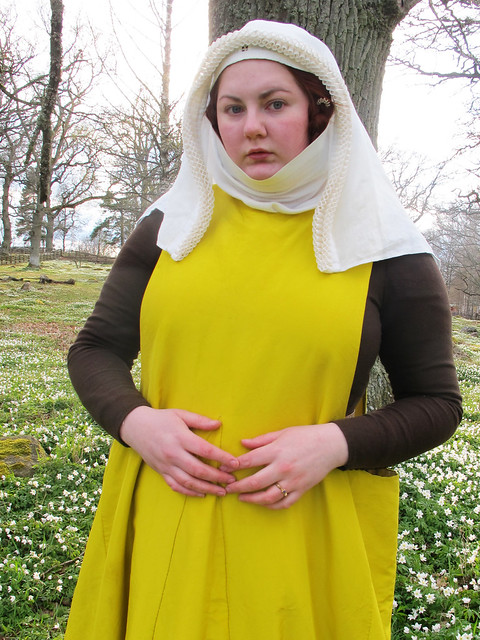
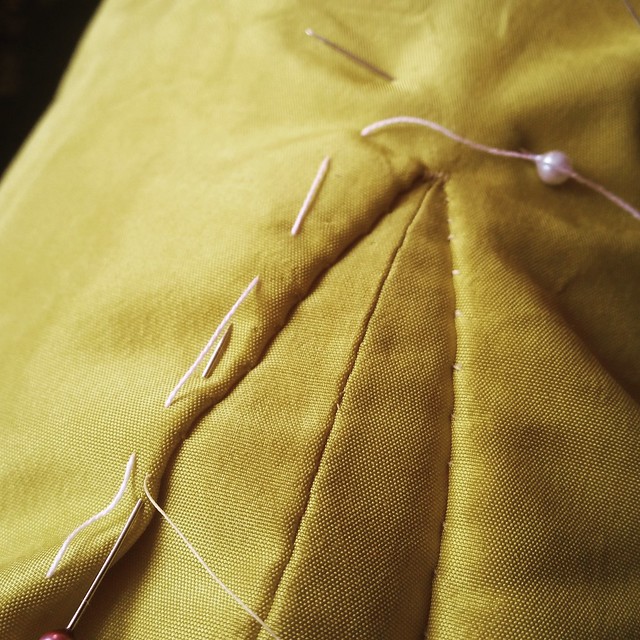
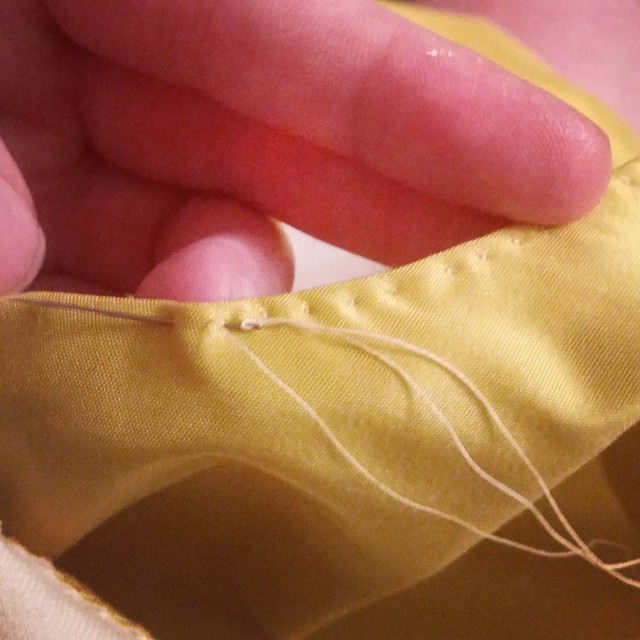
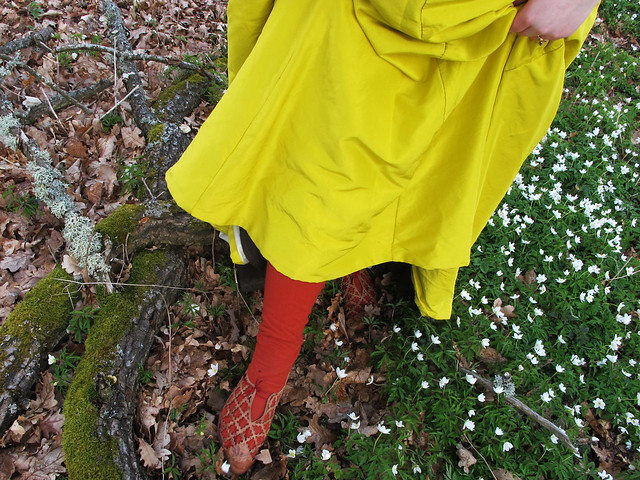
16th century German unbleached long smocked shirt

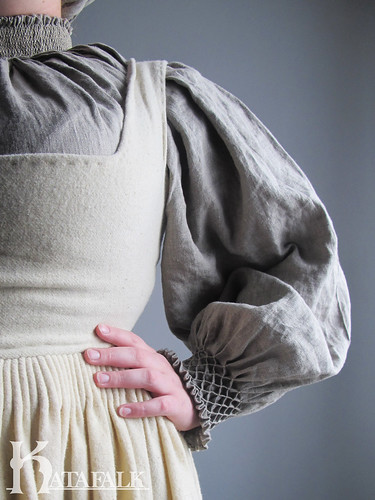
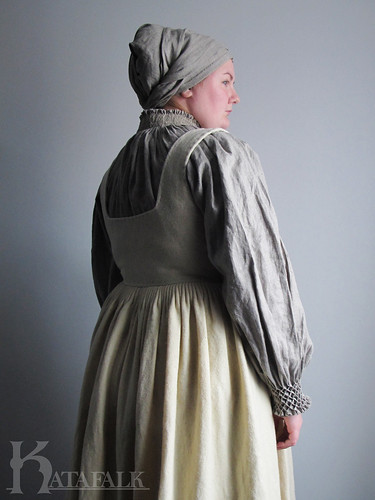
When I made my new plant dyed 16th century German dress I knew that I would need to make a new smocked shirt as the old one was so fancy.


smockedgerman-1

So I decided on a medium weight unbleached linen fabric.
This time I decided to make the shirt longer then the last time and also make it less wide.

smockedgerman-2

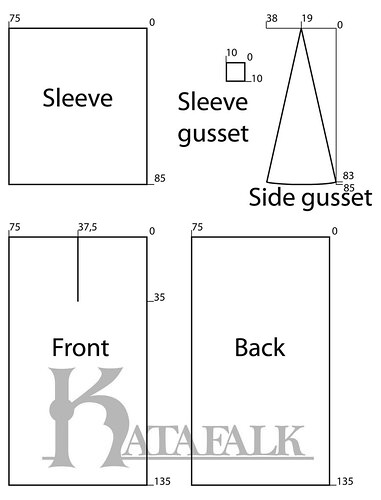
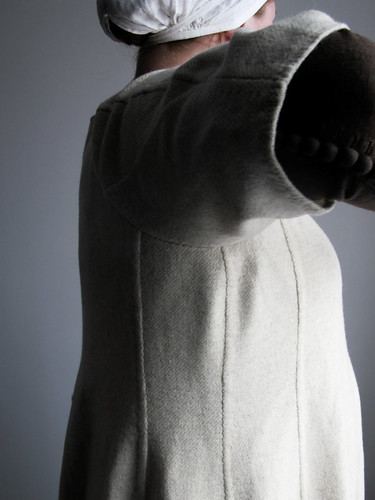
The shirt is sewn just as my last smocked German shirt, but with the addition of two gores, one in each of the side seams.
But other then that one can follow the assembly instructions of the white smocked shirt to the letter.
They can be found HERE

The good thing with this version is that there is not that much fabric in the collar, so you will save time on marking out dots, and also, the smocking is a bit different here, more suitable for the English smocking.

smockedgerman-3

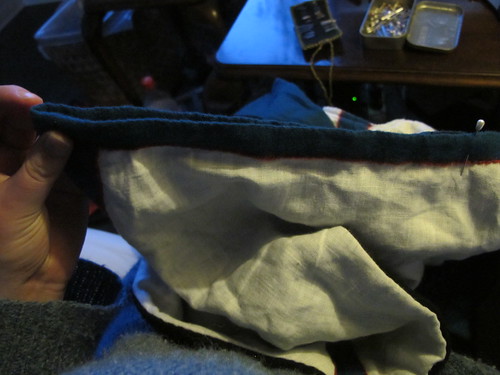
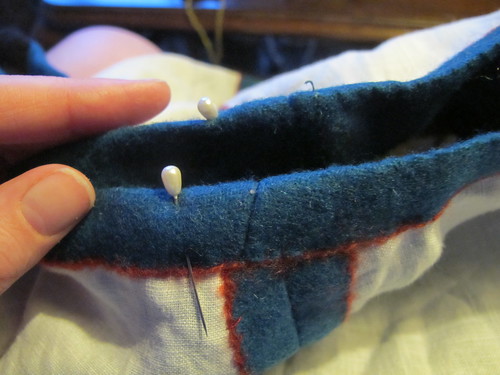
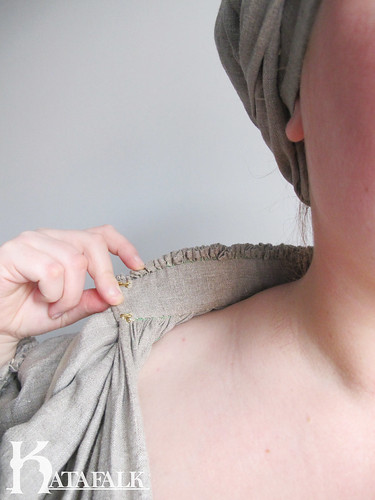
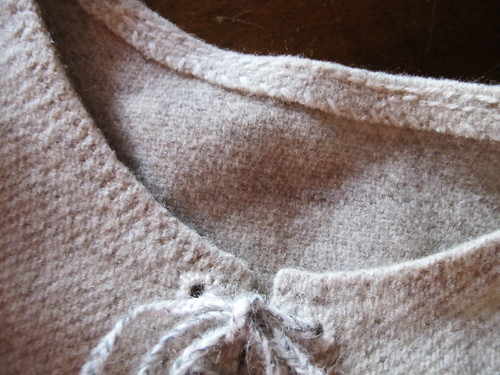
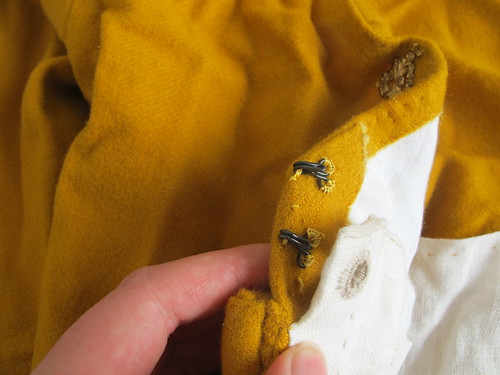
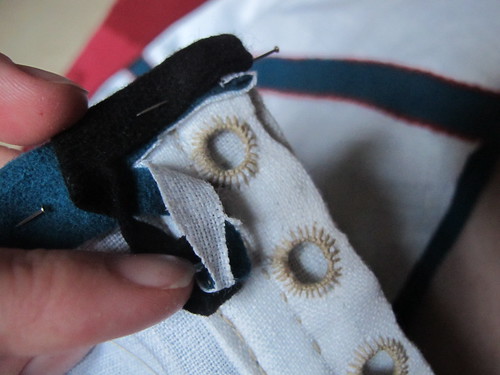
It is lined in the neck with the same linen fabric, and closes with two small brass hooks on one side and two thread loops on the other side.

smockedgerman-4

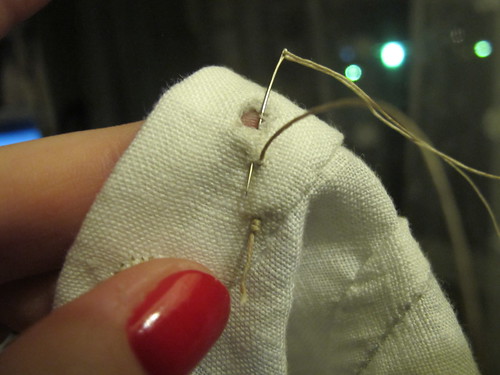
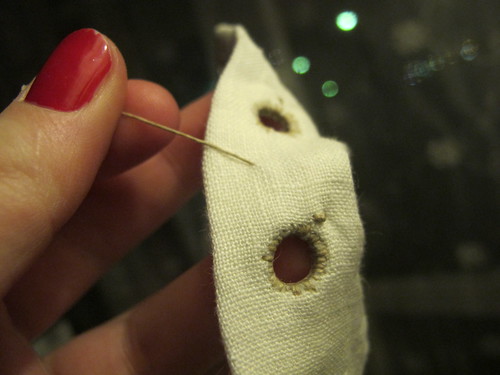
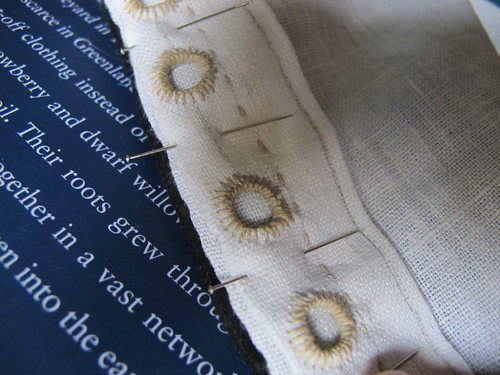
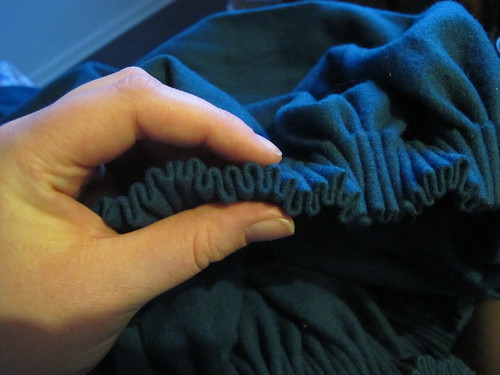
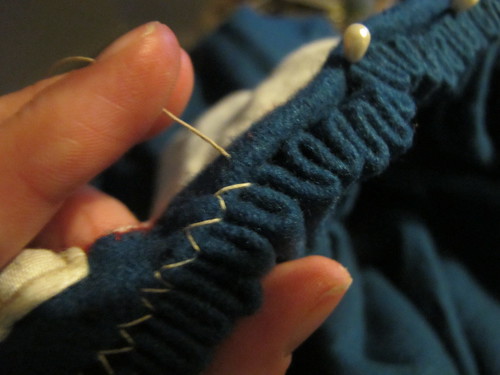
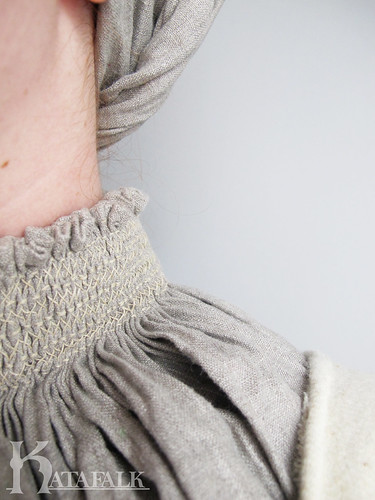
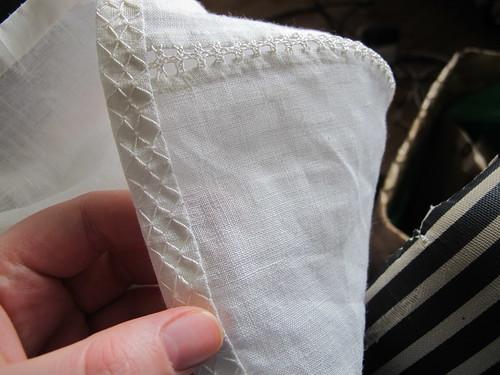
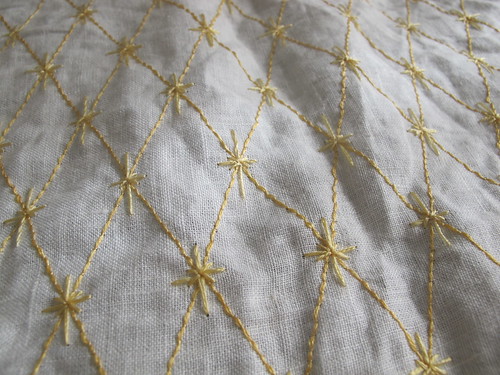
Here you can see the smocking on the collar, done in a unbleached linen thread, making it nice, neat and subtle.

smockedgerman-5

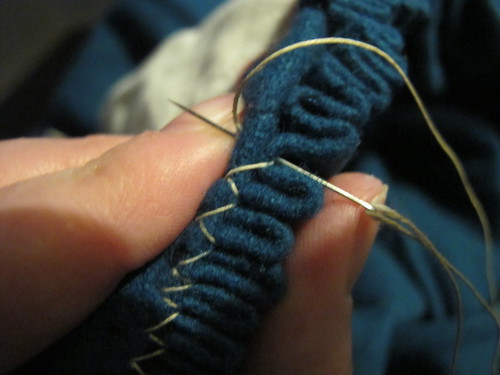
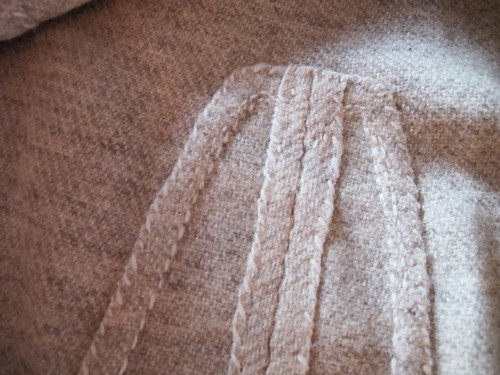
The width of the sleeves are gathered in the bottom with a simple honeycomb smock.

smockedgerman-6

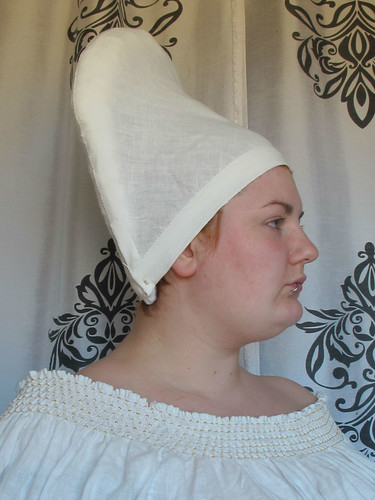
It is very nice and subtle, here it is worn under the underdress.
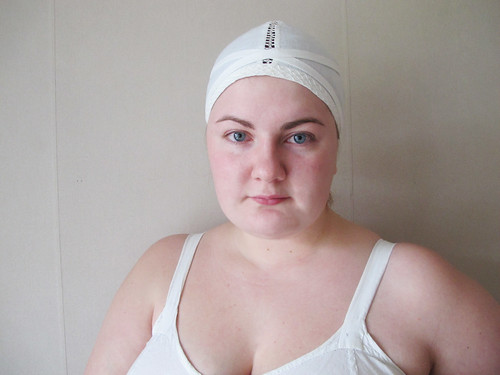
You can also see the new steuchlein I made to match the new smocked shirt.

Here is the pattern As always it is made for me and it is in cm.
So when using this, please make a mock up and check it against your own measurements.

smockedgerman-7

How to set a sleeve

För denna beskrivning på Svenska; klicka här!

Some words before we start

A lot of people find setting sleeves to be the hardest part about sewing. That is why have made this small troubleshooting manual to make your future sleeve setting a bit easier.
It is written from the point of getting a “god looking sleeve”. One should note that a good looking sleeve is not always a historically correct sleeve. Some creasing and pulling is accurate and you have to decide on either pleasing your modern eye or your historical and also choosing between form and function.
There is no way of you always getting both pretty and functional.

This guide is written so that you will understand what is happening with your sleeve and what you can do to make it more visually pleasing, or to choose the more historical sleeve that will often times give you more movement than the modern sleeve will give you.

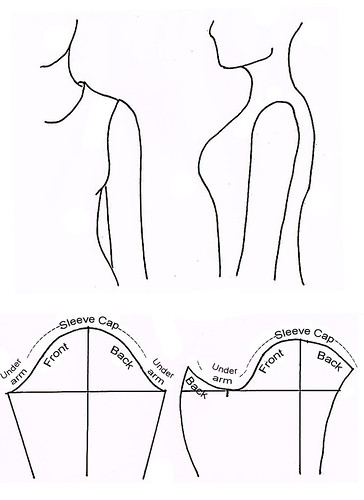
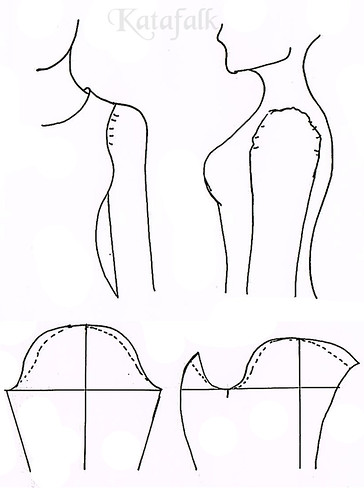
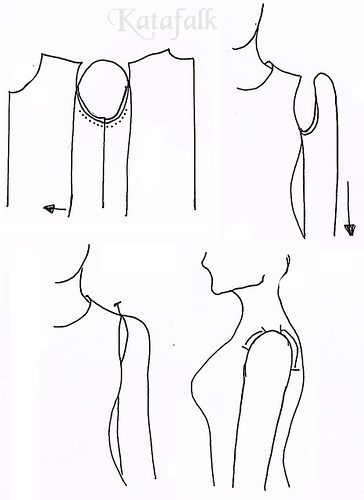
The sleeves will be shown from straight ahead and from the side. It shows what is happening with the sleeve on the body with the pulling and creases that might appear.
The sleeve will also be shown flattened as a pattern piece, both as a sleeve with the seam under the arm. but also as a historical s-sleeve. The solid line shows what we are starting with and the dotted lines shows how a “correct sleeve” looks in comparison. Note that a “correct sleeve” in this case is the more visually pleasing sleeve.

settingsleeves-1B

The armhole is the most important thing
The most common mistake people make when setting a sleeve is to have an incorrect armhole on their garment.
On a modern garment the armhole is often big, the bottom of the armhole is at the bust point and the sleeve seam is places a bit out on the shoulder.
A historical armhole is always smaller, it is first when they started to sell ready made clothing that they had to make the armholes bigger to make the clothing fit a bigger range of people.

How high the sleeve sit under our arm is very important to make sure that you get a good range of movement in you garment.
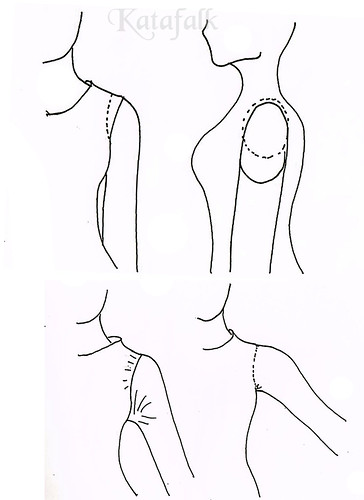
A lover armhole as shown as a solid line on the picture below will “lift” our entire garment when you raise your arms and you will get the feeling that there is a limit, you can not lift your arms higher. You can also get the feeling that he you lift your arm the seam will be pulled of your shoulder and it will pull both at the shoulder and armpit.

A more historical armhole sits a bit further into your body, as you can see as a dotted line on the picture below. It will give the ball of your shoulder more space and it sits tight up in your armpit. With this armhole you will feel that you can raise your arm higher without the garment is affected.

settingsleeves-2

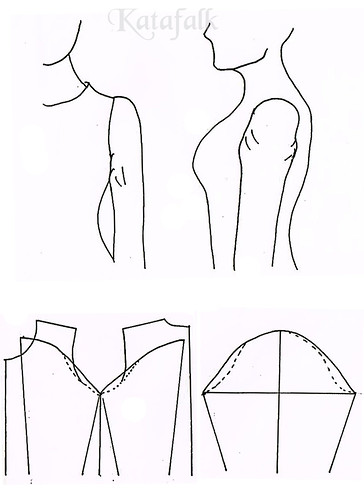
Low sleeve cap
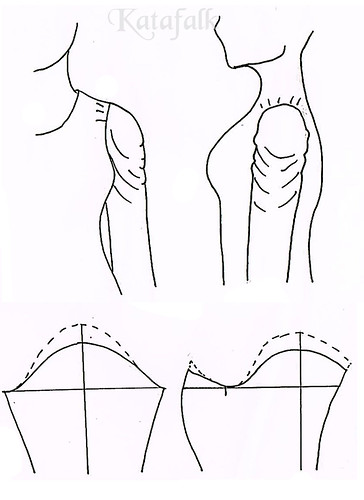
A clear sign of a to low sleeve cap is that some kind of creases in the fabric appears as the picture shows. It pulls from under the arm and if your sleeve is tight the shoulder sleeve might be pulled of the shoulder.
There are a lot of positive things about a low sleeve cap and also a lot of reasons that historical sleeves have a relativity low sleeve cap.

The lover your sleeve caps is the better movement your sleeve gets. The throwback is that you might have to live with the diagonal lines and pulling of the fabric and folds in the armpit. But as historical garments have a smaller armhole than a modern the result is that you will not need such a high sleeve cap.
That is why you can say that the lower your sleeve cap is the more movement your sleeve gets. Keep in mind that the best movement is given in a classic “t-tunic” with a completely straight sleeve and a gore under the arm.
But with that type of sleeve you will have to live with the fact that it does not sit completely smooth and pretty.

The set in sleeve is a choice that you make, if you want a pretty sleeve you will have to sacrifice the movement of the sleeve and vice versa. But as long as your armhole is small you will have a greater chance of getting a pretty sleeve with a low sleeve cap, than if you choose a bigger armhole that needs a higher sleeve cap.

settingsleeves3

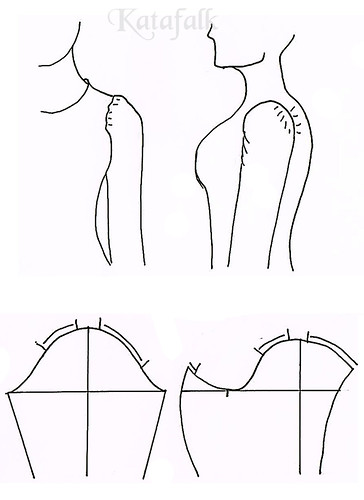
High sleeve cap
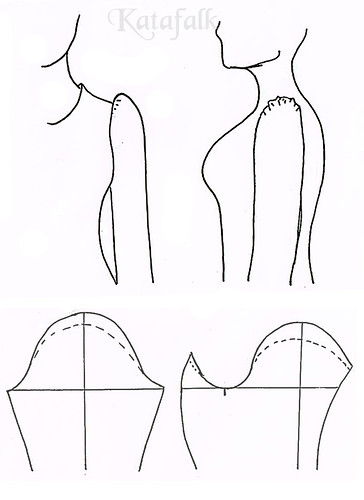
When you have a to high sleeve cap you will notice a slim puff sleeve at the top of your shoulder. It is high and it is clear that there is to much material in the top of your armhole.
A higher sleeve cap gives you a longer piece of fabric that needs to fit in your armhole. This might cause some puckering or gathers at the top of the sleeve cap, if you did not make a wider gathered sleeve by choice this is a clear sign that something is wrong.

You might want to say that a high sleeve cap always is the culprit in the drama about bad range of movement, but so is not the case. The bad range of movement is the result of a to big armhole that requires a higher sleeve cap if you wish to eliminate pulling and diagonal lines.
That is why you should not talk bad about the high sleeve cap, it is there because you want a nice smooth and well put in sleeve and can most often be found on modern garments that almost always have bigger armholes than the historical garments.

A historical armhole is always tighter against the body and smaller. It will therefore require a lower sleeve cap to get the same visual as the high sleeve cap in the modern armhole. The throwback with the modern armhole and high sleeve cap is that it will always have less range of movement then the historical one.
But it is your choice, do you sacrifice looks for function or the other way around.

settingsleeves-4

Slim sleeve cap
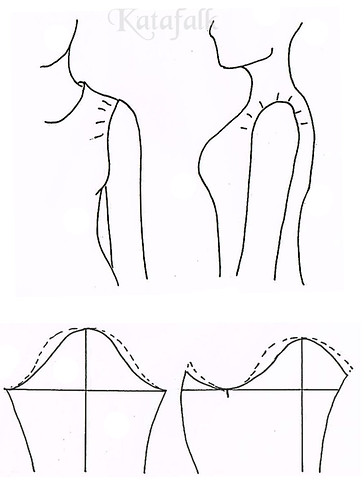
A slim sleeve cap will give you the feeling that it pulls a lot at the top of your sleeve. This is simply because there is not enough material to cover the ball of your shoulder. So the sleeve will pull fabric from your bodice and the sleeve seam will be pulled out onto your shoulder.

A modern armhole is bigger but also sits farther out on the shoulder than a historical armhole that is located on the inside of the ball of your shoulder.
This is why a modern sleeve often have a slimmer sleeve cap than what a historical garment needs. So when using a modern sleeve pattern when working on a historical garment you might end up missing an inch of fabric on your sleeve cap because the seam of the historical garment have been moved in further onto the body.

If you are only missing a inch or so you can solve this with the help of an iron. Using warmth and a bit of moisture, work in circular movements on the venter of your sleeve cap and sort of knead the fabric out.

This will of course only work if you are using wool, but in a fluffy wool fabric it might give you that extra inch of fabric if you are lucky. But be careful so that you do not distort the shape of your sleeve cap, remember that it is important to have a pretty shape.

settingsleeves-5

Wide sleeve cap
One way of seeing if your sleeve cap is to wide is to look at it from the side.
Does the sleeve feel unnecessary roomy in the sleeve cap? Then it might be that it is to wide. To have a wide sleeve is one thing, but to have a sleeve that is above everything else, wide at the top of your upper arm might not be that attractive, if you are not aiming for a “leg o mutton sleeve”

A to wide sleeve cap might also be notice by to much ease in your sleeve cap, so that when you are trying to set your sleeve smoothly you will get some tendency for puckering or gathers.

A wide sleeve cap is positive when you are making a puffed sleeve, then you need the extra width over the top of your upper arm so that the sleeve becomes not only puffy in the top but also lower down and to the sides.
But this is not often what you are looking for when wanting a smoothly set sleeve.
A mistake people do is to try and make it slimmer by taking away material in the seam under the arm. But is is important to look where it is puffy and only slim it down where it is needed, in this case only in the sleeve cap.

settingsleeves-6

The wrong fit of the bottom of your sleeve
To be honest I do not know the technical term for this area of the sleeve, but it is the area that is 2-3 inches beside your side seam/underarm seam. this is the area under your arm where the bodice and sleeve lays always exactly against each other.

This is why it is very important that these places have the exact same shape, as they are always going to lay against each other.
If they are not the same shape you will notice this as a “bubble” will form under your arm, as if it was just a few cm to much material only under your arm.
This is because you are forcing the bottom of the sleeve to lay flat against a shape that is different from its own.

The rule is usually that you should follow the shape of the armhole of the bodice if it has a nice shape. Put the sleeve pattern against your bodice pattern, front to front, trace the shape of the bottom of the sleeve of the bodice for 2-3 inches and then make sure that is connects with the sleeve cap line with a nice shape.
Do the same on the other side of the sleeve, put it back to back, trace the bottom of the armhole and meet the top of the sleeve cap line in a nice shape.
When you draw a sleeve the shape of the line is important, if it is smooth and not wobbly on the pattern the same thing will be true on the body.

settingsleeves-7

Incorrectly distributed ease
Does it feels that you have all this extra material on the front of your sleeve of the other way around, then you might have distributed your ease incorrectly.

But what ever is ease?
When you make a sleeve it needs to be a bit bigger than the armhole to be able to be put in nicely. The extra length of the seam of the sleeve needs to be eased in when you are setting your sleeve and the result is supposed to be a totally smooth sleeve without puckering or garters at the top.
If you have no ease at all you might end up with your armhole looking a bit gathered.

A higher sleeve cap needs more ease to sit correctly on your arm and a lower sleeve cap needs less. The result of this is that in historical garments you end up having less ease as the naturally needs less. This is because of the fact that they often have a lower sleeve cap.

You can say that you need 0,4-2 inches of ease depending on the material, but you can some times squeeze in even more.
The ease is distributed differently in the front and the back of the sleeve.
In the front it is concentrated over a short distance. This is because you need the extra width there so that the sleeve goes over the ball of your shoulder in a nice way without pulling.
At the centre of your shoulder, 0,6 inches on each side of the shoulder seam you need no ease at all.
At the back the ease is distributed over a longer distance, as you are flatter in the back of your arm.

settingsleeves-8

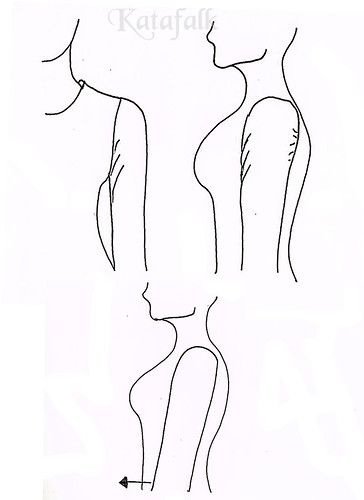
Wrong position
Does it pull in the back is is a lot of material in the front of the sleeve or the other way around? One might think that the problem here is incorrectly distributed ease.
It does give the same kind of feeling but in this case the problem is that the sleeve have been angled in the wrong direction when it was set, in the drawing below it was angled backwards.

A sleeve should be angled a bit forward to look good on the body. You can often see on historical garments that they often have a exaggerated forward facing sleeve.
This is also often combined with a sleeve that does not fall down to the sides of the body as a modern sleeve but is bent forward already in the pattern.

This might feel a bit of in the beginning when you are not used to it, but is most likely made in this way to give the prettiest sleeve when worn. If you think about it, it is not that often that you walk with your arms straight down, they are often a bit bent forward.

settingsleeves-9

To set a sleeve, step by step
Start by sewing the side, underarm and shoulder seams. Press them well and sew them down as you want.

Put one of the armholes of the bodice over your knee with the shoulder seam facing up. So that your knee peaks out of the armhole and you can see the side seam.

Put the sleeve right on top of the armhole and match the bottom up with the side seam. Make sure that you put it in the right way, the sleeve cap is always a bit more roomy in the front so that the ball of your shoulder will have room and flatter in the back. Also make sure that the sleeve is positioned right, a bit titled forward.

Then baste the bottom, 2-3 inches on each side of the side seam.

Turn the sleeve and garment right side out and hold it either in your hand or put it on a doll or better yet, the person you are sewing the garment for.
Make sure that the sleeve falls nicely, a bit tilted forward and that the area under your arm is smooth and nice, watch out for that “bubble”.

Using your hand, follow the sleeve upwards and simply lay the top of your sleeve cap against the shoulder seam. Make sure that there is no pulling in any direction and that is is straight.

Distribute the ease on each side of the shoulder seam by all the rules in the book and baste the rest of the sleeve.

Control the sleeve and adjust as needed after this guide.
Then sew in the sleeve for real.

settingsleeves-10

I hope that this guide might help you in some way, remember, the sleeve is your friend not your enemy.

Herjofsnes challenge No. 39

Herjofsnes challenge No. 39 - 2

Earlier this year, Elina at Neulakko started the Herjolfsnes challenge on Facebook after a bunch of us realised that we all bought the same fabric with the intention that it would become a garment based on the extant garments from Herjolfsnes, Greenland. With the books “Woven into the earth” and/or “Medieval Garments Reconstructed” as a base and help.

Herjofsnes challenge No. 39 - 3
Herjofsnes challenge No. 39 - 4

I decided to make a no. 39 based on the fact that there was no strange seams, no singling or tablet weaving involved. I wanted to take the “easy way out” as I always seem to make things harder and more complicated. I need to exercise simplicity.
Also I really wanted to make a short sleeved overdress and the double pointed gore in front and back is so pretty.

Herjofsnes challenge No. 39 - 8

The fabric is a white/gray wool twill fabric from Medeltidssmode.se it is a bit fluffy but not to thick. It was very nice to work with and for this dress I decided to not use any measuring while sewing. Trying to get over my tailor training of exact measurement but trust my eyes.

Herjofsnes challenge No. 39 - 1

Herjofsnes challenge No. 39 - 13

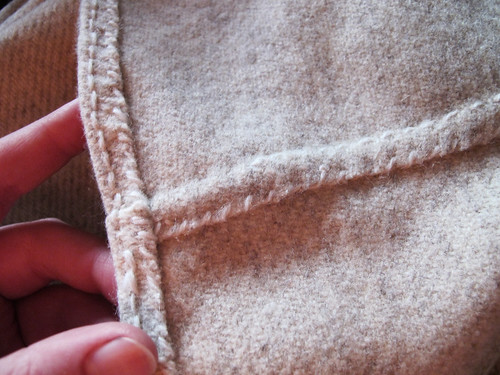
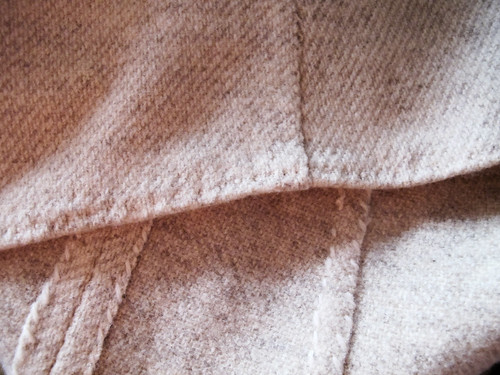
The dress is sewn with wool tread using only running stitches as the original. All the seams are sewn to the dress with overcast stitches.

Herjofsnes challenge No. 39 - 10

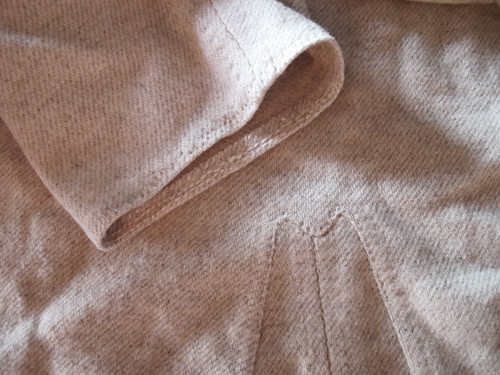
Both in the neckline, hem and sleeves 1cm is folded in and cast down. The extant gown have no filler threads mentioned at all so I decided not to use any either.

Herjofsnes challenge No. 39 - 11

There is two rows of stab stitching at the neckline and sleeves and in the bottom hem there is one row of stab stitches. I also stab stitched the top part of the front and back gore as the original. It is a good way of defining and making a durable edge. Locking the seam allowances down and helps from stretching.

Herjofsnes challenge No. 39 - 12

Herjofsnes challenge No. 39 - 14

Herjofsnes challenge No. 39 - 15

Herjofsnes challenge No. 39 - 9

Herjofsnes challenge No. 39 - 6

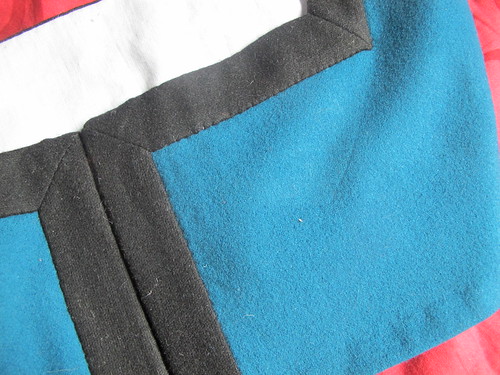
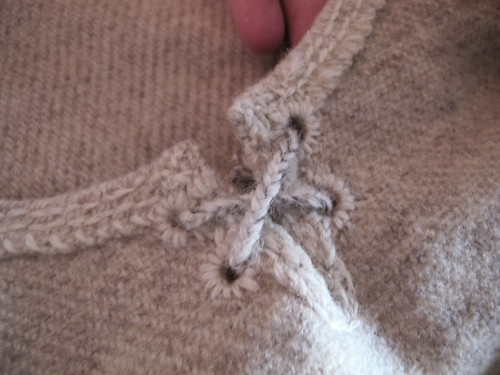
The neckline have two pairs of eyelets, the text does not mention anything about what the were sewn with but as all the other seams are sewn with wool, I used that for the eyelets as well.

Herjofsnes challenge No. 39 - 5

Herjofsnes challenge No. 39 - 7

Silk sideless surcoat

sideless surcoat - 8
Being a trial member of the 14th century re-enactment group Fraternis Militia Carnis I was invited to the carnival at the annular meeting. I decided to dress up as a popular medieval saint, Catherine of Alexandria. For this I needed some “fancy clothing”. So I decided to make a yellow silk sidless surcoat, something that also have a home in my “normal medieval wardrobe”.

sideless surcoat - 7

sideless surcoat - 1
It is made in silk tafetta and is flat lined with a thin wool fabric to give the right drape of the fabric. I choose to machine wash the silk and wool before sewing, that was a good thing as I was spilled on after 30 minutes, meat on silk dress leaves a stain, but most came of after a go in the machine.

sideless surcoat - 2

sideless surcoat - 5
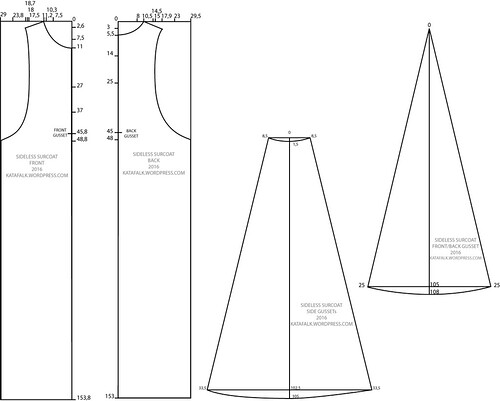
I also made a front and back gusset even if all extant sidless surcoats are with only side gussets. But based on manuscripts the fullness seems sometime to also be in front of the sidless surcoat. But if you wish to make it without I would advice you to make the side gussets a bit wider in the hem.

sideless surcoat - 6
The whole dress is sewn by hand with running stitches with silk thread, back stitches are kind of unnecessary as there is no strain what so ever on the seams in this kind of dress. The seams are then sewn to the wool lining with not to big stitches.

sideless surcoat - 3

sideless surcoat - 4

I finished the neckline with stab stitches and will probably do the armholes as well. I hemmed the neckline with a single fold, but the armholes with a small double folded hem, as you can see it when it is worn. The bottom hem is a wider single folded hem.

sideless surcoat - 9

This dress was made for me who is 176cm long, bust measurement 120cm, hip measurement 130cm.
The pattern is made in cm, click it to see a larger version.

sideless surcoat - pattern

Pattern weights, making and using.

I often get comments that people really like my pattern weights, at least once every time I post a picture of a project where they can be seen on a photo or two so I thought that I would tell you how they are made, as they were dead simple to do!

Pattern weights - 1
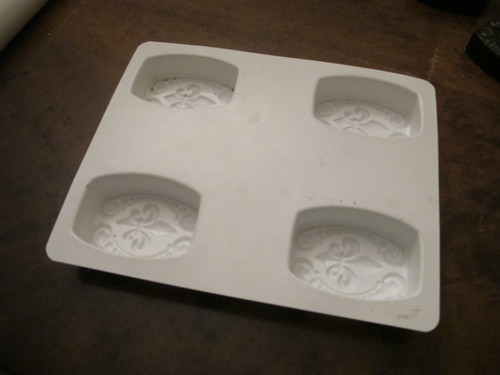
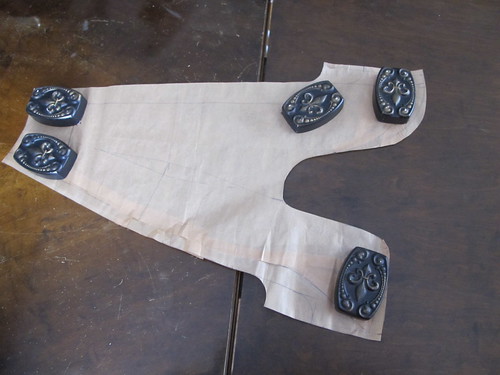
They are made out of plaster, so they are kind of light, but for patterns they are just enough. I simply mixed plaster as the bag told me and poured it into this soap mould that I got of ebay ages ago.

Pattern weights - 2
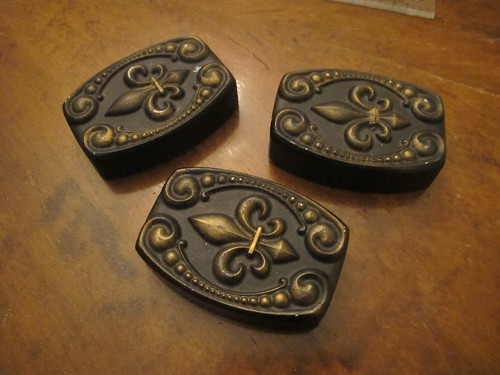
When the plaster had dried over night it was simple to pop them out to let them dry completely and then I painted them black with acrylic paint. To make the pattern more visible I dry brushed some gold on the top.

Pattern weights - 3
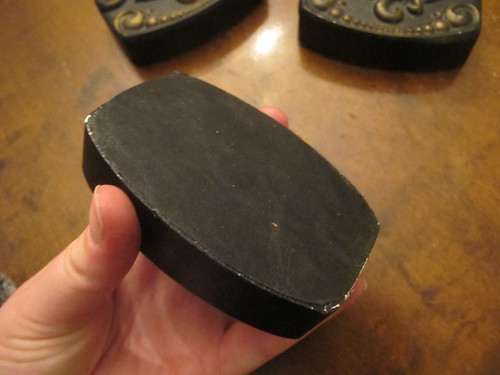
And then as I wanted the bottoms to be smooth and to make them stay where I put them, I cut some faux leather and glued it to the bottom.

That is how easy they were to make, and kind of inexpensive as well, the plaster does not need to be the best quality as they are just weights and the acrylic paint have made them durable as it is basicly a layer of plastic. After seven years of use they only have some chips here and there.

So how do one use pattern weights anyway, I saw someone saying that I was probably one of those rotary cutting people. But I am actually not. This is how I use my patter weights.

Pattern weights - 4
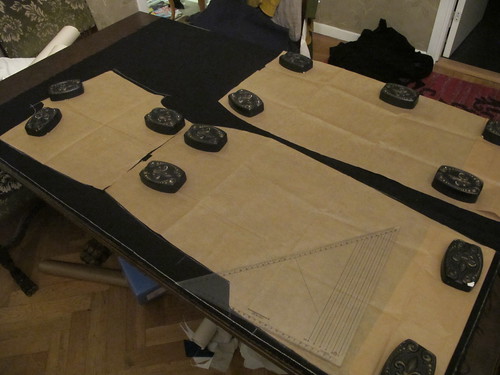
I put the pattern on the fabric, making sure that the grain lines are right and all that putting my weights on strategic places. Here you can see my best friend, the grading ruler. Something that I simply can not live without as it makes it really easy to chalk with perfect seam allowance.

Pattern weights - 5
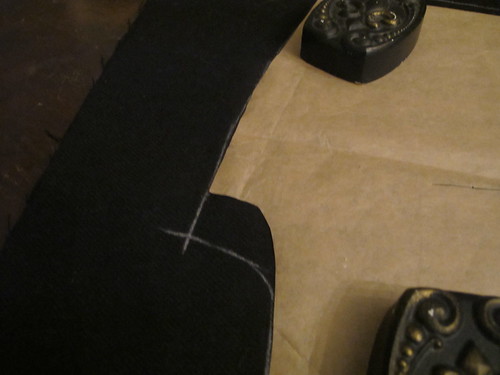
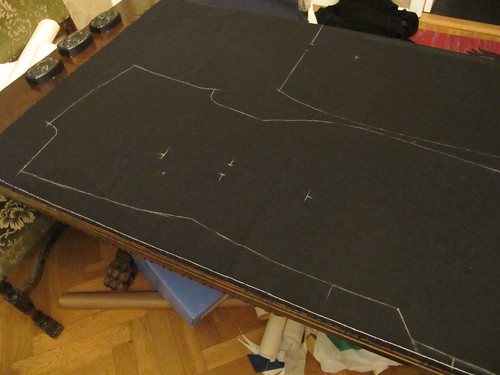
Then I chalk all the pattern pieces, this pattern was made with included seam allowances as I made it in school, but I am reusing it so there is a different neckline, as you can see by my chalk lines. If the seam allowance is not included (like I make my patterns at home) I use a ruler to chalk around my pieces. I never pin as I feel that the pins makes the fabric wobbly and shift. So I simply put my weights on the pattern and that keeps it in place as I chalk.

Pattern weights - 6
I thread mark darts and other important things and then remove my pattern all together. Then I can simply cut after the chalk lines.

Pattern weights - 7
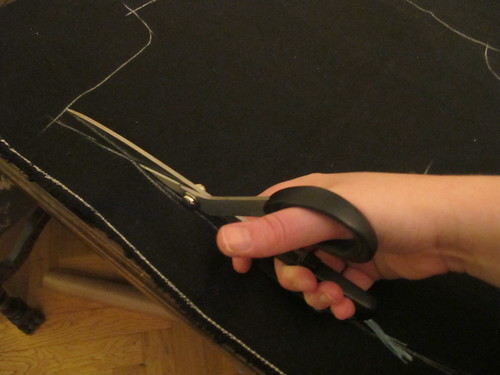
You might ask if the fabric shift when I cut. But it actually don’t. I keep the bottom of the scissors to the table and cut in long cuts. It goes quick and rarely shifts a bit.

Embroidered St. Birgittas cap

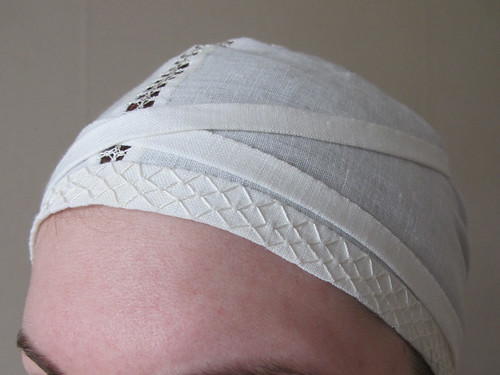
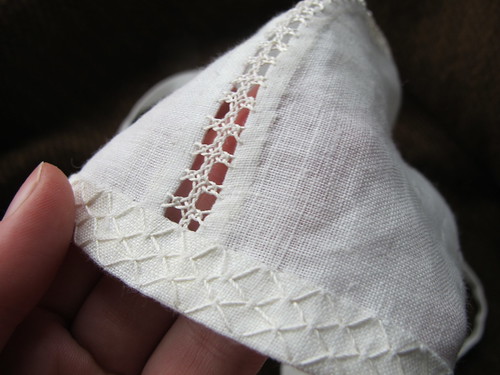
After having my old St. Brigitta’s cap for several years, and not really liking it that much. Well I like the cap itself as it is the best thing to pin your veils to, but it was a bit on the rough side with a bit to thick linen and also the band over the seam seemed like a good idea at the time but I don’t want it to show when wearing my frilled veils. Also the original cap have a lace embroidery over the head and in front on the band.

Making a new one is not that much work either, and the embroidery part was much easier than I thought.
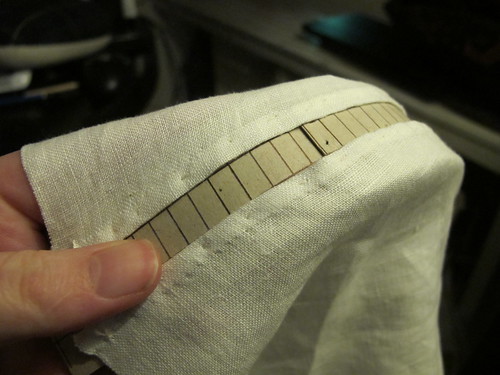
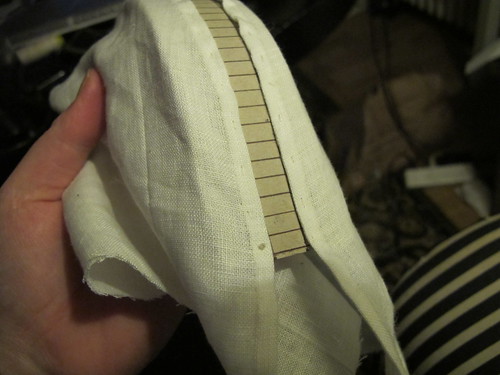
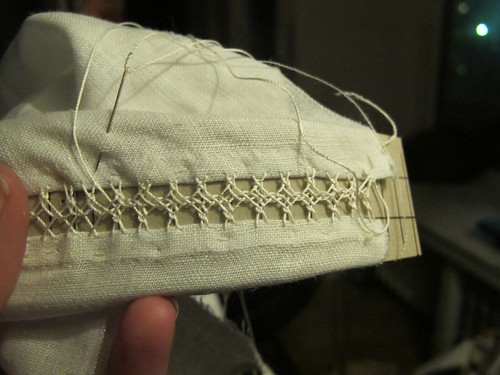
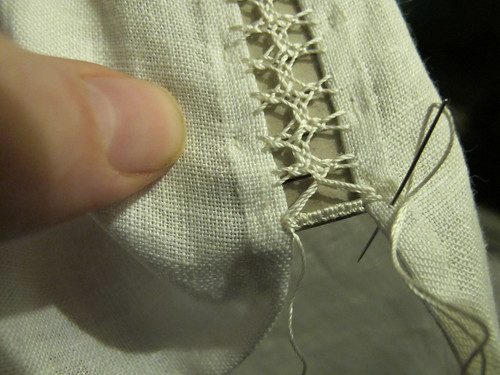
I started by cutting the cap part out, in stead of sewing the back seam together I hemmed the two parts individually. Then I basted the cap to a thin cardboard that I had marked out some guide lines on to make it easier to embroider, the gap is 1cm wide and the markings are 0,5cm apart.
Embroidered St. Birgittas cap - 1
Embroidered St. Birgittas cap - 2

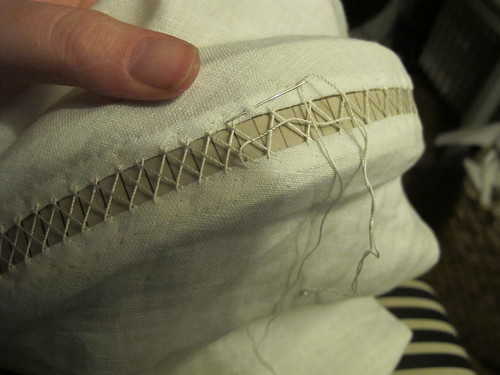
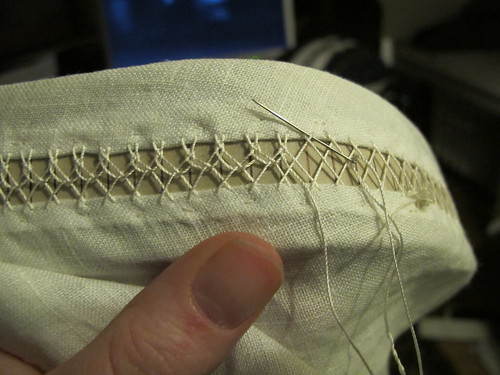
I used this excellent guide for the embroidery for the interlaced herringbone stitch.
I recommend looking at the guide in stead of my pictures, it is very clear. My pictures was mostly to show the progress on facebook.
I used a silk buttonhole tread for my embroidery, it became very delicate and nice, the original cap was probably embroidered with linen thread.

Embroidered St. Birgittas cap - 3
Embroidered St. Birgittas cap - 4
Embroidered St. Birgittas cap - 5
Embroidered St. Birgittas cap - 6
At the end where the slit in the cap will be I made a bar by making buttonhole stitches over a couple of treads.

Embroidered St. Birgittas cap - 7
In the front I made a embroidery inspired by this picture on Medieval Silkwork.

And this is how it looks when finished.
Embroidered St. Birgittas cap - 8
Embroidered St. Birgittas cap - 9
Embroidered St. Birgittas cap - 10
Embroidered St. Birgittas cap - 11
Embroidered St. Birgittas cap - 12

Embroidered St. Birgittas cap - 13
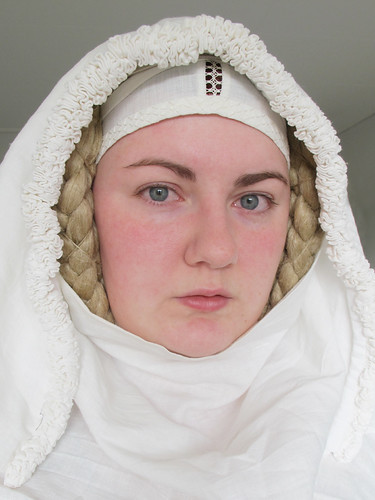
And also how it looks when worn with a frilled veil, and also here with some flax cornettes I made a while ago. I love how the lace embroidery is seen under the veil.

If you want to make your own St. Birgitta’s cap here is a tutorial with a pattern.

16th century German – Dress

This tutorial is long due, I took most of the pictures two years ago so when I decided to redo the skirt on my 16th century German dress a couple of weeks ago I took the last pictures for the tutorial.
16th century German dress - 1
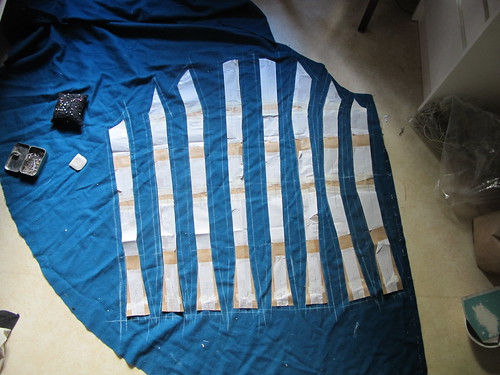
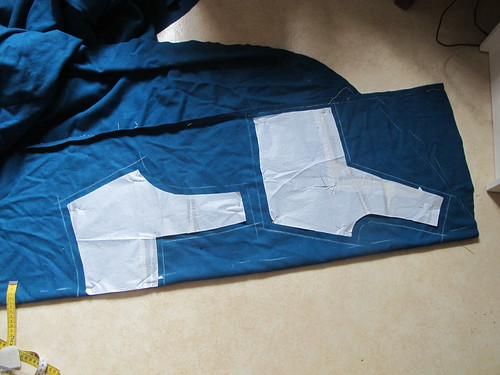
Start out by cutting the shell fabric, I have a blue wool fabric that is slightly fulled. The back piece is cut on fold, but not the front piece, as it will open in front.
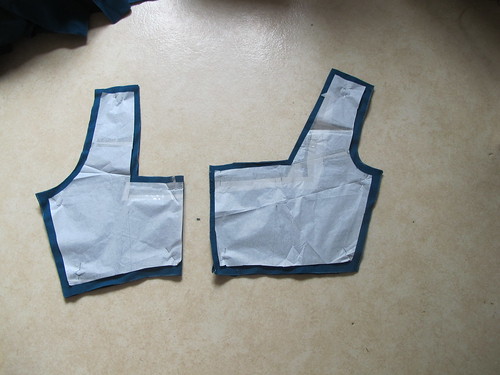
16th century German dress - 2
The pattern is without seam allowances as you can see, I choose to have 1,5 cm seam allowance everywhere except the neckline and centre front, there the seam allowance is 1cm.
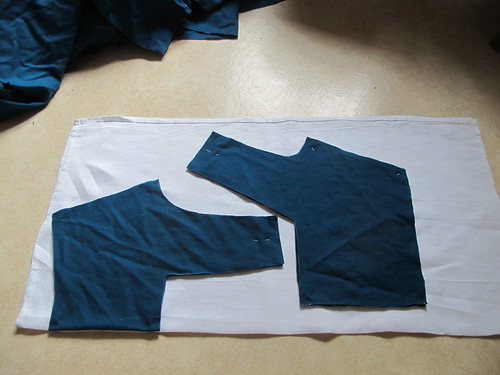
16th century German dress - 3
The I cut my linen lining, I use my shell fabric as pattern pieces in stead of the paper patter, it lays better on the pattern and you can just cut them the same size, no measuring seam allowances a second time.
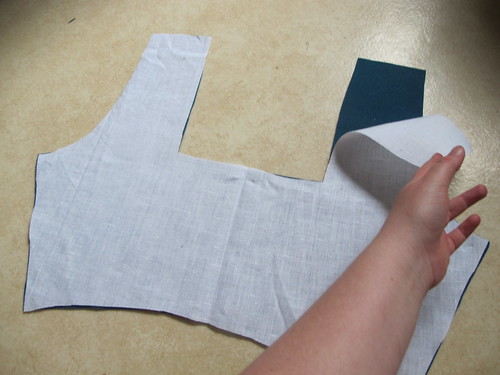
16th century German dress - 4
Put the shell fabric and lining wrong sides together.
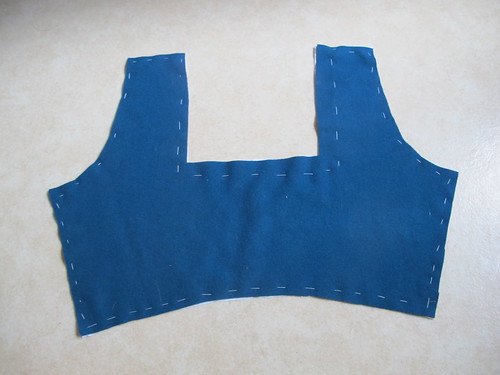
16th century German dress - 5
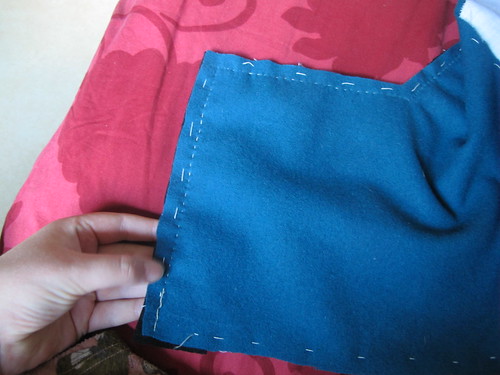
Baste the two layers together, they will now be treated as one piece of fabric.
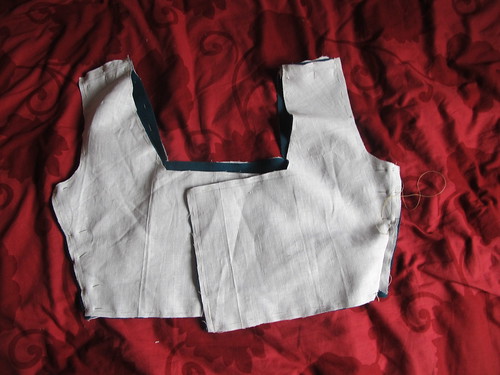
16th century German dress - 6
Put the pieces right sides together and pin the shoulder and sides seams together, I have made a sewing line with a pen so that my stitches will be straight, these lines will never be seen so no need to use any special pens.

16th century German dress - 7
I sew the shoulder and side seams with backstitches using waxed linen thread, as this is a tight garment so it is important that the seams hold up.
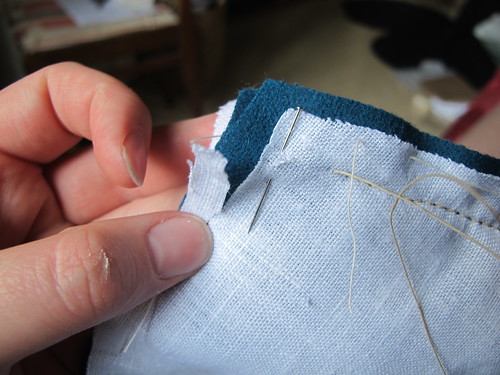
16th century German dress - 8
Before sewing all the way down to the hem I cut away some of the lining, this is so that when the bodice is hemmed the lining won’t peak out.
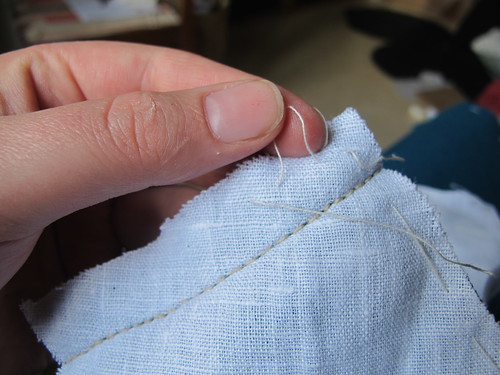
16th century German dress - 9
Then I take away the basting on the shoulder seams and side seams.
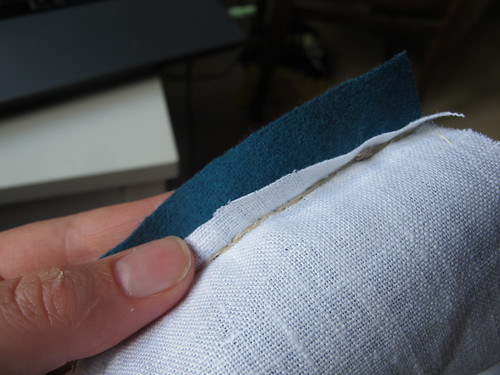
16th century German dress - 10
The lining is cut down in all the seam allowances in side seams and shoulder seams, to make the seams less bulky and to make sure that the lining won’t peak out when the seams are felled.
16th century German dress - 11
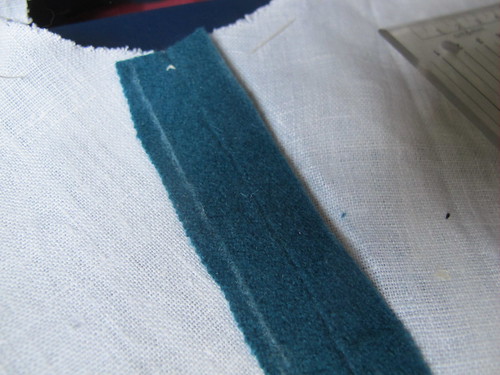
I press my seams flat with my iron and then I trim the seam allowances down to 1cm. You can start with smaller seam allowances from the start, but by cutting them at this stage you can mask if you have not sewn 100% straight. I think this make the seam allowances look cleaner especially if you have a fabric that is prone to fraying.
16th century German dress - 12
16th century German dress - 13
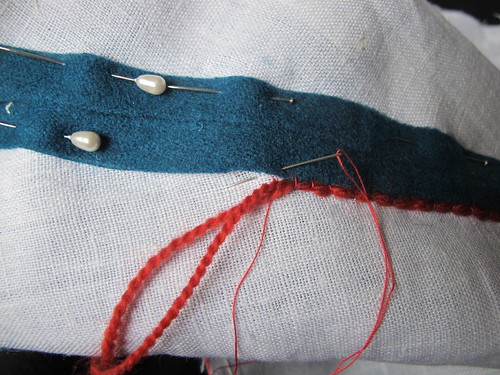
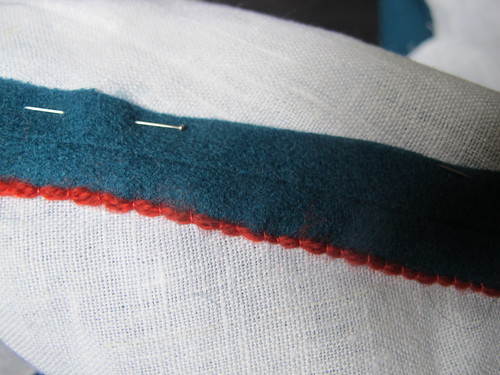
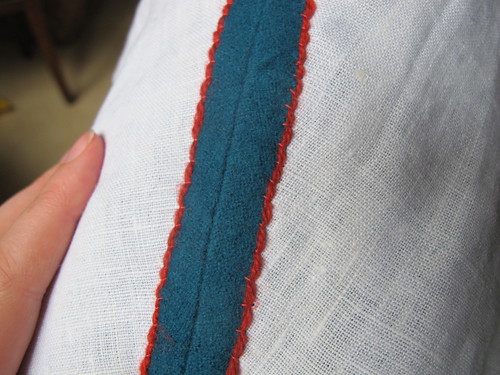
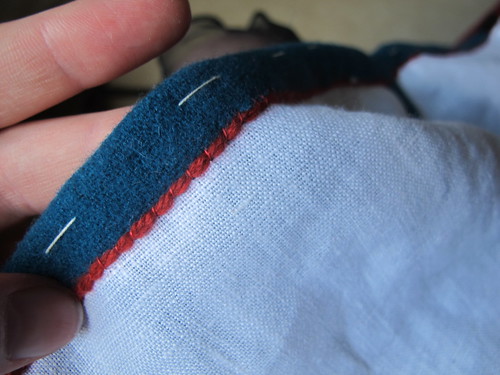
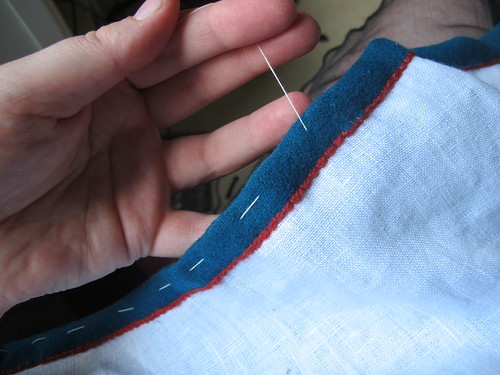
Then I cast the seam allowances down, I use a filler thread because it is pretty and it keep the edge from fraying. To be honest the use of filler threads like this is something that might not be 100% historically accurate, the use of filler threads have been found on the garments from Greenland, but the findings is from the necklines only. But I do this anyway, as I find it historically plausible and pretty, but I wanted to make clear that it might not be correct.
16th century German dress - 14
But it is so pretty!

16th century German dress - 15
Take care when casting down the seam allowances to not go through the shell fabric, as I have done here, red might not have been the best choice of colour.
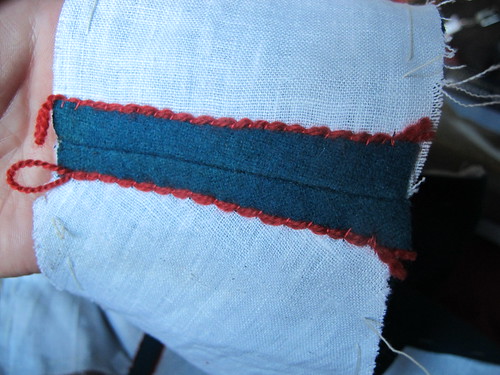
16th century German dress - 16
I do the same on the shoulder seams.

16th century German dress - 17
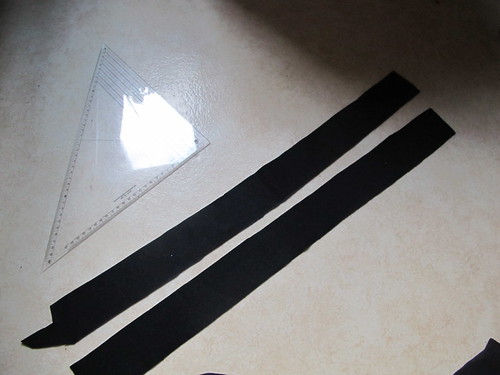
Then I cut out the fabric for my guards. The width is you choice, there are a lot of variation in the pictures, but they are all fairly wide. I have also added 1cm seam allowance on both sides.
I cut them longer then I really need, to have some fabric to work with.
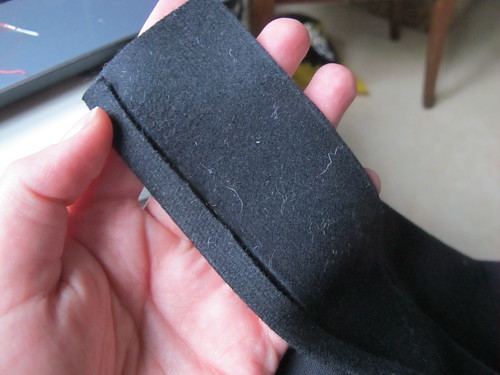
16th century German dress - 18
I press in the seam allowance on one side.
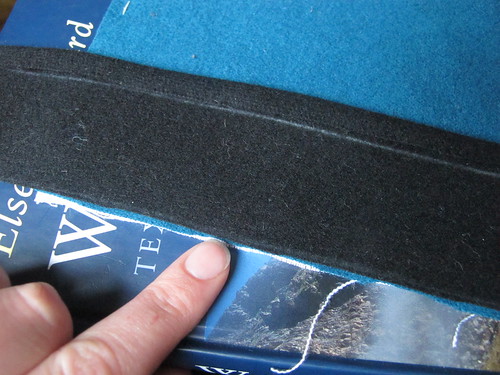
16th century German dress - 19
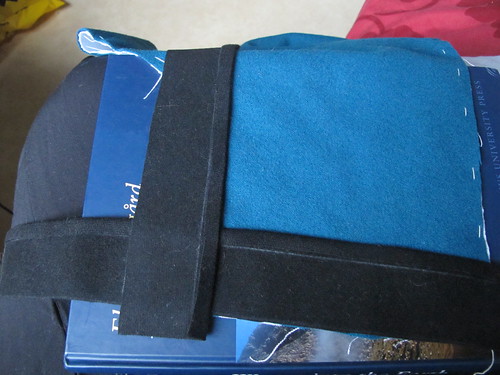
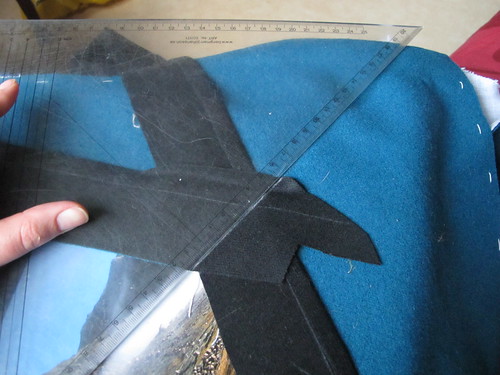
Then put the guard right sides together with the front opening, make sure that you the guard is sticking out in the top and bottom.

16th century German dress - 20
Mark the top of.

16th century German dress - 21
Then put the strip from the bottom of the neckline in the front.
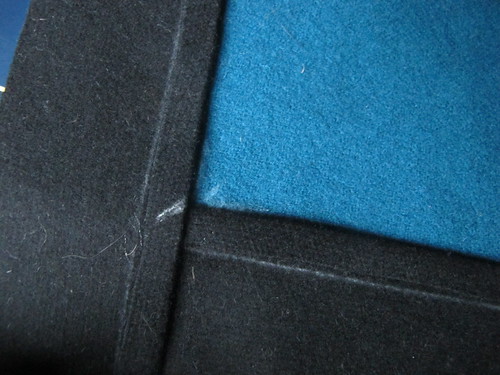
16th century German dress - 22
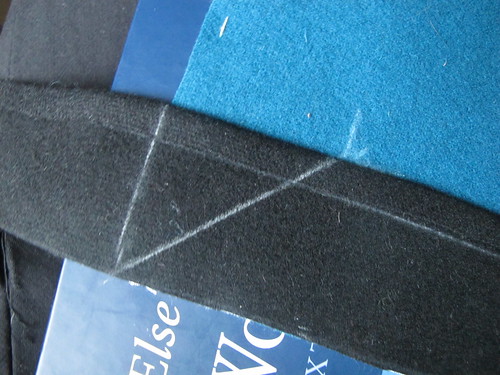
Mark the corners on both strips.

16th century German dress - 23
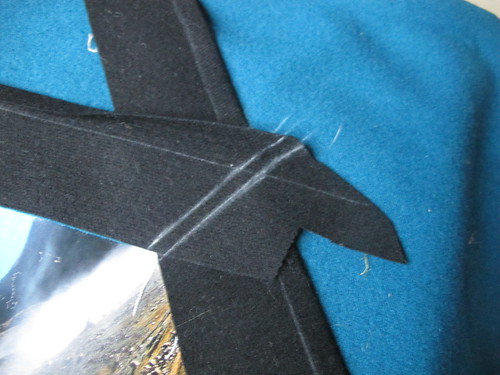
Draw diagonal lines on both strips connecting one corner to another.
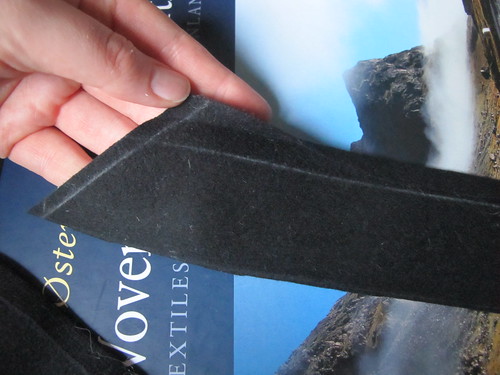
16th century German dress - 24
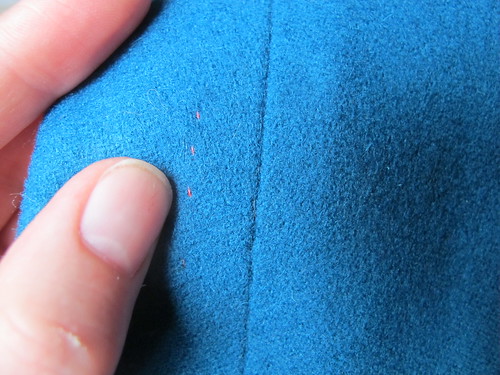
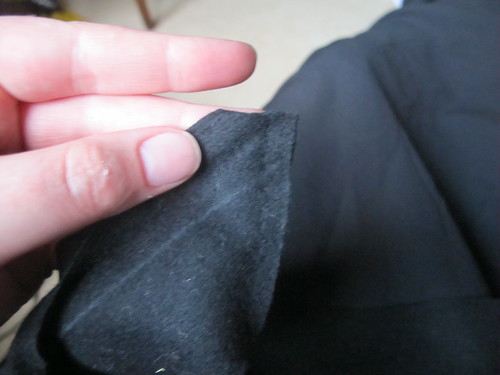
That line is the seam line, I add 0,5cm seam allowance.
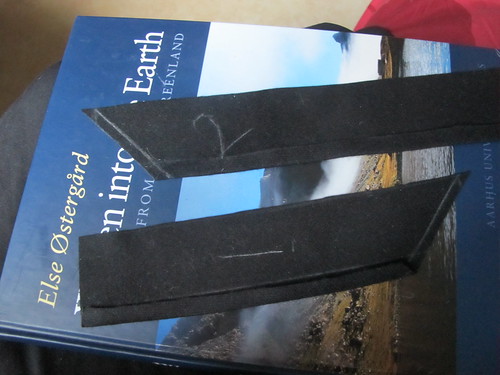
16th century German dress - 25
I always number my pieces to make sure that I know where they are supposed to go.
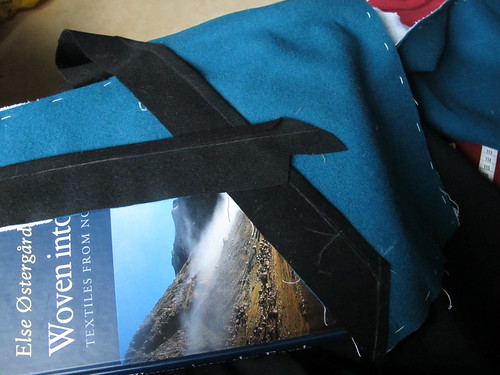
16th century German dress - 26
16th century German dress - 27
16th century German dress - 28
Then I keep doing the same thing for the whole neckline. Putting the strips right sides to the bodice, marking the corners, drawing seam lines and adding seam allowance.
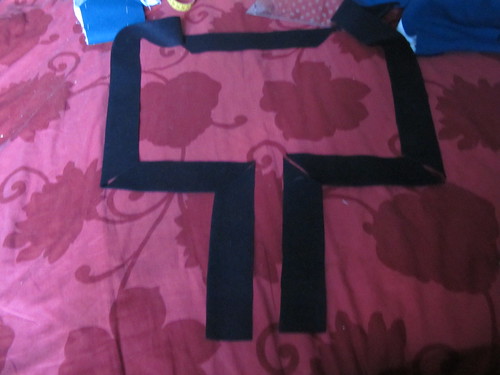
16th century German dress - 29
Do this for the whole neckline and front openings.
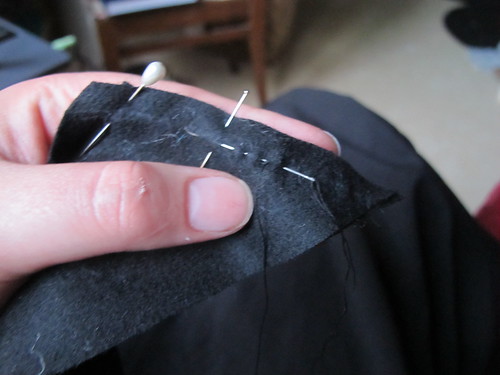
16th century German dress - 30
I sew them together in the right order using running stitches and silk thread, the reason for not using back stitches is that these go faster and on this seam there will be no stress so the strength if the back stitch is not needed. It is important to use the seams wisely. You are hand sewing this thing so why waste time by using a stitch that is unnecessary, time that can be better used doing other nice things.
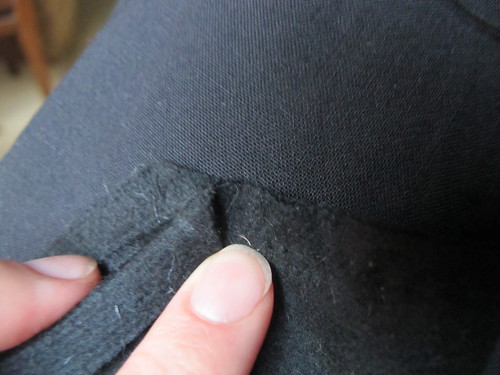
16th century German dress - 31
I sew only to the pressed fold of the seam allowance, not all the way down.
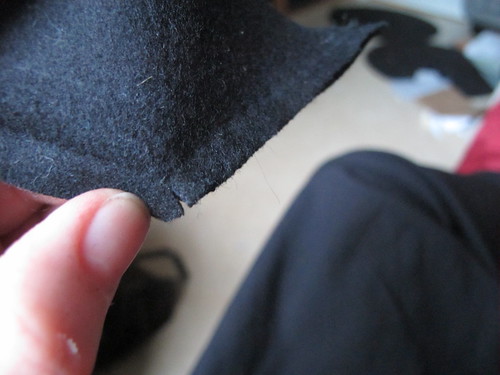
16th century German dress - 32
16th century German dress - 33
16th century German dress - 34
In some of the corners you need to make some cuts and to cut away some material to make the guards lay flat when you press the seams down.
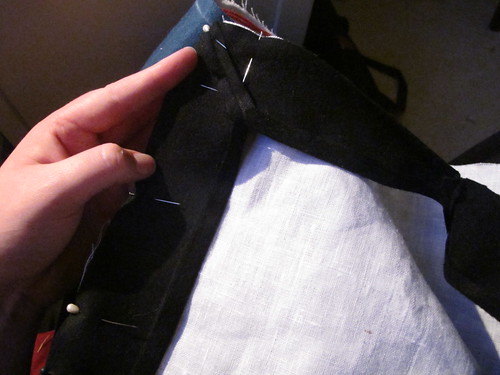
16th century German dress - 35
When the seams of the guard is pressed you put it right side to the lining of the bodice.
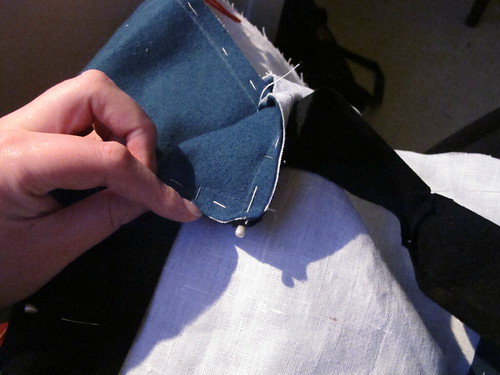
16th century German dress - 36
I have marked out my seam allowance on the neckline and centre front; 1cm with a tailors chalk.
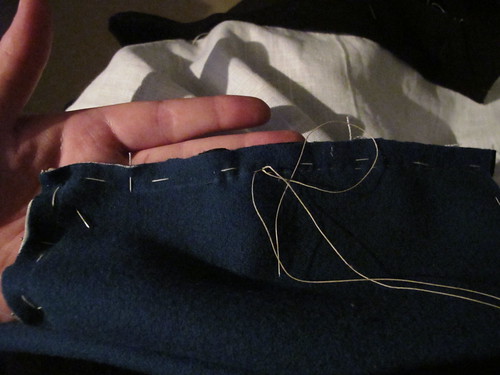
16th century German dress - 37
16th century German dress - 38
16th century German dress - 39
16th century German dress - 40
16th century German dress - 41
16th century German dress - 42
Then I sew the guards to the bodice using running stitches with waxed linen thread, make smaller stitches or even back stitches in the corners.
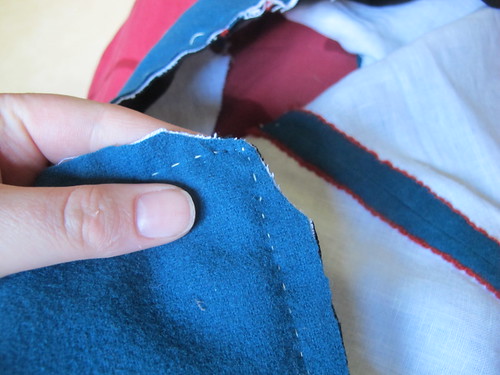
16th century German dress - 43
Then I trim down the corners to make them less bulky.

16th century German dress - 44
I take away the basing thread in the neckline.
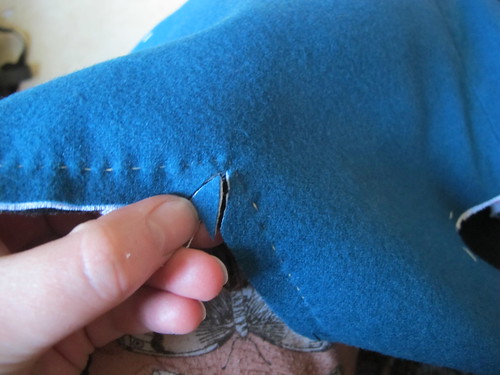
16th century German dress - 45
I also cut away like this, to make it possible to turn the guards and make the corners nice and neat.
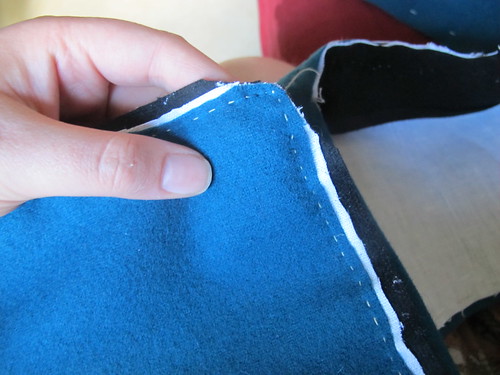
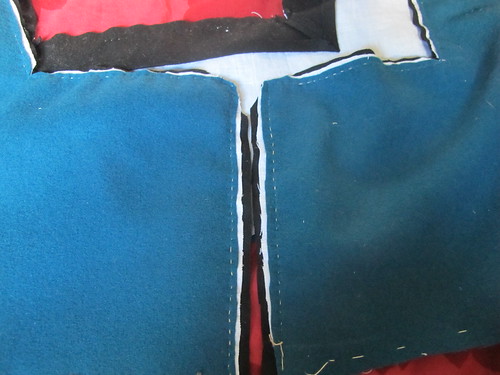
16th century German dress - 46
16th century German dress - 47
I trim down the seam allowances all around the front and neckline. The shell fabric is shortest, the guards are longest and the lining is in between.
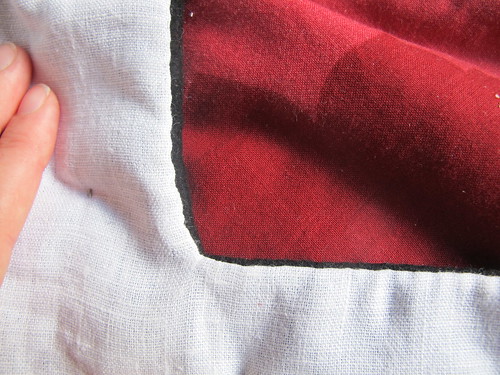
16th century German dress - 48
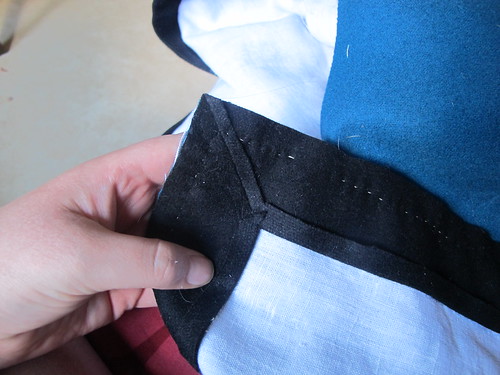
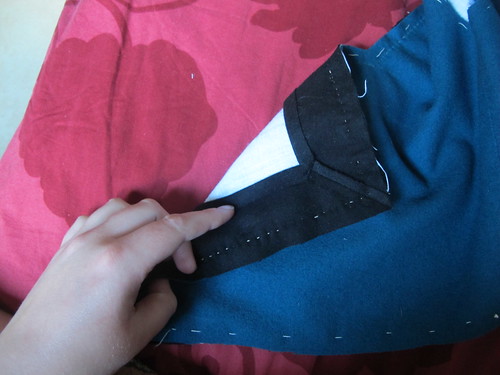
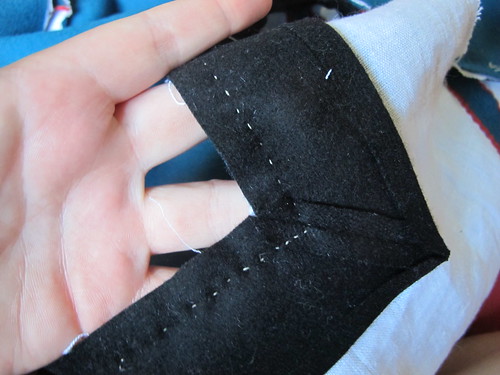
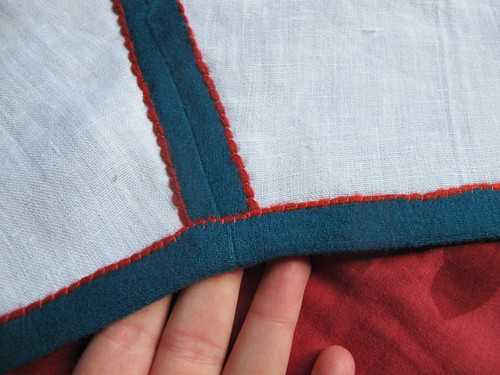
Turn the guards around and press the edges, make sure that the black is visible from the lining side, this is to make sure that the lining fabric will not peak over the edge when the dress is worn.
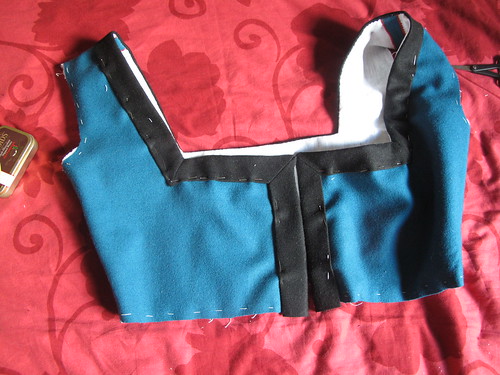
16th century German dress - 49
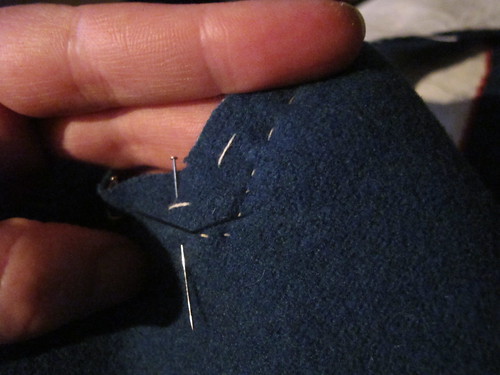
Pin the guards down.

16th century German dress - 50
16th century German dress - 51
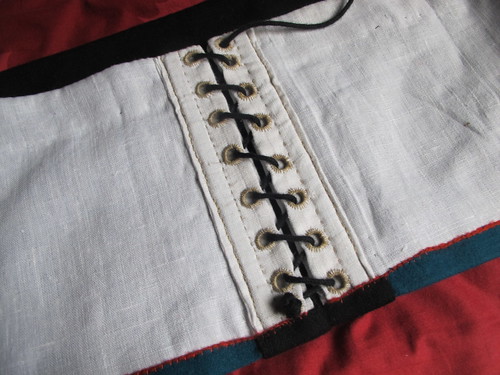
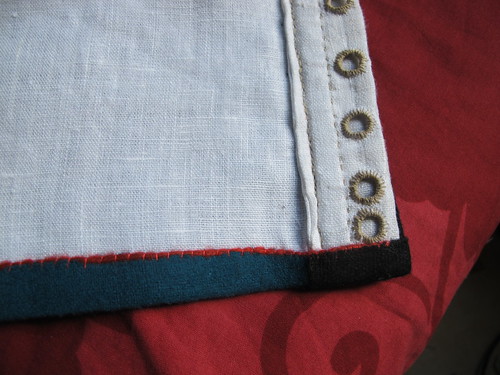
Now we take a break from the bodice and make lacing strips. They are made from the same linen as the lining, folded so that you fold the raw edges inside so that the whole strip have four layers of fabric. As you can see the lacing holes are for spiral lacing, that is the most common lacing type in the 16th century.
16th century German dress - 52
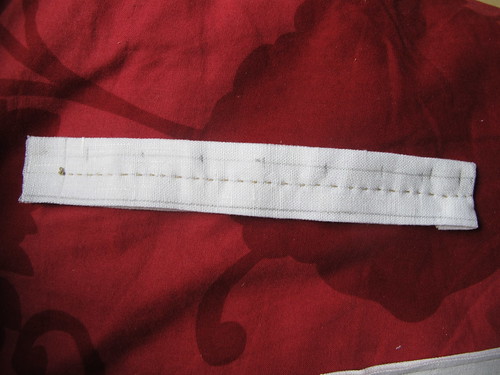
I sew a line of running stitches on one side of where I want my boning.
16th century German dress - 53
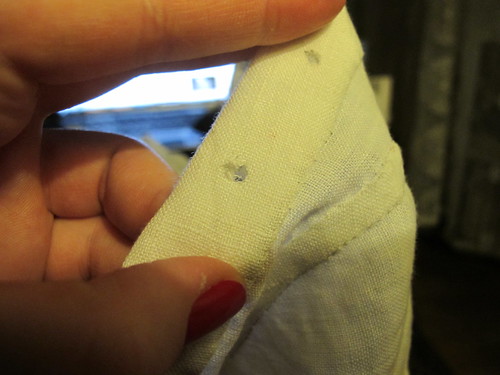
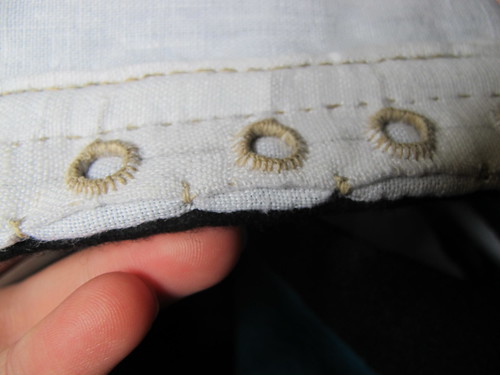
Then I make my lacing holes, the next pictures are taken from another project, as I forgot to take pictures. I start of by punching holes in the fabric with the smallest setting. I sew them with button hole stitch, as this is a period correct way to do both buttonholes and lacing holes. The knots on the buttonhole stitch makes the lacing holes and button holes more even and it protect the edge. Each stitch is a knot and that means that when the buttonhole or lacing hole gets a lot of wear so that it actually wears of threads the rest of the buttonhole will be intact. If you don’t have the knots the entire buttonhole might unravel.
16th century German dress - 54
16th century German dress - 55
16th century German dress - 57
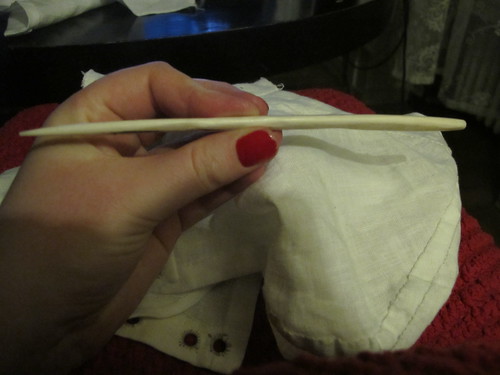
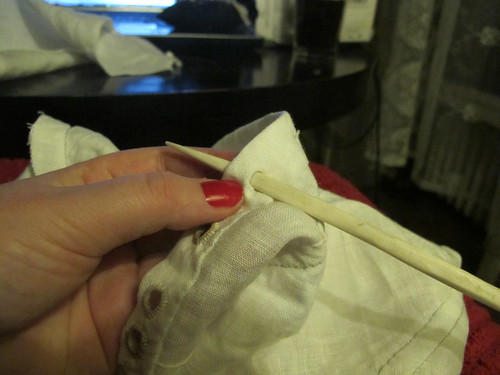
Then I widen the holes using my bone tool, I know a lot of people use knitting needles for this work, I made this bone tool to polish the edges of punched holes in leather, but it is perfect for making lacing holes as well.
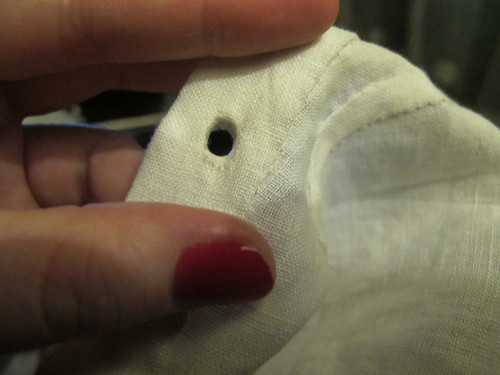
16th century German dress - 58
Make a hole as big as you want.

16th century German dress - 59
Thread a needle with waxed linen tread and make a knot at the end. I put the needle in a bit away from the hole and come up about 4mm from it.
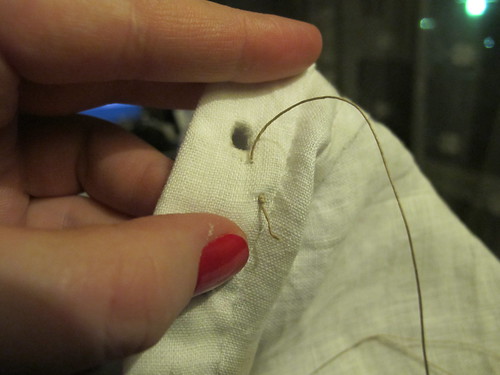
16th century German dress - 60
Pull the thread through.

16th century German dress - 61
Put the needle through the hole and up through the fabric again, at the same distance from the hole as last time.
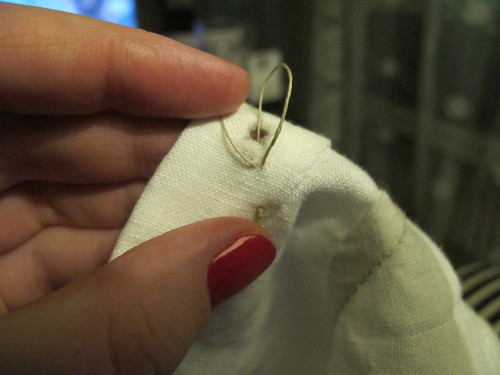
16th century German dress - 62
As you pull the tread you will see the loop that is forming.
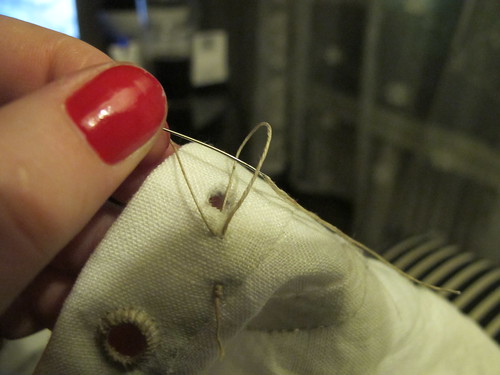
16th century German dress - 63
Put the tread on the left side of the loop, and then take the needle through the loop from behind. It is important that you put the tread on the left and come through from behind, this is what makes the knot on the thread.
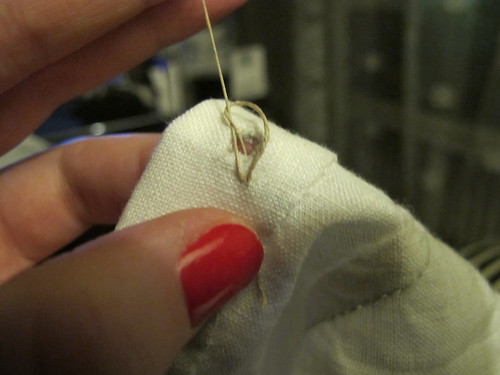
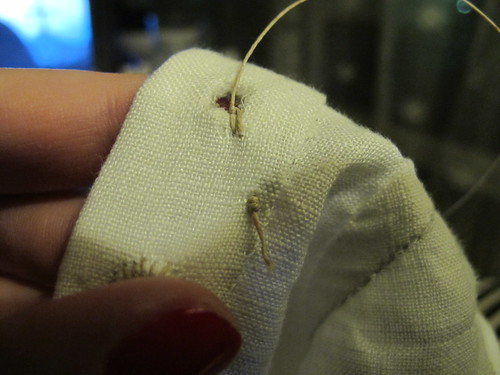
16th century German dress - 64
16th century German dress - 65
Pull the tread, see in what direction I am pulling the tread, this makes the knot end up at the edge of the hole. You can pull it so that it comes more up on the edge or even more inside the hole depending on how you pull the thread. It is a matter of taste where you place the knot.
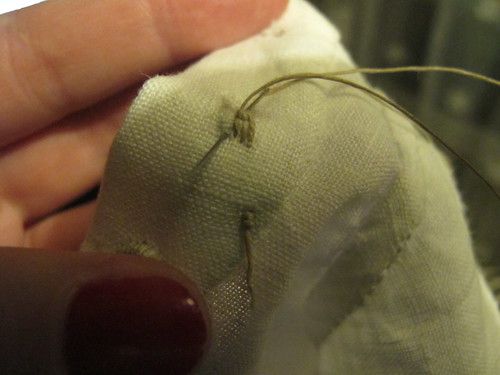
16th century German dress - 66
Do the same again and you will see that row of knots form like a pearl bracelet!
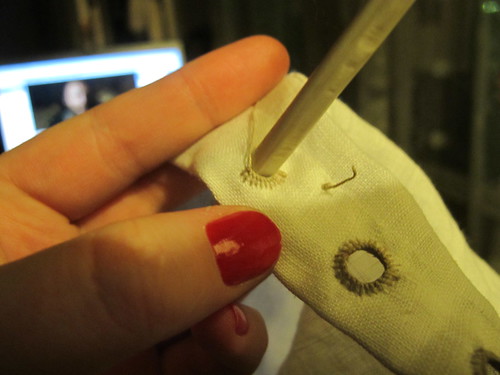
16th century German dress - 67
After some stitches I like to use my bone tool again, when you sew lacing holes it tends to shrink as you work. Doing this makes the hole bigger, you can get a lot more stitches in and the lacing hole itself gets stiff from all the stitches, no need to reinforce with metal rings at all.
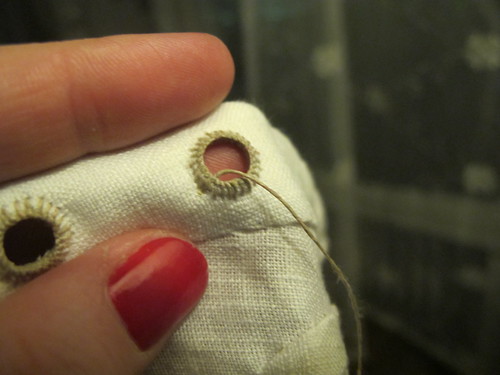
16th century German dress - 68
Then you keep stitching until you come all the way round to your first stitch.
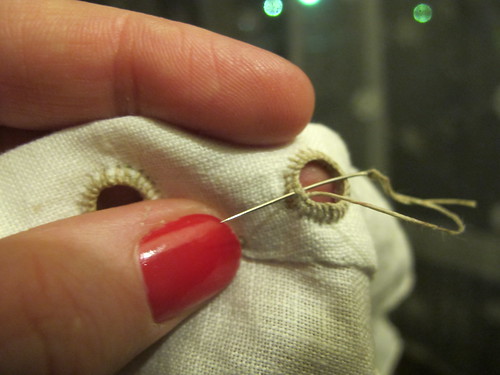
16th century German dress - 69
Here I go through the treads between the first and the second knot.
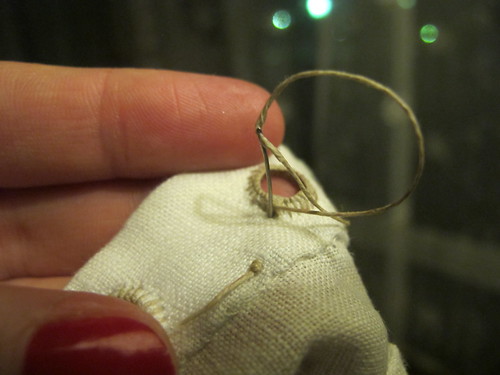
16th century German dress - 70
And then down to the backside. Doing this will make sure that there is a solid ring without gaps.
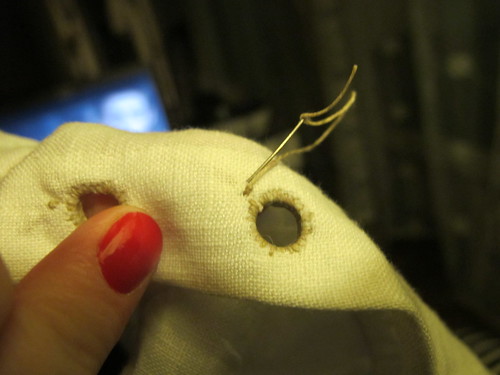
16th century German dress - 71
I secure the thread on the backside.

16th century German dress - 72
Take the needle through the layers and then up again.This is so that the end of the tread will not be visible. And if you cut the tread of just where you secured it the knot will unravel, having a cm of thread left will keep the knot secure.
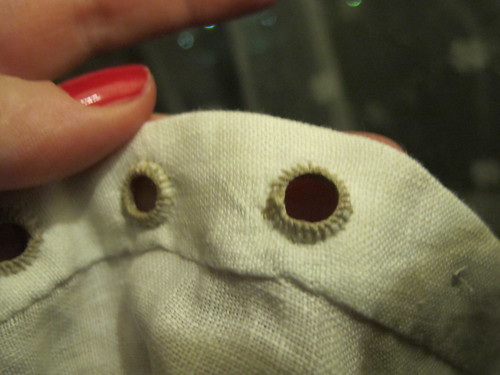
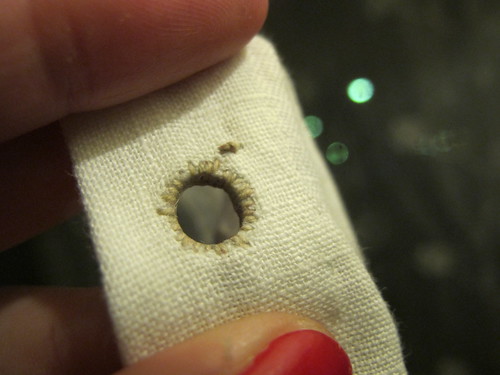
16th century German dress - 73
16th century German dress - 74
Cut the knot of on the front and the tread of the back.
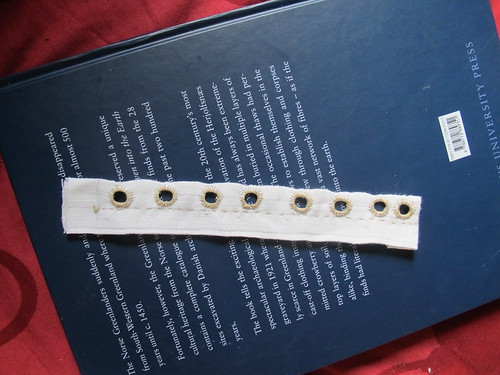
16th century German dress - 75
And then you do it all over again, and again and again.
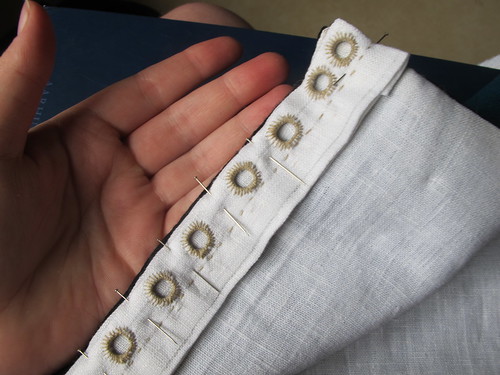
16th century German dress - 76
16th century German dress - 77
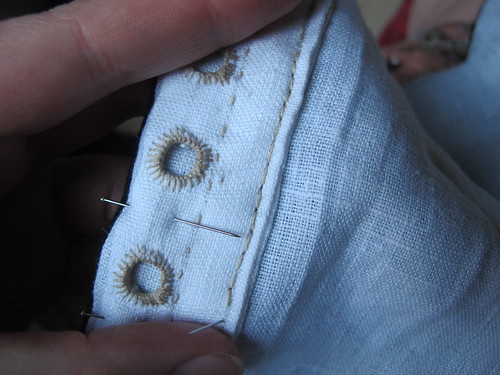
Then I pin the lacing strip to the bodice about 0,5 cm from the centre front edge.
16th century German dress - 78
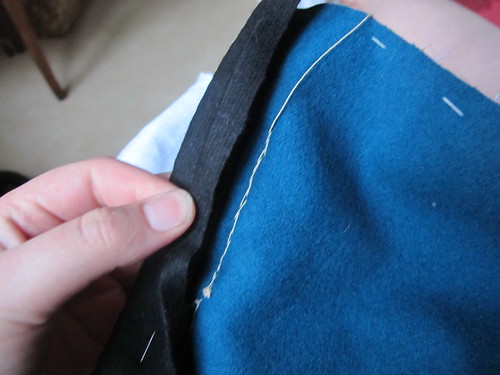
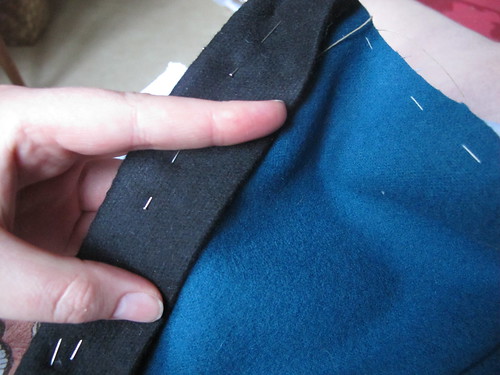
Then I attach the lacing stitch with backstitches, through all the layers except the guards. This line of stitches forms the boning channel.
16th century German dress - 79
16th century German dress - 80
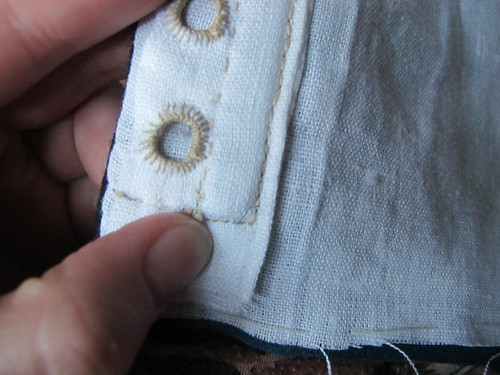
See how clever it is, the seam is totally hidden by the guards.
16th century German dress - 81
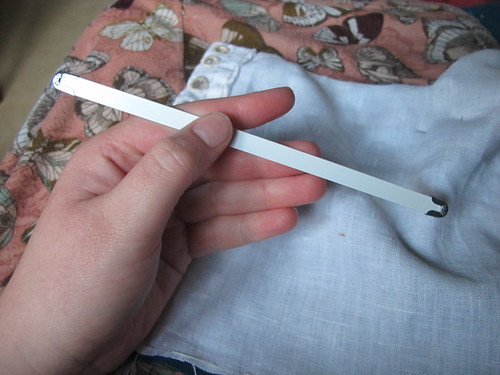
Here is where I stray from period correctness, I use a modern crinoline steel to help my lacing out. I guess the period correct version would be to use reed as you use in 18th century stays.
16th century German dress - 82
I secure the top and bottom with extra tiny stitches.
16th century German dress - 83
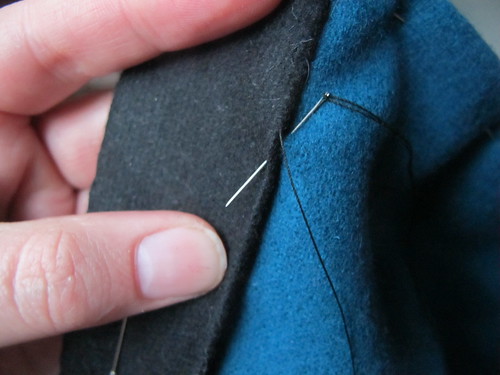
Now I sew the guards down, I sew with silk thread and with these stitches that makes the seam invisible.
16th century German dress - 84
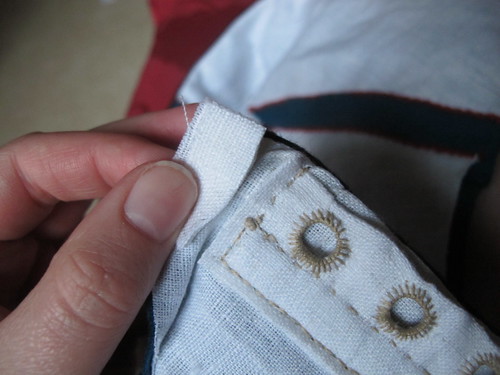
Then I trim of the end of the lacing strip.
16th century German dress - 85
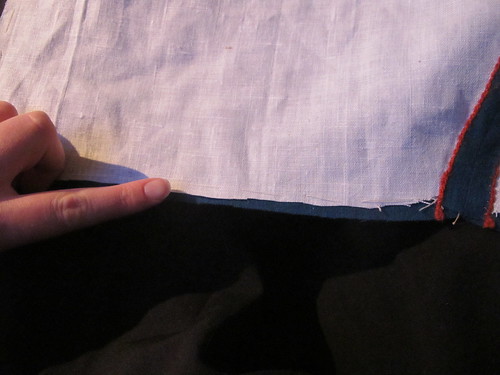
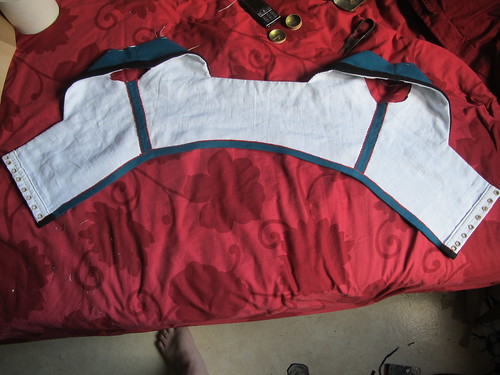
I trim some of the lining of to make sure that it won’t peak out when the bodice is hemmed.
16th century German dress - 86
Then I fold 1,5 cm up and press the hem, I trim some off just at my lacing panel.
16th century German dress - 87
Then I sewing it the hem down with small stitches.
16th century German dress - 88
Then I pull away the basting thread at the hem.
16th century German dress - 89
All clean and pretty, but not done yet! My floor is not so clean ;) I have the habit of throwing scraps and treads on the floor, it is quicker for me that way, to clean it all in one go.
16th century German dress - 90
16th century German dress - 91
16th century German dress - 92
This is how it looks so far.

16th century German dress - 93
Now lace it up with a scrap string.

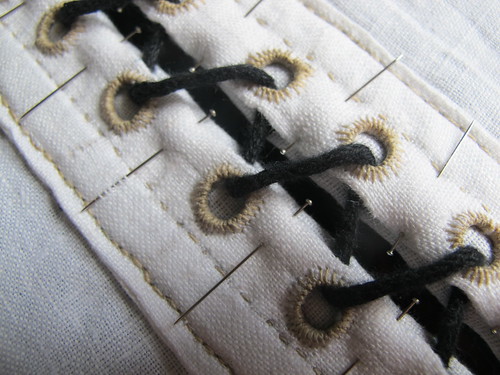
16th century German dress - 94
Put needles in between the lacing, this is to prevent the lacing from gaping.
16th century German dress - 95
Secure with stitches.

16th century German dress - 96
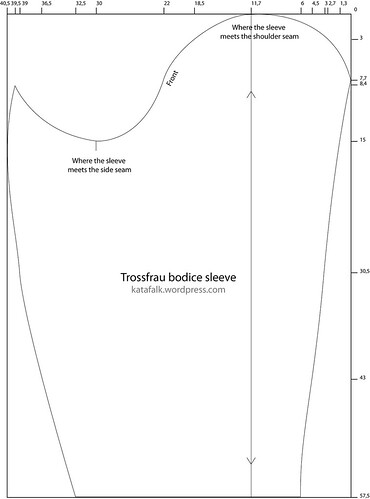
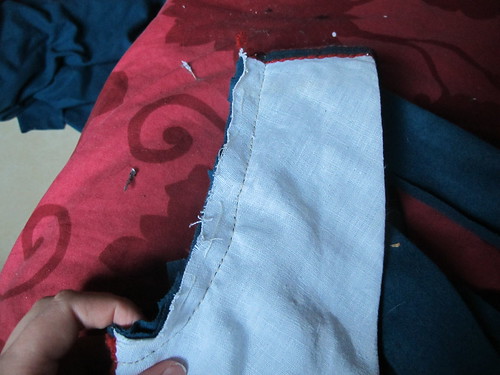
Now on to sleeves, this tutorial comes with a pattern of a simple s-sleeve but here you can see my fancy sleeve that is a adapted version of the s-sleeve.
16th century German dress - 97
I sew the sleeve together using back stitches, and then I sew it into the bodice also using back stitches.
The sleeve head have added 3 cm of ease, the sleeve is 3 to big for the bodice arm holes. This is to make a pretty sleeve and those 3 cm is distributed at the top of the sleeve around the shoulder seam. It is not supposed to be a puffy sleeve, done correctly you will have no small pleats or ruffles in the seam. for wool 3 cm of ease is not that much is you sew in linen it will be harder to fit the sleeve.
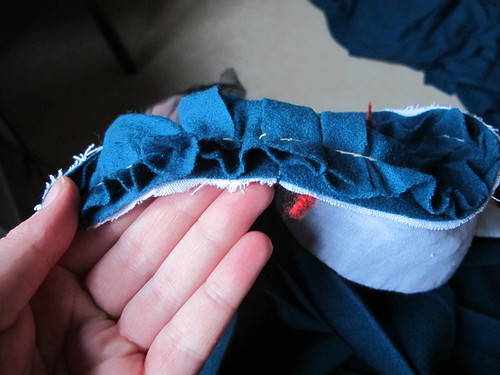
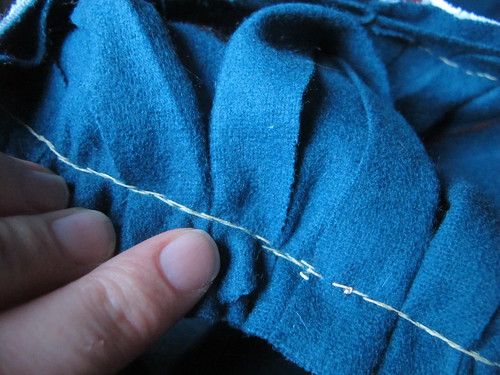
16th century German dress - 98
16th century German dress - 99
Here you see the ease, but where the seam is there is no pleats or ruffles. To make a pretty sleeve this ease must be pressed down.

16th century German dress - 100
I put it on my tailors ham and add water.
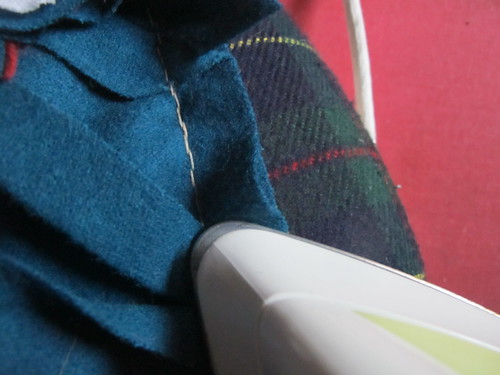
16th century German dress - 101
then I gently start to work the ease down. You will have to go easy to not press the ease into pleats. Add more water when you fell that is is dry and press until flat.
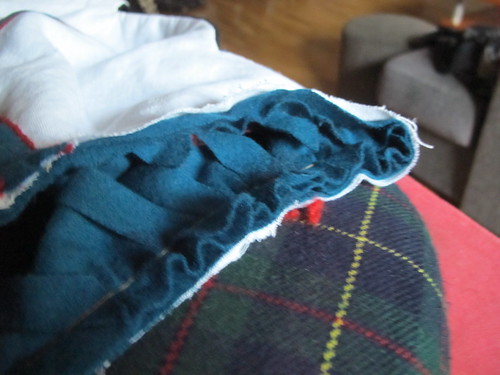
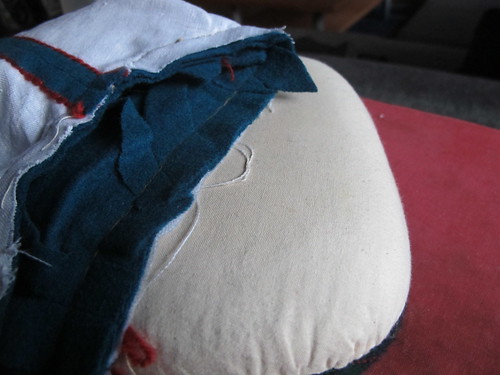
16th century German dress - 102
16th century German dress - 103
Here we see before and after, insane difference, this is why wool is awesome!
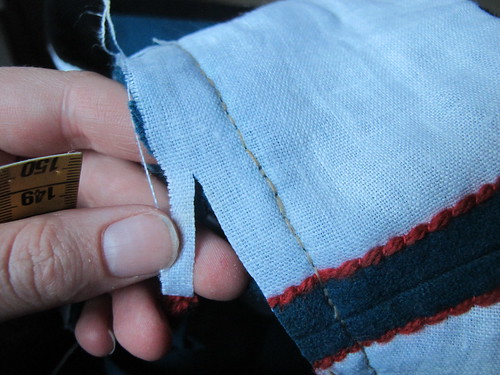
16th century German dress - 104
Now I trim down my seam allowance in the sleeves to 1 cm.
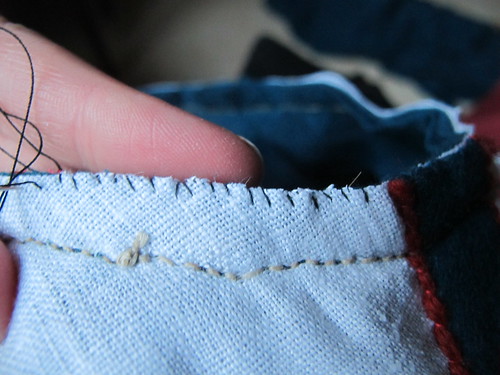
16th century German dress - 105
Then I cast the edges of all the layers together, this is all the finishing I will do on this edge, binding it would make it to bulky, but this is enough to keep it nice and together.
Remove all the basting threads left on the bodice.

Now on to the skirt, unfortunately when I took the photos I decided not to show you how to attach the skirt as I wore it as a separate piece. But is is much more period correct to have the skirt and bodice sewn together so when I decided to renovate my 16th century German dress and attach the skirt I took photos of that. But that means that I have no photos of how to sew the skirt part together.
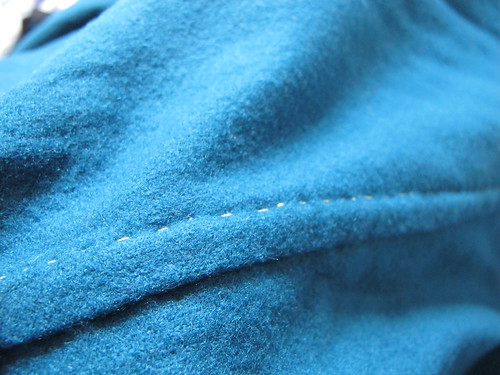
16th century German dress - 106
But it is very easy. My skirt is made up by three widths of fabric sewn together with running stitches and then the seams are felled. In one seam there is a opening so that you can get in and out of the dress.
I choose three widths of fabric to make it wide enough in relation to my body. I am big, and to make the hem look on me as it does on the women in the woodcuts, to make the pleats as deep ad they need to be I needed three widths of fabric. If you are smaller you will do fine with less and it personal preference. I already have a good trossfrau body, round hips, small waist and big breast but I you need more hips the extra fabric will help you out. I like to joke and say I was built to for 16th century German fashion ;)
16th century German dress - 107
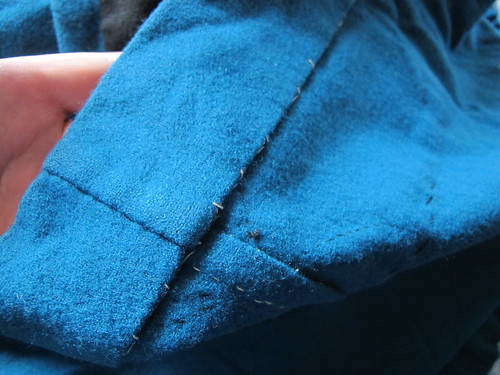
I have quite the wide hem on the skirt, this helps to hold it out in shape.
16th century German dress - 108
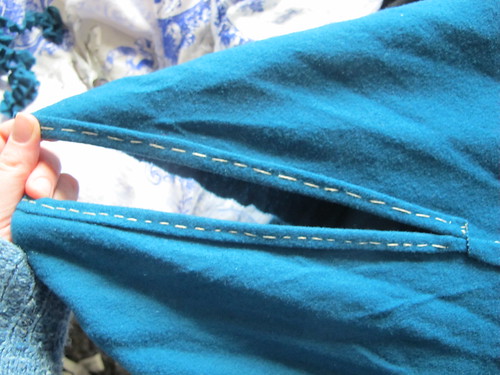
The slit in front, here you can see my stitching before I started tailoring school, sooo big stitches ;)
16th century German dress - 109
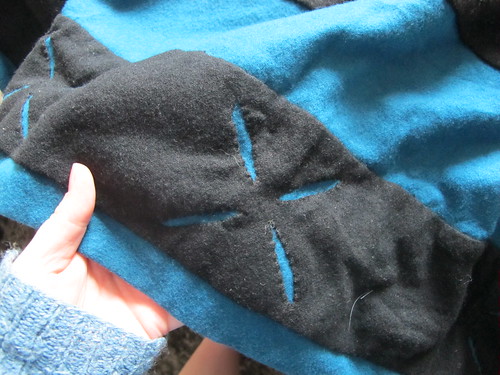
I have two rows of guards on the skirt, the cut-out is inspired by a woodcut, some people have puffs of silk coming out of these slashes, I wanted mine to be simple. I have also sewn down the slashes onto the skirt in stead of only hemming them. After a few incidents of getting stuck on low objects and benches and ripping the slashes or at some times part of the whole guard of the dress I decided to make it more secure.
16th century German dress - 110
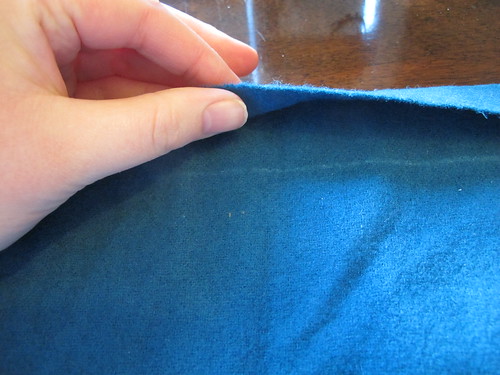
On the top of the skirt I fold down 3 cm. This is because I want to make the cartridge pleating in double fabric, to make the pleats even fuller.
16th century German dress - 111
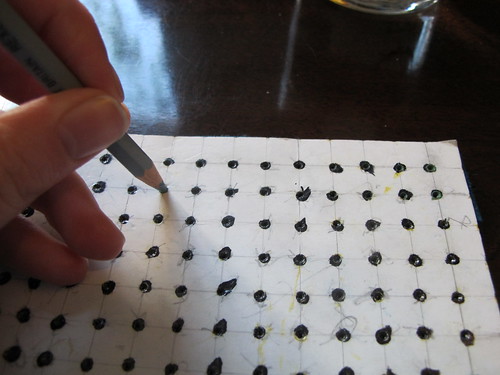
Using my smock guide I mark out two lines of dots that are 1 cm from each other and 1 cm from the edge.
16th century German dress - 112
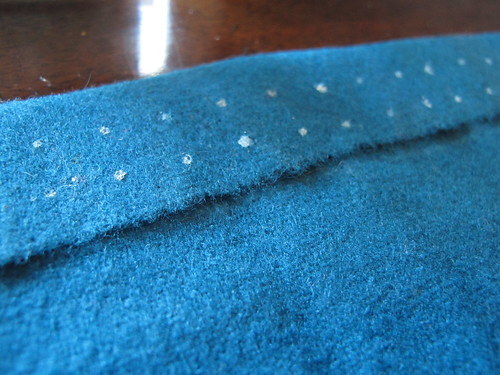
Like this

16th century German dress - 113
Then I divide the skirt into four parts, this is to make gathering the skirt even easier, I make marks with some thread.
16th century German dress - 114
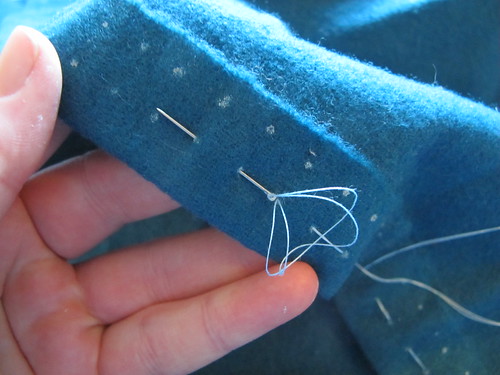
Then I sew the gathering treads, down one dot up at the next.
16th century German dress - 115
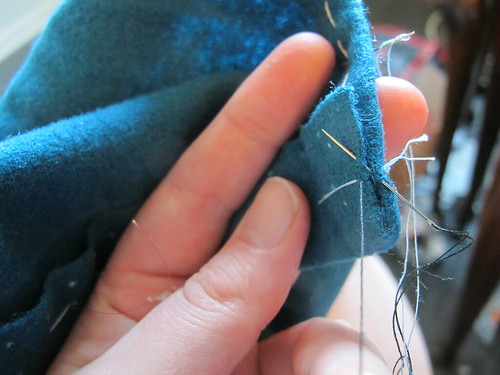
At the slit I sew the edges of the fold and the skirt together.

16th century German dress - 116
I sew two lines of gathering stitches that I secure in one end.
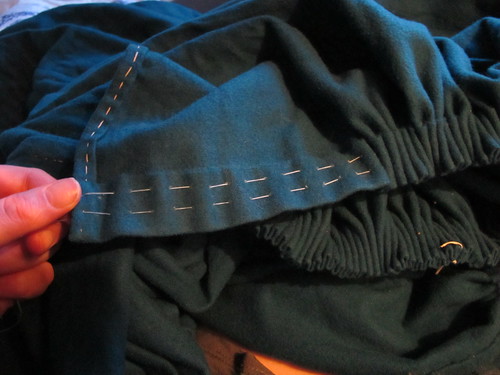
16th century German dress - 117
16th century German dress - 118
Then I pull the treads, look at the pretty cartridge pleating.
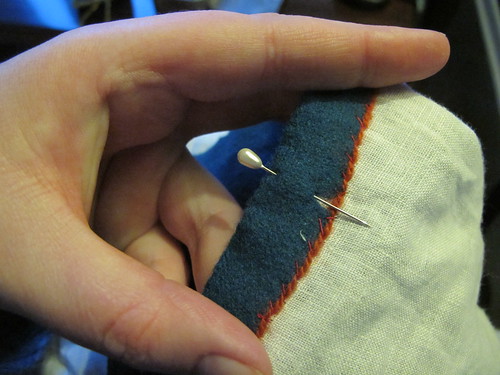
16th century German dress - 119
16th century German dress - 120
16th century German dress - 121
I also mark the bodice in four equal parts.
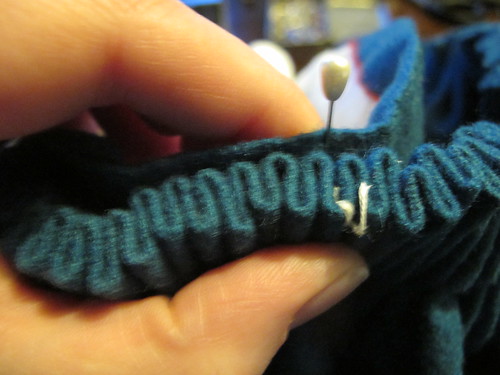
16th century German dress - 122
Then I put the markings at the skirt to the markings on the bodice right sides together.
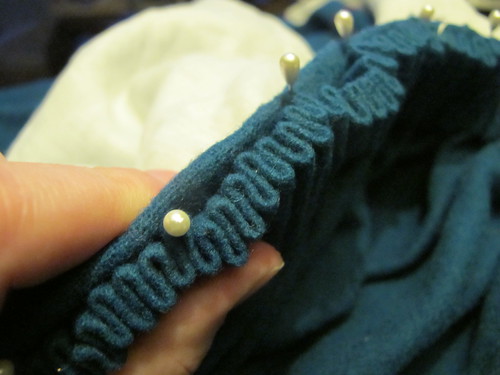
16th century German dress - 123
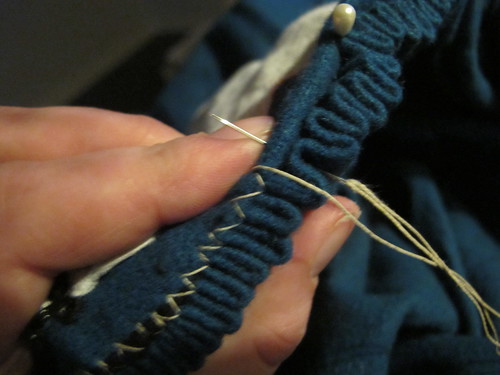
Now it is easy to gather the skirt evenly, put some pins as I go along.
16th century German dress - 124
16th century German dress - 125
16th century German dress - 126
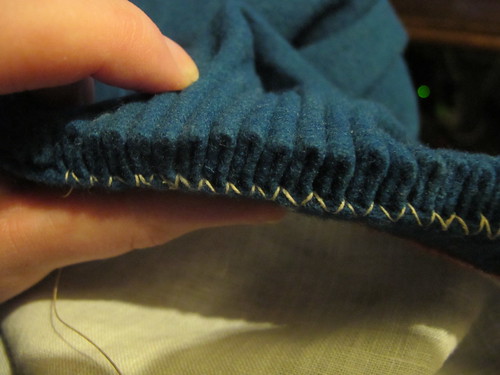
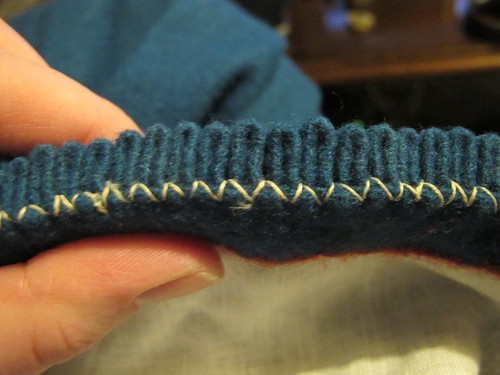
Then I stitch the skirt to the bodice. I do it with two stitches at each pleat, to make it strait.
Also the skirt is kind of heavy and these stitches need to be able to hold that weight.
16th century German dress - 127
16th century German dress - 128
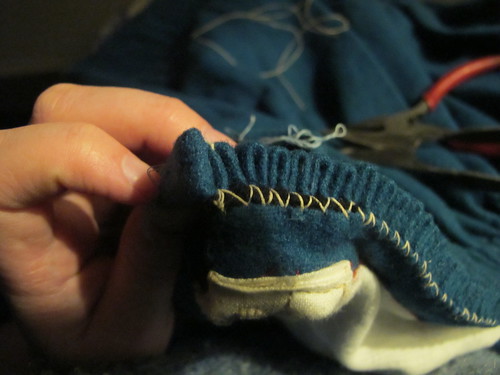
Look all neat and nice, I love cartridge pleats!
16th century German dress - 129
This is how it looks at the front opening.
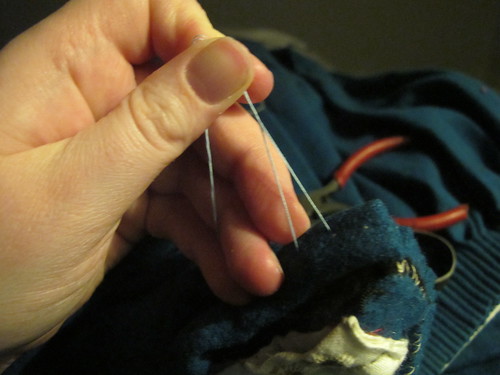
16th century German dress - 130
When you are finished with the seam you can pull the gathering treads out.
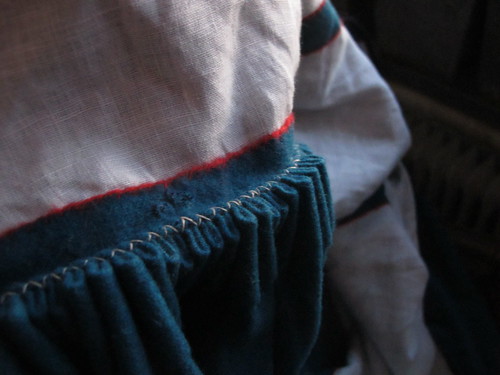
16th century German dress - 131
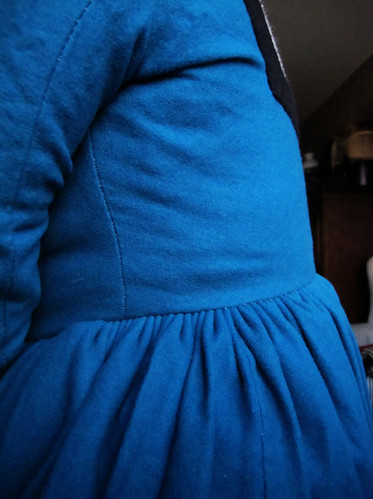
As you can see the cartridge pleats “stands open” inside the dress, this gives you the extra hip boost that will give you the correct 16th century hips, and for us that already have 16th century hips naturally; we get the superfrauhips! More hips is good, the German ladies all seems to have a lot of them.
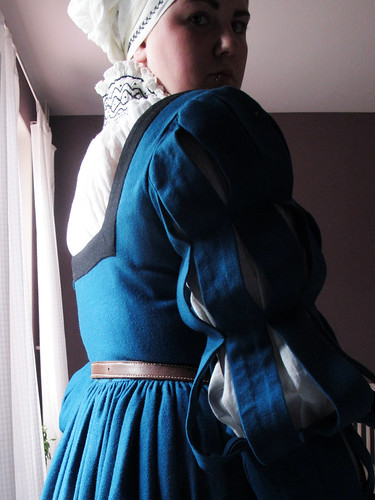
16th century German dress - 132
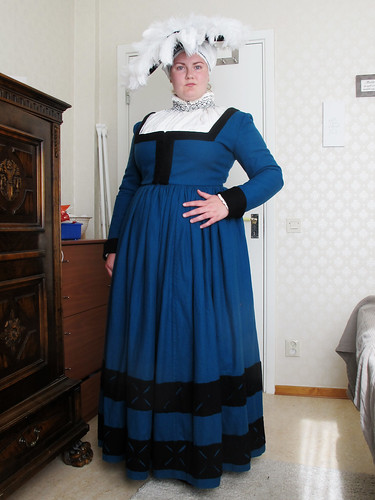
And now, you are actually DONE! With the dress that is, the list of stuff you need now is long, this is why the 16th century German women never gets boring. It is easy to give one dress many looks by simply changing the chemise, the veil or the size of you wulsthaube. Throwing on another hat, getting a fancy new gollar. I have tutorial for most of the details to make a 16th century German outfit in my tutorial list

16th century German dress - 133
16th century German dress - 134
16th century German dress - 135

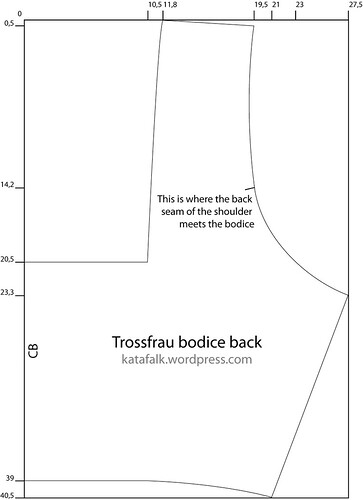
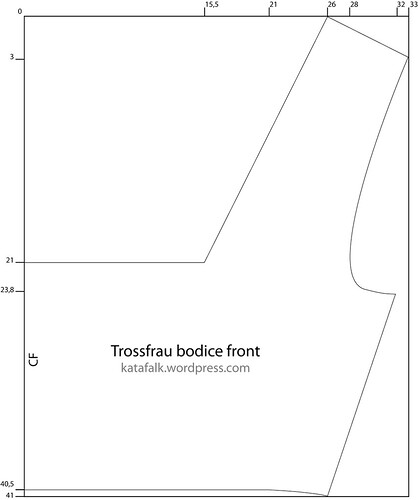
Here is the pattern.
It is in cm as always and made for me.
Bust: 118cm
Waist: 94cm

Remember to do a mock-up before cutting into the real fabric.
16th century German dress - pattern front
16th century German dress - pattern back
16th century German dress - pattern sleeve

The yellow dress – or the housebook dress.
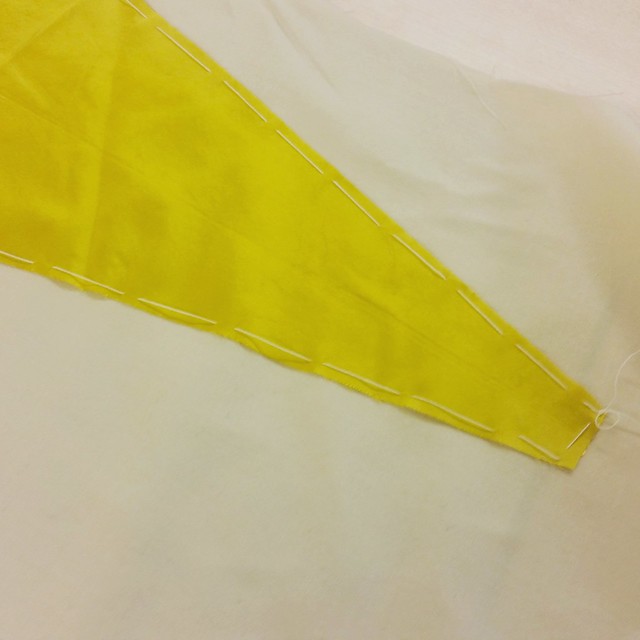
It always starts with the idea, I see someone in a outfit that makes the gears in my head turn furiously. So I do a lot of looking at pictures, on paintings and then I sketch my idea. The sketches always look something like this.
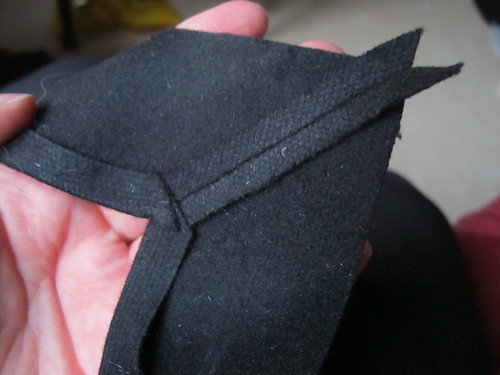
The yellow dress - or the housebook dress - 1
The yellow dress - or the housebook dress - 2
Many lines and text, explaining to myself what my idea is, the drawings are not made for someone else to look at, only so that I can remember that great idea I had about that specific detail.

I have collected my “housebook” dress pictures on a separate pinterest board, if you wish to have a look.

This dress is interesting, with the silly pleated part in the front, the low cut neck. There is a lot of details in the look and as always what I find interesting is “how does this work with my boobs?!

The yellow dress - or the housebook dress - 3
The yellow dress - or the housebook dress - 4
The yellow dress - or the housebook dress - 5
And as always when dealing with a difficult model, I start with a toille. Drawing new lines, cutting it up after those lines and making it work. The front piece is a square, and then the shape for the bust is pinned to this piece, this makes all the shaping for the bust invisible, as on the finished garment it looks like straight lines.

The yellow dress - or the housebook dress - 6
The yellow dress - or the housebook dress - 7
The yellow dress - or the housebook dress - 8
The pieces, now comes the real pattern work.

The yellow dress - or the housebook dress - 9
The yellow dress - or the housebook dress - 10
The yellow dress - or the housebook dress - 11
The yellow dress - or the housebook dress - 12
The yellow dress - or the housebook dress - 13
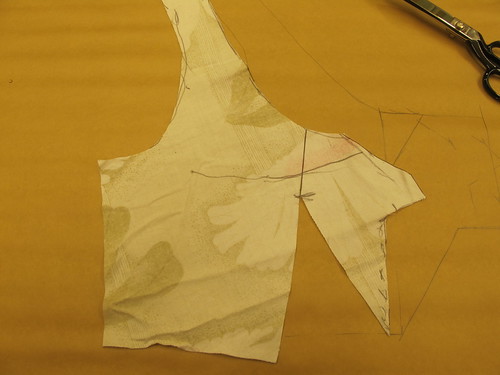
The old darts of the toille is cut away and then put together to close up the pattern pieces for one single pattern piece without the seam. Some of the width is lost, but if it is only this small amount you will not notice it.

The yellow dress - or the housebook dress pattern - 2
The yellow dress - or the housebook dress pattern - 1
The yellow dress - or the housebook dress pattern - 3
The yellow dress - or the housebook dress pattern - 4
The yellow dress - or the housebook dress pattern - 5
The pattern when finished looks like this I have added a skirt piece that widens in stead of putting in gores. As the paintings show no visible lines for gores in the skirt, and they show every other seams there is. The pictures show wide hems, so I did this and also have 75cm of fabric in the front and back pleated panels.

The yellow dress - or the housebook dress - 14
Here we have the panels, my panels are 75cm wide, and the front panel have a slit down the front to allow for an opening of the dress centre front.

The yellow dress - or the housebook dress - 15
I have a sturdy linen as a base for my panels.

The yellow dress - or the housebook dress - 16
The yellow dress - or the housebook dress - 17
The yellow dress - or the housebook dress - 18
I decided to make rolled pleats. Many recreations have stuffed cartridge pleating, but looking on the paintings and drawings they never have more then ten pleats, but very wide hems on the dresses, so I decided that even if there is no “evidence” for rolled pleats in this period they would be perfect. There is no need for stuffing the pleats, they fall just as in the pictures and you can get a lot of fabric to fit on a small area.

The yellow dress - or the housebook dress - 19
The yellow dress - or the housebook dress - 20
They are made like this, They are sewn onto the linen linings with running stitches.

The yellow dress - or the housebook dress - 21
then they are rolled one at a time and secured like this.

The yellow dress - or the housebook dress - 22
The dress is then sewn and the pleated panels inserted in the front, they are attached at the top like this.

The yellow dress - or the housebook dress - 23
I decided to do the open back sleeves, so here we have lacing holes, they look like golden silk suns.

The yellow dress - or the housebook dress - 24
The yellow dress - or the housebook dress - 25
They are backed with a sturdy linen.

The yellow dress - or the housebook dress - 26
I sew in silk with buttonhole stitches, as this makes for neater and sturdier buttonholes, and it is also the period way to do.

The yellow dress - or the housebook dress - 27
The yellow dress - or the housebook dress - 28
The neckline is a single fold hem finished with stab stitching and on the back with a filler thread.

The yellow dress - or the housebook dress - 29
Last thing is to finish the hem. I always put the dress on, make someone put one needle in each seam at the height of where I want my hem. Then I take it of, fold the dress in half and make a nice line working from these needles.

The yellow dress - or the housebook dress - 30
The yellow dress - or the housebook dress - 31
The yellow dress - or the housebook dress - 32
As I did not want to take away the wools ability to stretch and shape around the body, I only put lining around the waist, where I wanted to make sure that there was no tension on the pleated panels. If they strain you can be sure that the hidden lacing will show. There is a corsets steel behind the lacing holes, to keep it all straight and nice. I guess the period way would to have reeds there in stead of modern spring steel.
The Lining is only secured in the back with big stitches, and then in the side seams and at the front on the pleated panel.

The yellow dress - or the housebook dress - 33
A picture on neat seams in the inside.

The yellow dress - or the housebook dress - 34
I have hooks and eyes in the top, as the lacing only goes up to the height of the pleated panel.

The yellow dress - or the housebook dress - 35
The yellow dress - or the housebook dress - 36
The yellow dress - or the housebook dress - 37
The sleeves have one continuous lace, I did not work that well to have it free so I have stitched it to keep it from bunching up when wearing the dress.

The yellow dress - or the housebook dress - 38
There is many pictures with elaborate veils, so I was inspired to make something that looks like “Meister des Amsterdamer Kabinetts: Das Gothaer Liebespaar” so I made a paper guide where I made a hole in each crossing with a big needle and then made dots on a thin linen fabric with the help of a pen.

The yellow dress - or the housebook dress - 39
The long lines was couched in silk.

The yellow dress - or the housebook dress - 40
The yellow dress - or the housebook dress - 41
And then I made stars with the same silk but another tone over each crossing.

The yellow dress - or the housebook dress - 42
The yellow dress - or the housebook dress - 43
Some details in the front.

The yellow dress - or the housebook dress - 44
The yellow dress - or the housebook dress - 45
The yellow dress - or the housebook dress - 46
Sadly there was not enough silk to make the last three stars, but this place is hidden in the back and never visible.

The yellow dress - or the housebook dress - 47
The yellow dress - or the housebook dress - 48
Under the dress I wear my Lengberg castle brassiere, and to wear over that I made a now hemd, I use the same method as in my kampfrau tutorial, but in stead of the high neck I choose to make it low and only honeycomb smock and to have less fabric in the body.

Then there came the problem of closure of the top of the dress. When I saw the big golden closure of THIS and THIS ladies I was in love, but with no metal working skills there was no way that I could make them.

But then suddenly I saw this blog post. And of course! I can make one like that to.

The yellow dress - or the housebook dress - 49
The yellow dress - or the housebook dress - 50
The yellow dress - or the housebook dress - 51
So I turned to good old Etsy and ordered a pile of golden filigrees and started building. Layering the filigrees gave it a very nice solid look.

The yellow dress - or the housebook dress - 52
To top it all of I needed a wulstahube that was so big that it looked really silly. This was important for me, to make it so high that I could almost not wear it. There are numerous pictures of really big wulsthaubes in period artwork, and as I love the silly headdresses I wanted to top this silly dress of with something equally silly. As stuffing this wulst with fabric would make it to heavy I turned to thin birch branches that I made into a wulst and padded with linen wrapping.

The yellow dress - or the housebook dress - 53
And yes it turned into a really silly wulsthaube, it took me several weeks to decide if I could wear it. But I finally started to like the sillyness of the height.

And this is how the dress turned out, the yellow and golden dress.

The yellow dress - or the housebook dress - 54
The yellow dress - or the housebook dress - 55
The yellow dress - or the housebook dress - 56
The yellow dress - or the housebook dress - 57
The yellow dress - or the housebook dress - 58
The yellow dress - or the housebook dress - 59
The yellow dress - or the housebook dress - 60
The yellow dress - or the housebook dress - 61
The yellow dress - or the housebook dress - 62
The yellow dress - or the housebook dress - 63
The yellow dress - or the housebook dress - 64
The yellow dress - or the housebook dress - 65

resetting smock

After spending lots of hours of smocking, you wear your fancy new smocked garment on a event, afterwards you throw it in the washing machine.

resetting smock - 1
And it comes out looking all wonky and not at all that crisp and nice.
But there is no need to worry, resetting is easy, it just takes some time if you only have a ordinary ironing board.

resetting smock - 2
You need lots of pins for this, star of by pinning on the edge.

resetting smock - 3
Pin at every stitch for as long as your ironing board or garment allows.

resetting smock - 4
Then you pull the fabric under each stitch, see, now you can see the crispness again, and then you put a pin.

resetting smock - 5
Lots of pins, you need to have these without heads, as we are going to apply heat to them later on.

resetting smock - 6
If you do not have a iron with steam, you take a piece of fabric, I use a linen kitchen towel and make it really wet in one end, Use a old washed fabric to prevent excess colour from staining your work. Squeeze out some of the water.

resetting smock - 7
Lay the wet part of the towel over the smock.

resetting smock - 8
Then really lightly touch the towel with the iron just where your smock is. Do not apply any pressure, you only want the heat. The towel should now do a sizzling noise, the water turning into steam. If you happen to have a steam iron, you can just use a dry towel and then hold it over the towel and use lots of steam on the smock.

resetting smock - 9
Now take the towel away and wait for it to cool down and dry completely. If you have a vacuum ironing board this takes you no time, but for us without it can take several hours.

resetting smock - 10
I do the sleeve on the sleeve board.

resetting smock - 11
And this is how it turn out after cooling down, as good as new or perhaps even crisper. Now you can move on the the newt part of your garment and work your way around the whole smock, just to the same thing all over again.

resetting smock - 12
Here is a smocked apron that I have done the same thing to.

And now you can go out, wear it at en event, throw it in the washing machine and then do it all again ;)

St. Birgitta’s cap

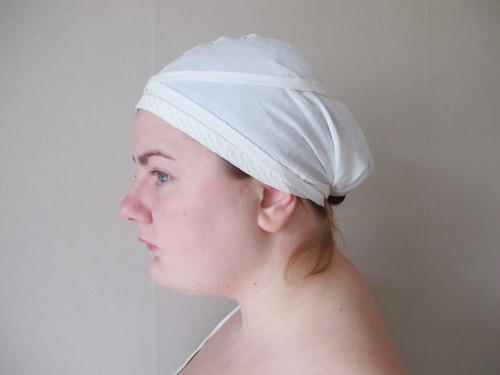
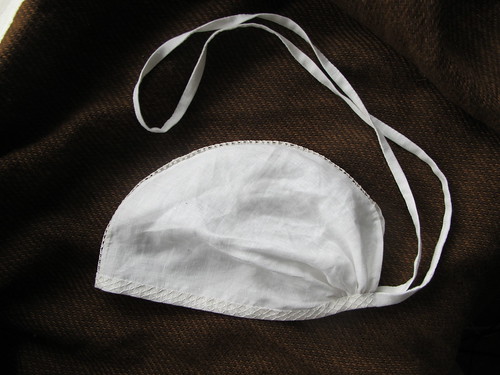
I swear by my St. Birgitta’s cap, as you could see in the post “How I wear my veil” I use it as a base when I pin my veils. It can also be worn as it is as you can see in these pictures.

Here you can see it on the woman on the left
The cap have a long strap that is put over the head two times
A collection picture
There is also a extant cap

There is a lot of people that have written about this already, Isis post on it on Medieval Silkwork is a good read.

What I will show here is a simple version, without the fancy embroidery.

St. Birgitta’s cap - 1
If you have looked at other peoples patterns, you will see that my patterns differs slightly. Most patterns have a square lower front, my pattern have that part rounded of, the reason is that I find it easier to gather it when it is like that. I have tried the square pattern, but the rounded of corner works best for me.

St. Birgitta’s cap - 2
Start of by cutting your cap parts, you will need two parts. I use a medium weight linen fabric, make sure to make the marks both in the front and back, these are important later on in the process. As the pattern does not include seam allowance, you can choose what is best for you. In these pictures I have 1,5 cm seam allowance on the back seam and 1cm on the front of the cap.

St. Birgitta’s cap - 3
Pin the top seam, you will sew from the front to the marking in the back. To be able to put the cap on you will need a slit in the back and the back marking marks out where it begins.

St. Birgitta’s cap - 4
I sew backstitches with silk thread.

St. Birgitta’s cap - 5
Sew with backstitches all the way to the mark for the slit.

St. Birgitta’s cap - 6
Now you need to press the seam you sewed apart, I use my fingernail to simply scrape it open.

St. Birgitta’s cap - 7
Fold in the raw edges to make the cap neat on the inside.

St. Birgitta’s cap - 8
Then sew the felled seams down, I use small stitches and only pick up a few threads of the outer layer, this makes a almost invisible seam from the outside.

St. Birgitta’s cap - 9
Hem the other side as well.

St. Birgitta’s cap - 10
Now it is time to gather the lower edge, this gives the cap it’s shape in the back.

St. Birgitta’s cap - 11
St. Birgitta’s cap - 12
St. Birgitta’s cap - 13
I stitch with big stitches from the back up to the mark in the front.

St. Birgitta’s cap - 14
By sewing two lines of stitches you will be able to gather the fabric nicer.

St. Birgitta’s cap - 15
Now it is time to sew on the ties straps. I first take a strip that is 70 cm long and 5cm wide. On one side I mark out my 1 cm seam allowance and on the other side I press that seam allowance down.

St. Birgitta’s cap - 16
Now on to some measuring, on the centre of your 70 cm make mark, this is where the top seam of your cap will be. From the centre you will mark out the distance of the front of your cap, in this tutorial it is 26,5 cm, a total of 53cm. This will make it fit a head measurement that is around 56cm. The measurements is 3cm smaller then the measurement of your head to allow for stretching of the fabric and so that you do not pull the slit completely together. If the slit is completely closed you will have a hard time getting a snug fit on your head. You will have to experiment to find what measurement fits best on you.
Put the cap part and the strap right sides together and pin them together.

St. Birgitta’s cap - 17
The gathering should be as tight as you can to the back of the slit, sew the seam with backstitches.

St. Birgitta’s cap - 18
As the strap should be longer I now sew on the other strips. They are 65 cm long and 5cm wide as I made this cap without a special person in mind. Most common is to have one continuous strap, but you can also pin the strap ends together when wearing the cap. When trying the cap on you will find what length you will need and you can shorten your straps later.
These two straps I prepare by folding and pressing in 1 cm seam allowance on both sides of the strip.

St. Birgitta’s cap - 19
Then I sew them on on each sides of the strap that you have already attached to the cap with backstitches.

St. Birgitta’s cap - 20
Like this.

St. Birgitta’s cap - 21
I scrape the seam open with my fingernail.

St. Birgitta’s cap - 22
Now what is left is to close the straps up and to enclose the raw edge on the front of the cap.

St. Birgitta’s cap - 23
I pin and sew the entire length of the strap together, enclosing the raw edges.

St. Birgitta’s cap - 24
If you wish to pin the straps together when wearing it, simply fold in the raw edge at the end of the strap and sew it shut.

St. Birgitta’s cap - 25
St. Birgitta’s cap - 26
St. Birgitta’s cap - 27
And your cap is done!

To sew the strap together, this is how you both put the cap on and measure how long the ends should be. If you are planning on having a continuous strap, you should not sew the entire length of strap together out to the ends. Save around 10 cm on the ends and then do this next part before joining the ends with a backstitched seam. After that you can close the last bit of the strap up.

St. Birgitta’s cap - 28
Put the cap on your head, if you have long hair it is good to have it in braids in the back or to put it in a low ponytail. As I have short hair I generally just put it in a low ponytail and stuff my bangs inside the cap. This cap is to small for me, I have a large head so for my personal caps I don’t use these measurements, also I could not bother with putting all my hair in the neck inside the cap, I always wear wimples so I usually don’t bother that much about some hair sticking out.
Cross the straps in the back.

St. Birgitta’s cap - 29
Pull them to the front and cross again, make sure that the straps lay nicely and so that they are not twisted.

St. Birgitta’s cap - 30
Then pull them over the back of your head above the bag that have formed for your hair, the straps should be snug around your head, if not the cap will slowly slide of your head. If you feel that the positioning of the straps makes the cap slide of your head you could also put it under the bag that have formed for your hair.

St. Birgitta’s cap - 31
St. Birgitta’s cap - 32
St. Birgitta’s cap - 33
Put a pin where they meet, now you can see where you need to sew them together, or if you want to pin them in stead, you can now go along and putting on wimples and veil if that is what you prefer.

St. Birgitta’s cap - pattern
Here is the pattern, in cm as always, and not including any seam allowances.